

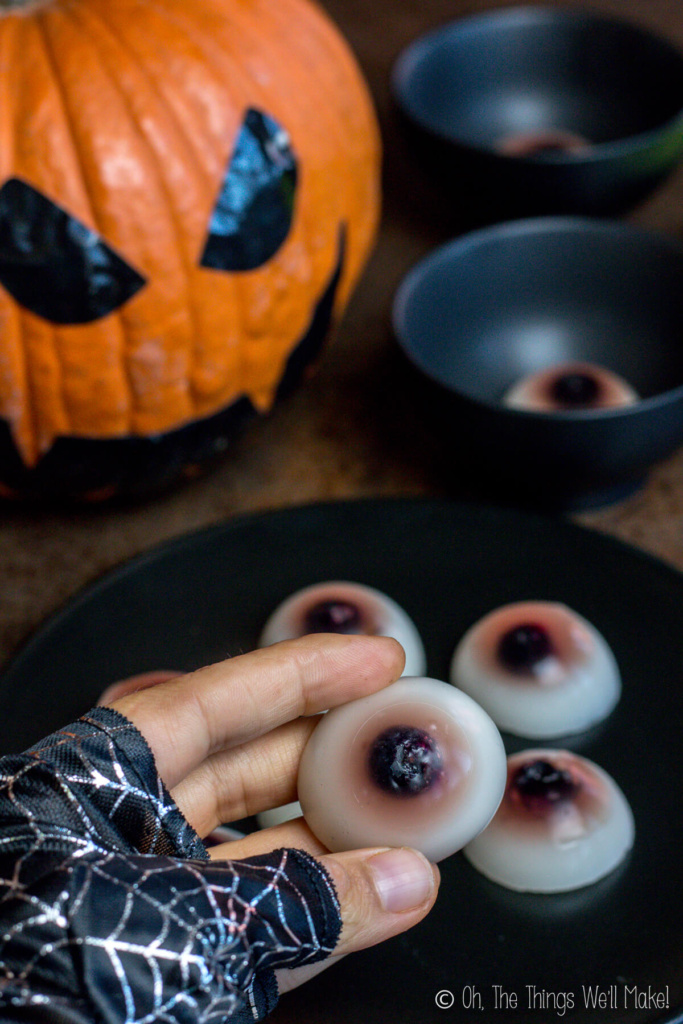
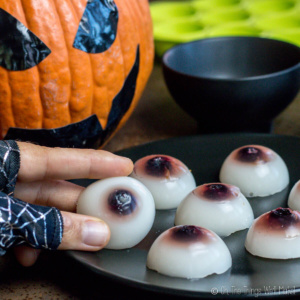
Spooky Homemade Gummy Eyeballs
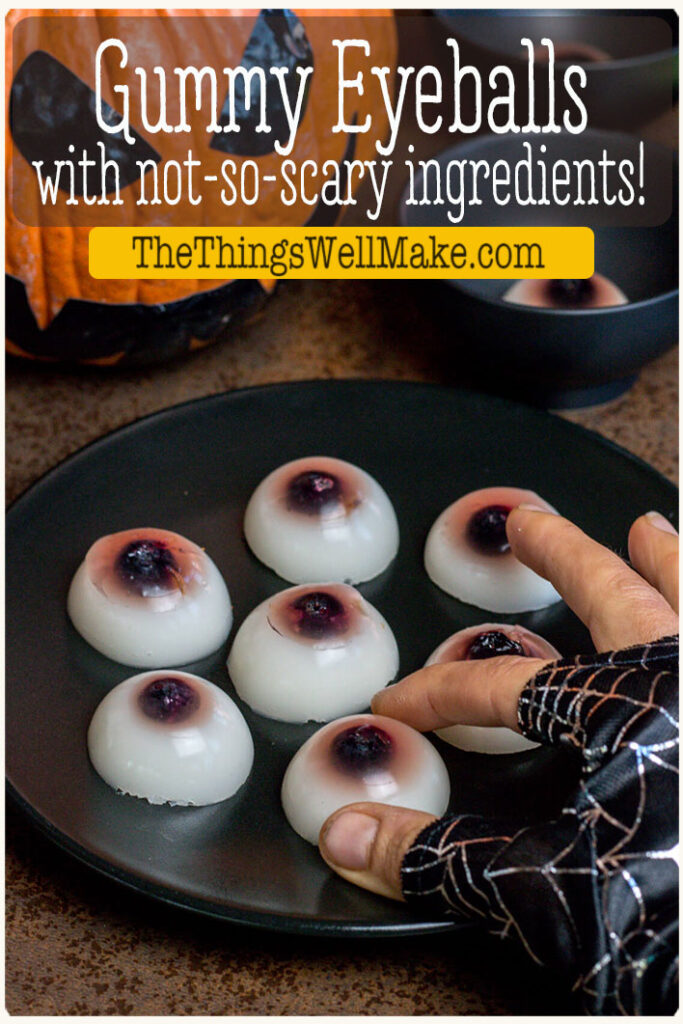
Looking for a healthier Halloween treat? Learn how to make gummy eyeballs, using not-so-spooky, real-food ingredients. They’re fun to make and delicious!
Being a summer girl at heart, the beginning of autumn makes me a little sad. You see, I don’t deal well with the cold of winter. Autumn does has a lot to offer, though, and my love of Halloween helps me get over the seasonal blues.
Even as a kid I loved planning Halloween parties and making fun, creepy Halloween food. With the excuse of the blog, I decided to cook up some healthier Halloween treats.
Why make these homemade gummy eyeballs?
It’s fun to make your own homemade gummy treats. Not only does it allow you to avoid the questionable ingredients in the gummies at the store (like corn syrup and starches), but it also allows you to be very creative and have lots of fun. You control the shape, the ingredients, and can have fun making them along the way!
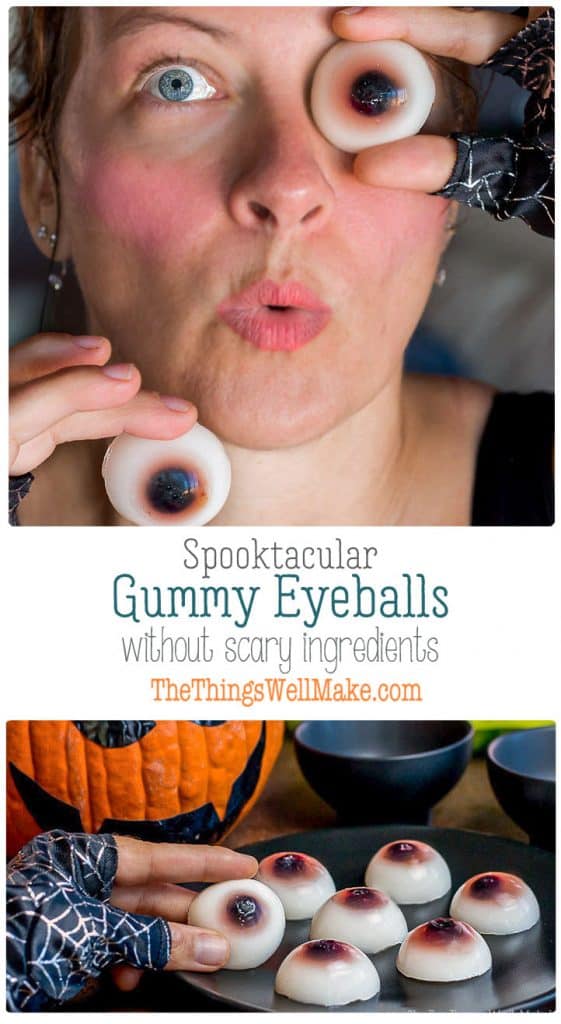
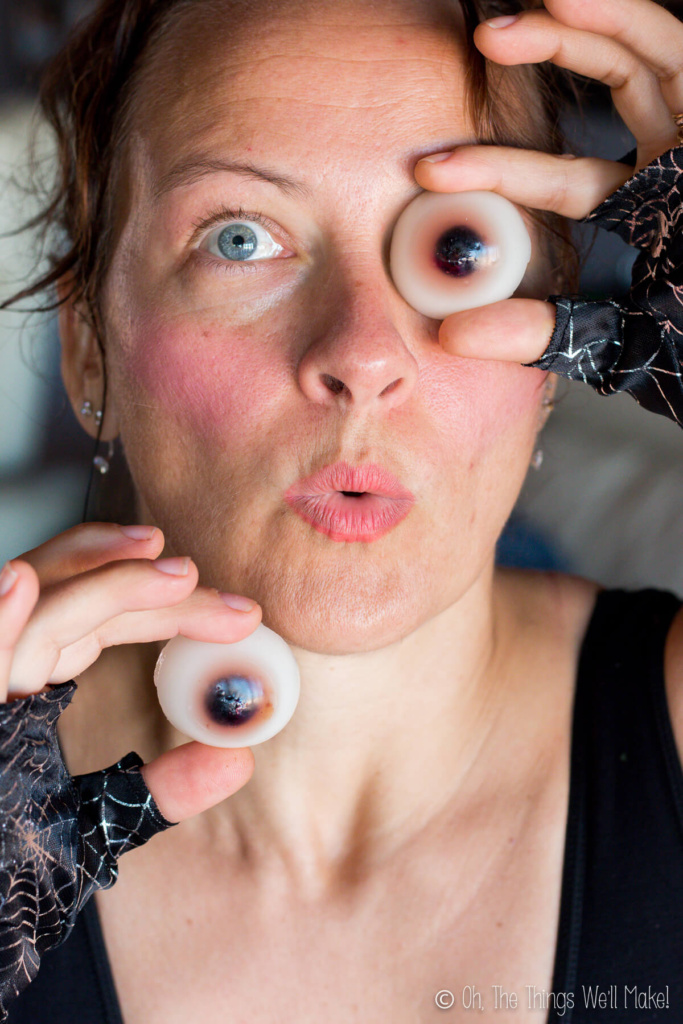
I also love making gummy worms and other gummy treats, but there’s something about these gummy eyeballs that has me making them again and again! I think it’s the delicious combination of coconut milk and blueberries! (Nothing scary about that!)
Ingredients
The ingredients for these are simple. You just need some blueberries for the pupils, some fruit juice (or fruit puree), coconut milk, and unflavored gelatin for the rest of the eyeballs. For sweetening them, you can use sugar or, to keep these even healthier, honey or maple syrup.
The first time I made these, I wasn’t sure if I would like the combination of flavors because I was really just going for the appearance. Luckily, though, I was pleasantly surprised by how good the flavors came together!
Choosing a fruit puree or fruit juice
As I mentioned before, you can use either fruit juice or a fruit puree for making the irises of your eyeballs. Ideally, choose a fruit that makes a nice (or creepy) colored iris for your eyeballs.
When using fresh fruit purees, stay away from fruits like pineapples or papaya that have proteolytic enzymes that don’t allow the gelatin to gel properly. (I have more information about which fruits to avoid in my post about how to make a healthy gelatin dessert.)
The easiest choice is to use fruit juice. Store-bought juices have normally been pasteurized so the proteolytic enzymes no longer keep the gelatin from gelling. (So, yes, you could theoretically use pineapple juice to make yellow irises.)
The first few times I made these, I used a berry puree. The problem with using a thick puree is that the mixture doesn’t seep around your blueberries well and they remain uncovered. If using a puree, you may want to dilute the mixture with some water or juice.
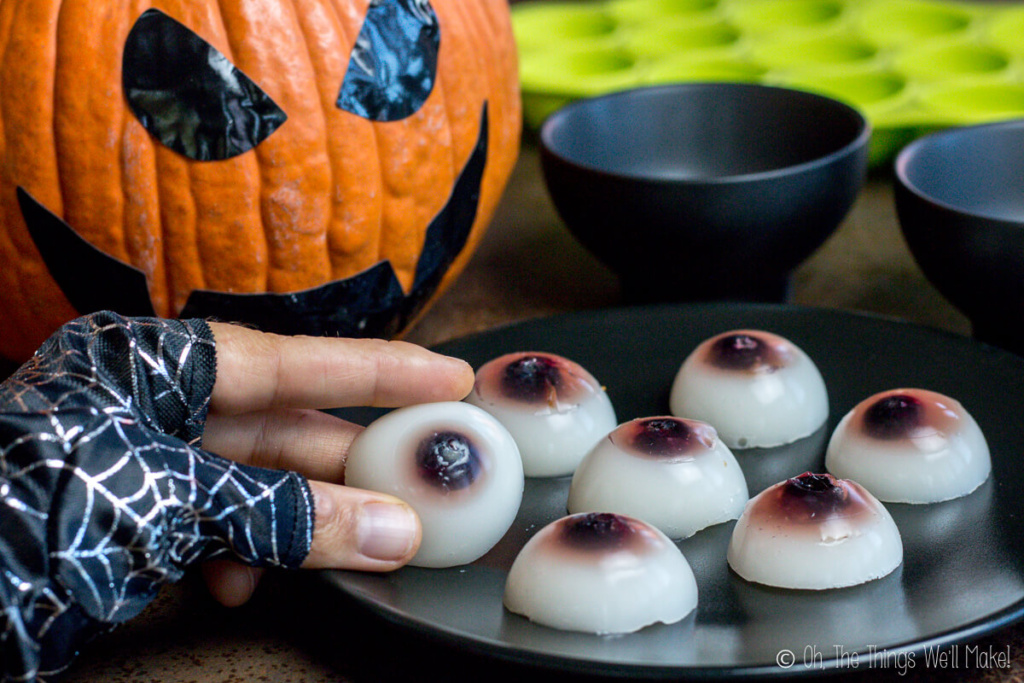
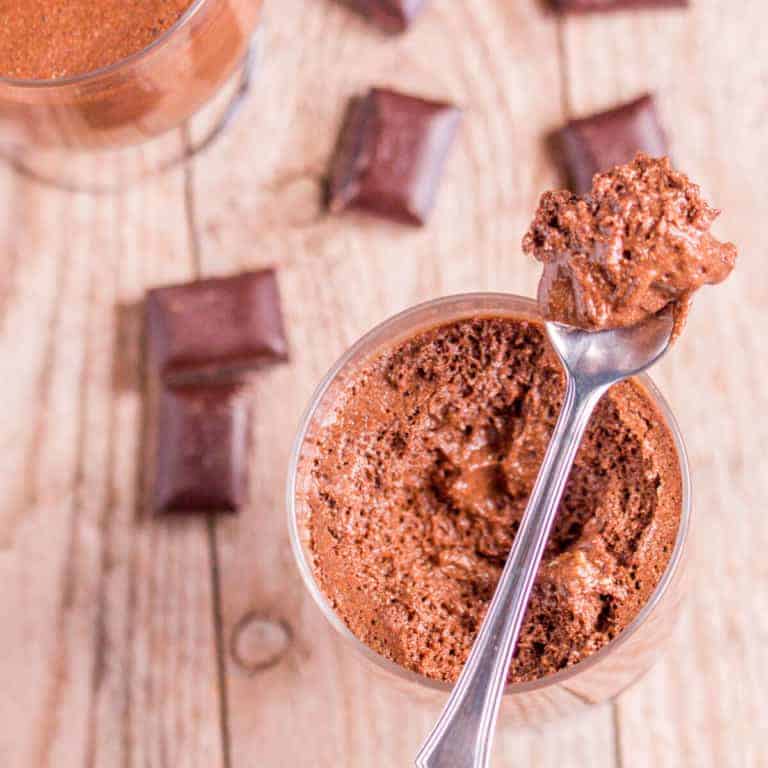
When making the batch of eyeballs pictured above, I used pomegranate juice. Using a thin juice worked wonderfully because it seeped around the blueberries which not only helped hold them in place but also made the eyeballs look like they had a cornea over the blueberry pupils.
Choosing a healthy gelatin
While you can use any unflavored gelatin, some are healthier than others. Gelatin is a great source of collagen and protein, which makes it great for your hair, skin, and nails. My favorite gelatins are gelatins derived from grass-fed cows.
Choosing your coconut milk
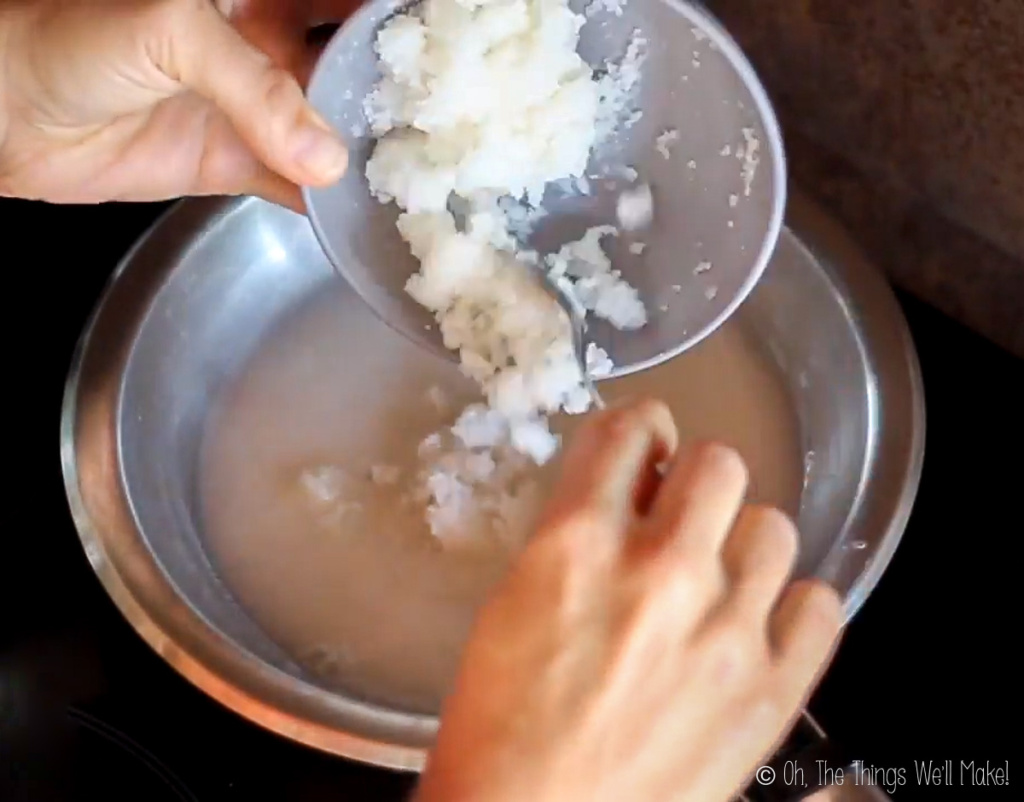
Because the gelatin solidifies these gummies, you don’t need to use coconut milk with added thickeners. This is a great opportunity to use homemade coconut milk.
If you don’t want to make your own, though, look for a coconut milk with minimal ingredients; something without a lot of extra gums or sweeteners.
If you don’t want to use coconut milk, you can use another white milk (dairy or non-dairy) of choice.
The sweetener
The sweetner you choose and the amount you add will depend on your taste. I prefer to use non-refined sweeteners like honey and maple syrup. For a lower-calorie version, you can use something like stevia or monkfruit sweetener. If you choose to use sugar, you’ll want to dissolve it in the other ingredients when heating them.
I didn’t add any sweetener to the pomegranate irises but did add some honey to the coconut eyeballs. Those with more of a sweet tooth will want to add a bit more sweetener. The great thing about making these at home is that you can control the level of sweetness!
The procedure
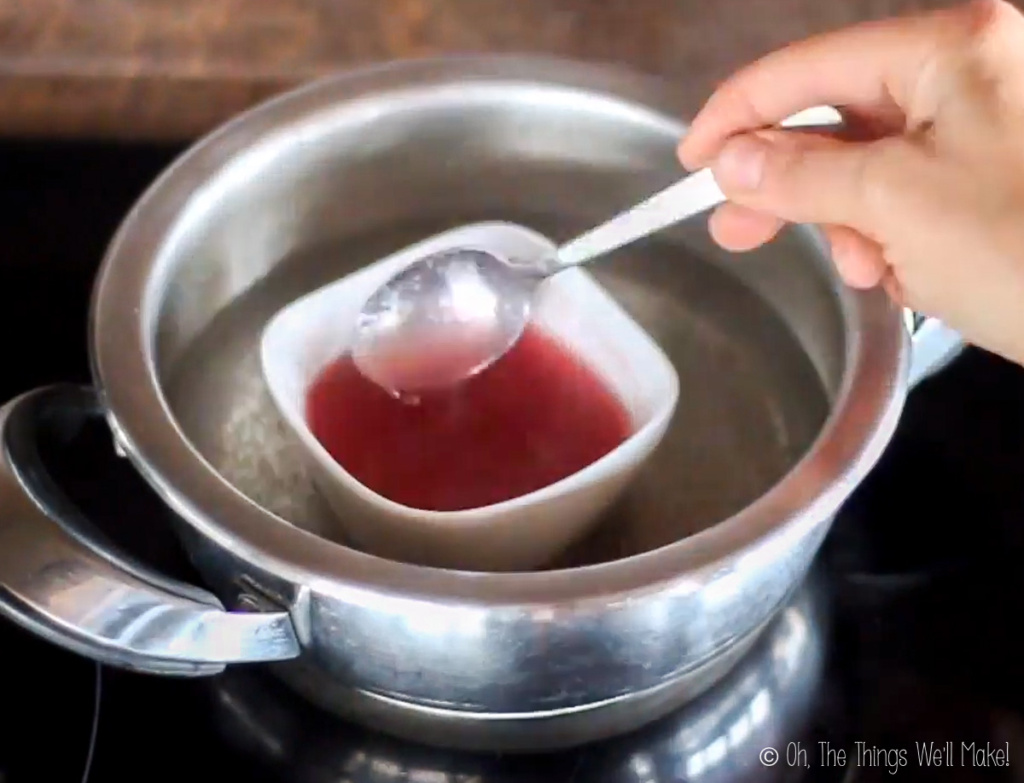
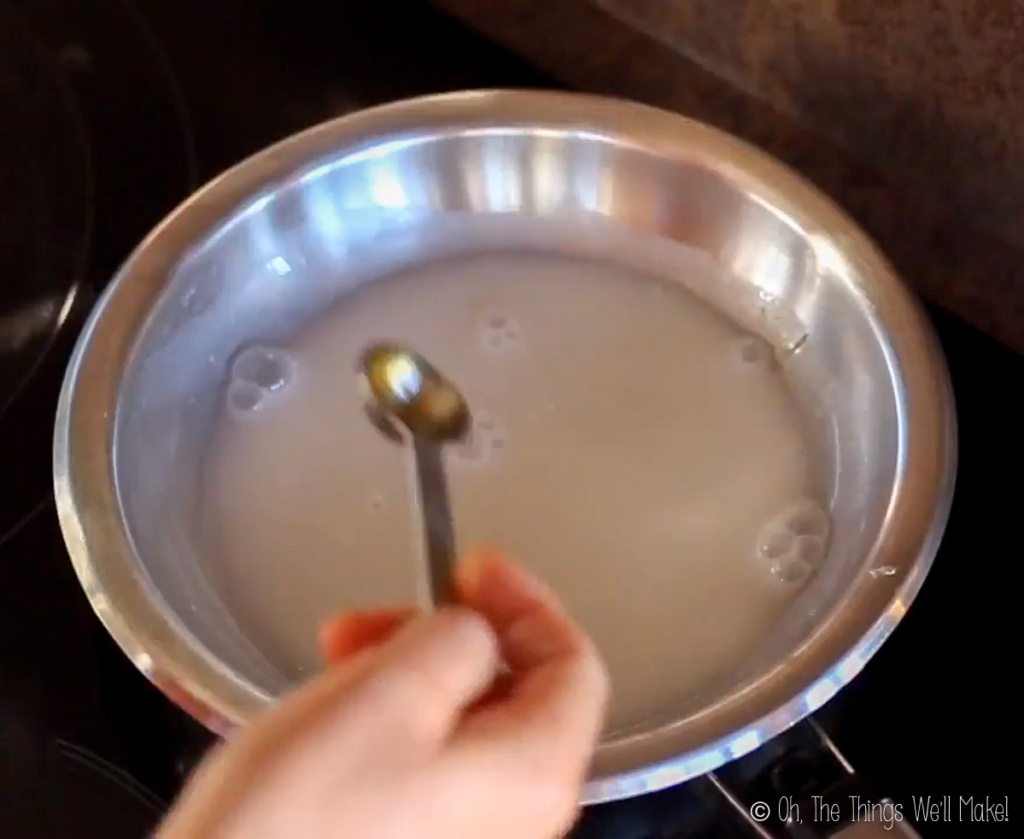
Making them is also easy enough, but it does take a little bit of patience. First, you’ll want to make the gelatin mixtures. The irises will be made by mixing a small amount of gelatin with a small amount of fruit juice or thinned-out fruit puree. The white part of the eyes is made by combining coconut milk with gelatin.
To make it easier to dissolve the gelatin, mix it with the cold juice or coconut milk and allow it to “bloom” (absorb the liquid and expand) before heating it to dissolve the gelatin. Because this will be done in layers, I generally only dissolve the fruit puree first and allow the gelatin to bloom in the coconut milk while I do the next steps.
While you can dissolve the gelatin directly in a small saucepan over the stove, I generally use a double boiler with a small container as I find it easier to work with since we are using such a small amount. Do whatever you find easier.
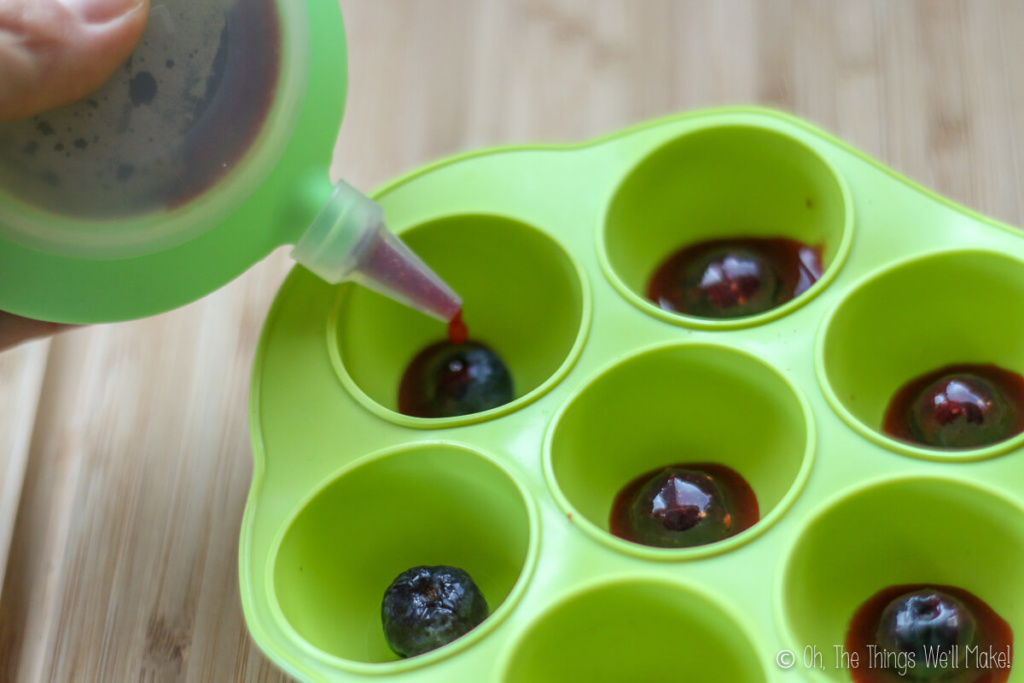
Once the gelatin has dissolved, place a blueberry in each section of a rounded ice cube tray mold. Pipe in a very small amount of the liquid over the blueberries. Ideally, the liquid will slip underneath the blueberries to help hold them in place. Don’t add too much liquid or the blueberries will float and you won’t see them in the finished eyeballs. Place the trays in the fridge or freezer to get the gelatin to set while you dissolve the gelatin in the coconut milk.
Once the gelatin has set, remove the trays from the fridge and pour in a very thin layer of white gelatin over the blueberries. The layer needs to be very thin. Otherwise, the heat of the gelatin can melt the gelatin, releasing the blueberries. After pouring in the thin layer, chill the trays again until the white gelatin sets.
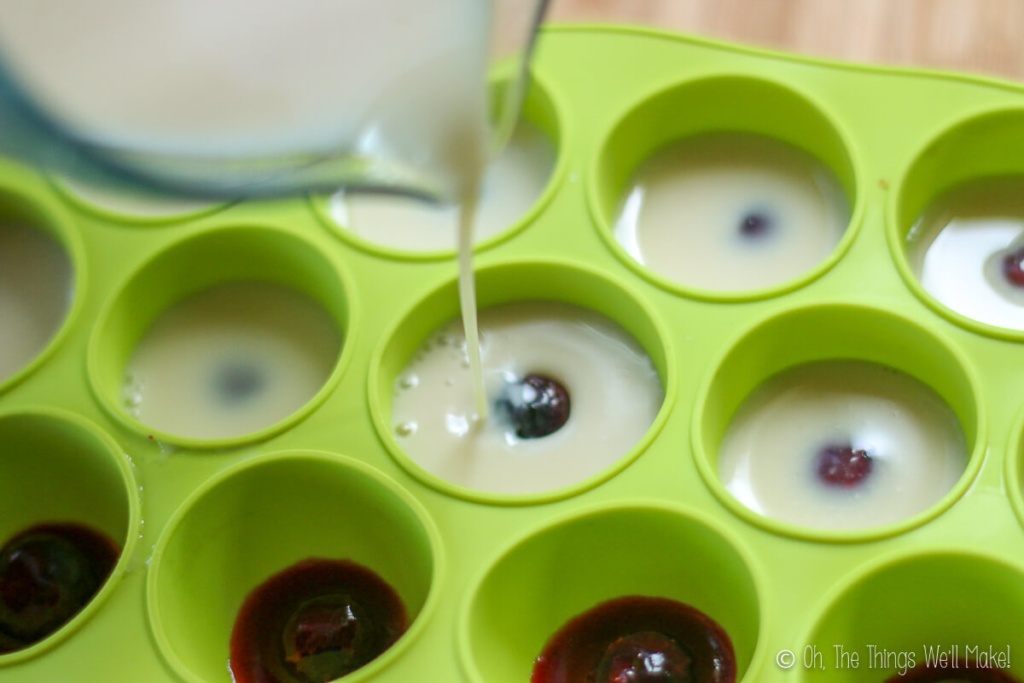
Once the gelatin has set, pour in the final layer of coconut milk gelatin and chill the trays again until the gummies are completely set. Carefully remove the finished eyeballs from the molds.
Choosing your molds
Luckily, when I decided to try to make gummy eyeballs the first time, I already had some silicone half-sphere ice cube trays at home. They inspired me to make these in the first place.
I like using silicone molds because they are flexible and they allow you to more easily remove the finished gummies from the molds.
If you don’t happen to have molds like mine, you can find similar ones on Amazon. (See one below.) While you’re shopping, you may also want to pick up either a syringe or a turkey baster because it makes the job of pouring the gelatin into the molds much easier. You can try to carefully spoon the mixture into the molds, but having something like a syringe tends to be much cleaner.
Expert tips
Using a thin juice rather than a thick puree for the irises makes it much more likely that the liquid will seep under the blueberries properly. If the liquid is mostly transparent, this gives a great cornea effect too. This year, I decided to use pomegranate juice instead of berry puree for the pinkish irises around the blueberry pupils. I think the result was excellent!
The first time I tried making gummy eyeballs, I used a thick puree that didn’t seep under the blueberries and most of the blueberry pupils are showing uncovered. For a spooky holiday like Halloween, it isn’t really a problem and looks nice and creepy.

Another thing to keep in mind is that when you add the warm, white gelatin, it can warm and melt the fruit gelatin enough to release the blueberries. That’s a problem because they float to the top of the mold, and you end up with eyeballs without visible pupils! The second time I made these, I added more berry puree around the blueberry irises to try to anchor the blueberries better in place. Unfortunately, using too much fruit around the blueberries made it so they didn’t look as much like eyeballs anymore. They were, however very tasty.
The best way to solve this problem is to use a thin layer of white gelatin and then add another layer after the gelatin has set.
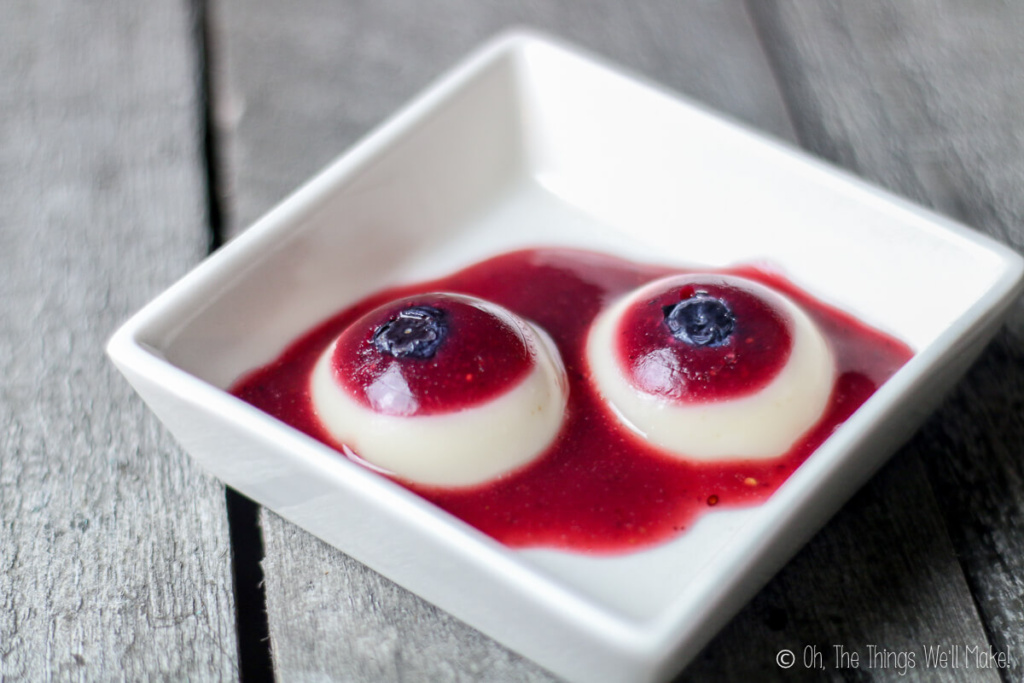
Both times I served the gummies in a “bloody bath”, made from either fruit juice or a berry puree. I think that the presentation is a fun one for a creepy Halloween party!
Video
Spooktacular Gummy Eyeballs
Ingredients
For the pupils
- 15 blueberries
For the irises
- 1 Tablespoon gelatin (unflavored)
- ¼ cup fruit juice or puree
- 1 dash boiling water
For the sclera (white of the eyeballs)
- ¾ cup coconut milk or you can make your own
- 2 Tablespoon gelatin
- 1 teaspoon honey or other sweetener, to taste
Instructions
If making a fruit puree
- Blend berries with a hand mixer and strain the mix through a sieve to separate the seeds from the berry puree.
- Add the gelatin to the fruit puree and allow it to absorb the liquid and expand (bloom).
- Mix the berry puree and gelatin with honey, to taste, in a saucepan over low heat. Thin out the mixture with a dash of water for a more workable mixture. Cook and stir until the gelatin has dissolved.
If using fruit juice
- Mix together the gelatin and fruit juice in a small, heat-safe bowl and allow the gelatin to bloom (absorb the liquid and fully hydrate).
- Place the bowl in a pan of water over the stove. Heat the gelatin over the makeshift double boiler until the gelatin has fully dissolved. (Optionally, add a dash of boiling water to help dissolve the gelatin and make a thinner mixture.)
Preparing the pupils and irises
- Place the blueberries in half-round ice cube trays, one in each compartment. These will be the pupils of the eyes.
- Pipe in a small amount of the iris gelatin mixture (either fruit puree or fruit juice mixture) around the blueberries. Using a syringe or turkey baster makes this job easier and much less messy.

- Place trays in the fridge for a few minutes to help set the irises.
- Pour leftover gelatin mixture into other molds so as not to let it go to waste. I suggest making gummy worms for Halloween!
Making the sclera (The white of the eyeballs)
- Add the gelatin and half of the coconut milk to a small bowl to allow the gelatin to bloom.
- In a saucepan, heat the other half of the coconut milk. Stir in the gelatin and coconut milk mixture once the gelatin is fully hydrated.
- Remove the molds from the fridge, and pour in a thin layer of the white, coconut gelatin over the blueberries. (Use thin layers so that the blueberries don't float away from the bottom of the molds.)

- Place the trays back in the refrigerator until the gelatin is set.
- Finish filling the molds with the white mixture until you’ve used it up, or until you are happy with the amount you have added.
- Chill again until set.
- Pop your eyes out. Ok, not YOUR eyes- the gelatin ones, please!
- The eyes look especially gory if you place them in a red liquid or sauce. Using some berry puree or red juice works wonderfully.
This post was originally published on October 4, 2013. It was republished, adding a more precise recipe, new photos and video.


Tracy, These eyeballs are so clever & cute!!
Thanks, Terri!
Was looking for the healthy “eyes” and am so happy I found them on your blog, Tracy – my daughter is having a monster party for her birthday and she was adamant she needed to feed her guests eyes! She also wants the prosciuto head and the worms, so you nailed our party food with those three! Thank you! Do you have any other spooky recipes that are not on the blog maybe?
Thanks for your comment, Masha!
I’m so glad you like them because not everybody appreciates my humor at Halloween. 🙂
I have a few more ideas for Halloween parties.
My latest recipe for the pumpkin soup can be decorated with spiderwebs as I show at the end of the post- but I guess that’s not a great food for parties. That said, the idea might be good for something more party like. I was thinking something like my pumpkin parfait in cups with the pumpkin part on top and the decoration on the top. The more I think about that, though, it may be a bit too complicated.
Depending upon what you allow in your diet, you can also make a cute cheeseball that looks like a pumpkin by rolling it in shredded carrots. Before I switched to real food I used to roll them in doritos. Sigh. But it does look very cute for a party and is easy to make ahead and serve with either crackers or cut veggies depending upon how healthy you want to get.
Lastly, you can make cookies that look like witches fingers using an almond as the fingernail. I’ve been meaning to come up with a healthy recipe to try out the idea for my blog.
If I think of more, I’ll let you know.
You can probably tell I love this sort of thing. 😉
Have a great party!
These are super cool!! I’m planning to share them on my FB page this coming week. Thanks for creating them!!! 🙂
Thanks, Starlene! I’m glad you like it! 🙂
Where did you find the circle ice molds? We looked at Target, Walmart, Dollar General, World Market, Bed Bath & Beyond and Pier 1 Imports and couldn’t find any….
I bought them from a local store here in Spain. (That probably doesn’t help you much)
That said, you can buy some from Amazon here.