

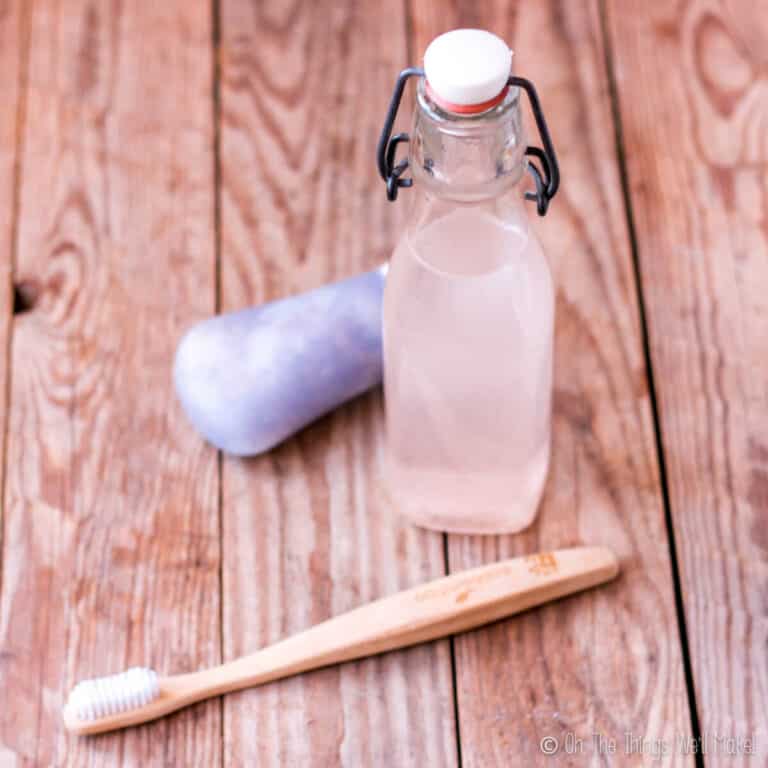
Easy Homemade Tallow Lip Balm
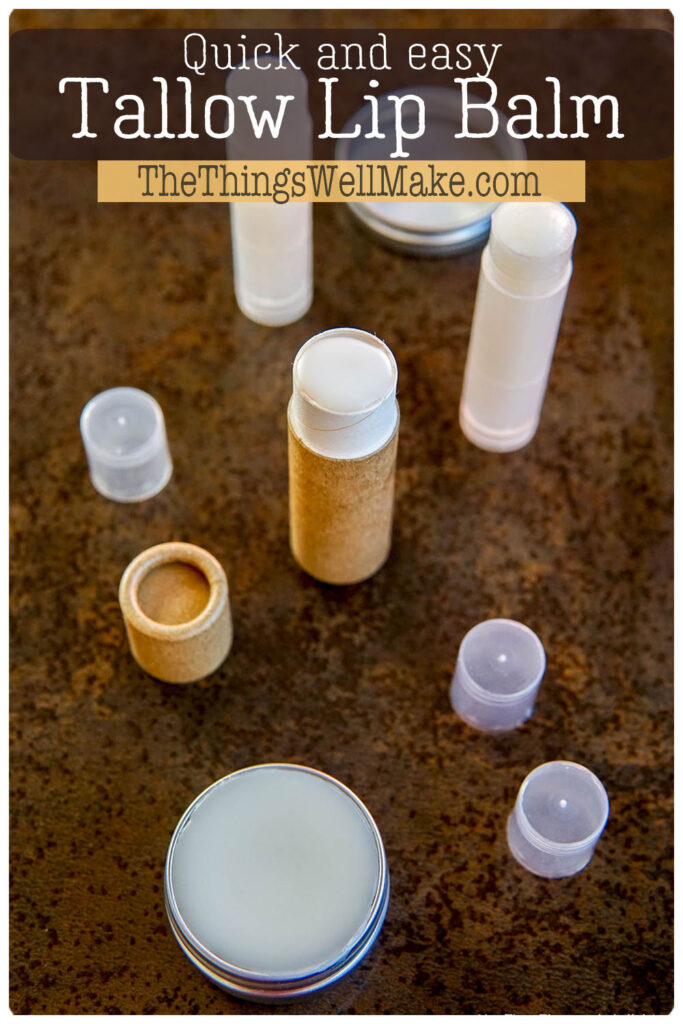
Protect your lips with this glide-on tallow lip balm made with only two inexpensive ingredients. This frugal recipe is quick and easy and is super nourishing.

In the past, I showed you how to make a healing lip balm with mango butter and oils. With my son’s lips chapping lately in our cold, windy weather, I was going to make a new batch, but…
Having recently shown you how to make beef tallow, I figured it was the ideal time to try making a homemade lip balm with it.
Ingredients
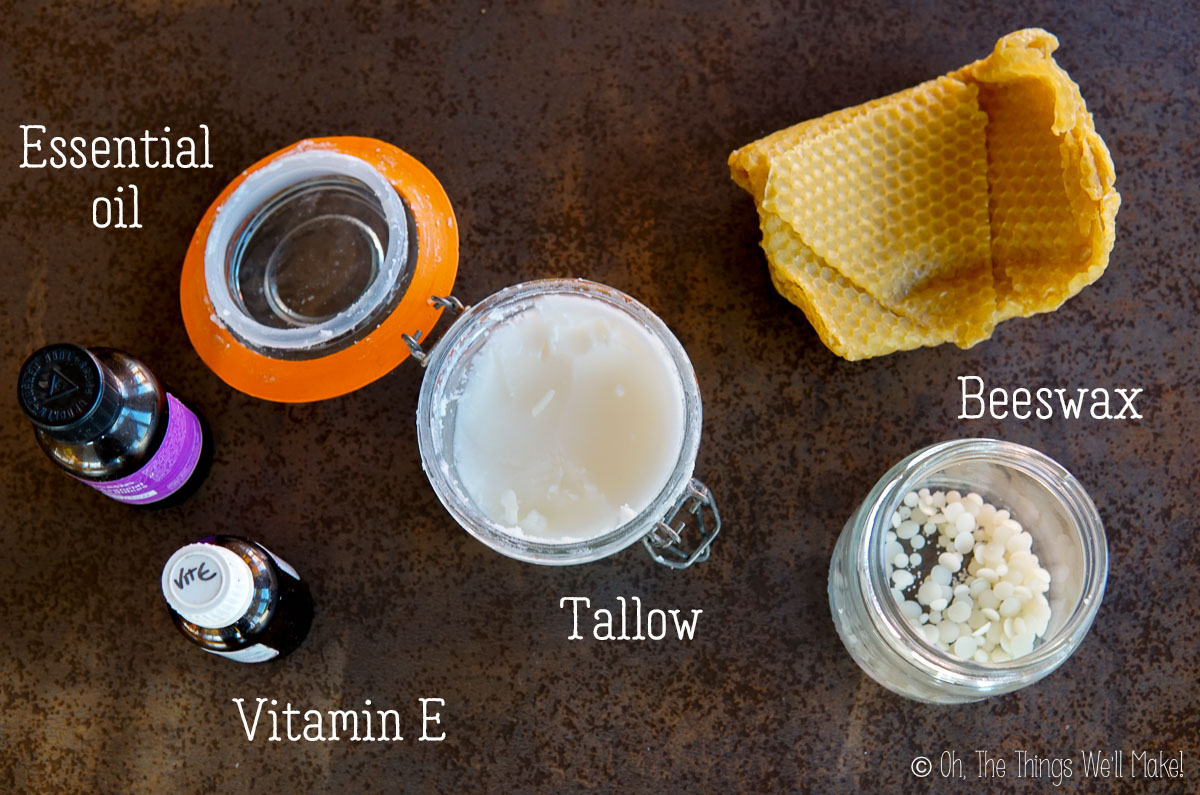
The ingredients for this recipe couldn’t be simpler or more frugal, especially if you happen to live on a cattle farm and keep bees. All you really need is tallow and beeswax.
To customize the recipe, you can optionally add some essential oils for fragrance and flavor. You can also add a drop of vitamin E to extend the shelf life with its antioxidant properties.
I used my homemade beef tallow in this recipe. It may sound intimidating to render suet into tallow, but it’s basically just clarifying beef fat. Whether or not you choose to make your own tallow or buy it, though, I highly recommend giving this versatile fat a try. Tallow is ideal for cooking, even at high temperatures, but it’s also great for cosmetics and soap making.
Tallow skin properties
Tallow is an amazing ingredient to use in skincare products for its moisturizing, softening, and protective properties. Rich in vitamins A, D, and E, tallow provides all the fat-soluble vitamins your skin needs to stay nourished and supple. It’s also a great natural source of anti-inflammatory fatty acids that help soothe dry and irritated skin.
Being an animal fat, tallow is very similar to the oils our body produces, making it more compatible with our skin. For that reason, it absorbs quickly and easily, making it perfect for a healing lip balm.
Why add beeswax?
Adding beeswax to your lip balm gives it a thicker, more stable consistency. The wax also helps form an occlusive barrier that helps protect your lips from the elements. This helps to lock in moisture, keeping your lips hydrated for longer.
Adding essential oils
Essential oils are a great way to customize your lip balm with natural fragrance and flavor. You can choose an essential oil based on its scent, or even its skin-soothing properties.
Lavender essential oil is known for its calming properties and makes a great addition to any lip balm. It combines well with citrus oils like lemon, lime, or tangerine.
Other popular essential oils include peppermint and sweet orange. Peppermint adds flavor, but also has a cooling effect on lips. (Going overboard with it can cause a tingling sensation, though!)
Cinnamon is also a popular choice but use it sparingly since it can be irritating for some people.
Certain essential oils like chamomile and blue tansy are especially soothing for dry or chapped lips, but they can be on the more expensive side. If you’re looking to keep your lip balm recipe as frugal as possible, leave it unscented or choose inexpensive oils that you already have on hand. (Blue tansy will also add a blue tint to the balm.)
When adding essential oils to your lip balm, keep in mind that some oils are phototoxic and can cause skin irritation if exposed to the sun. (This mainly applies to cold-pressed citrus peel oils.) Other oils can be irritating to the skin, especially if used in high concentrations. Begin adding a drop or two for each tube of lip balm you make.
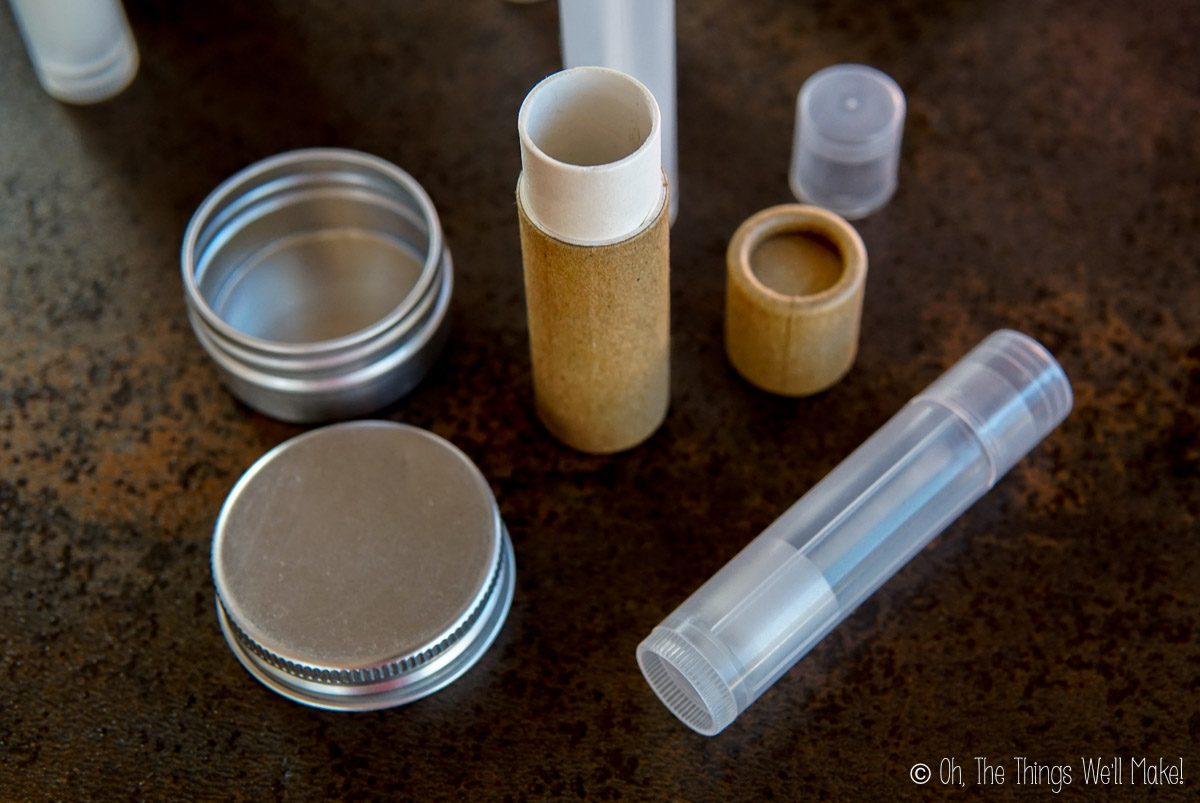
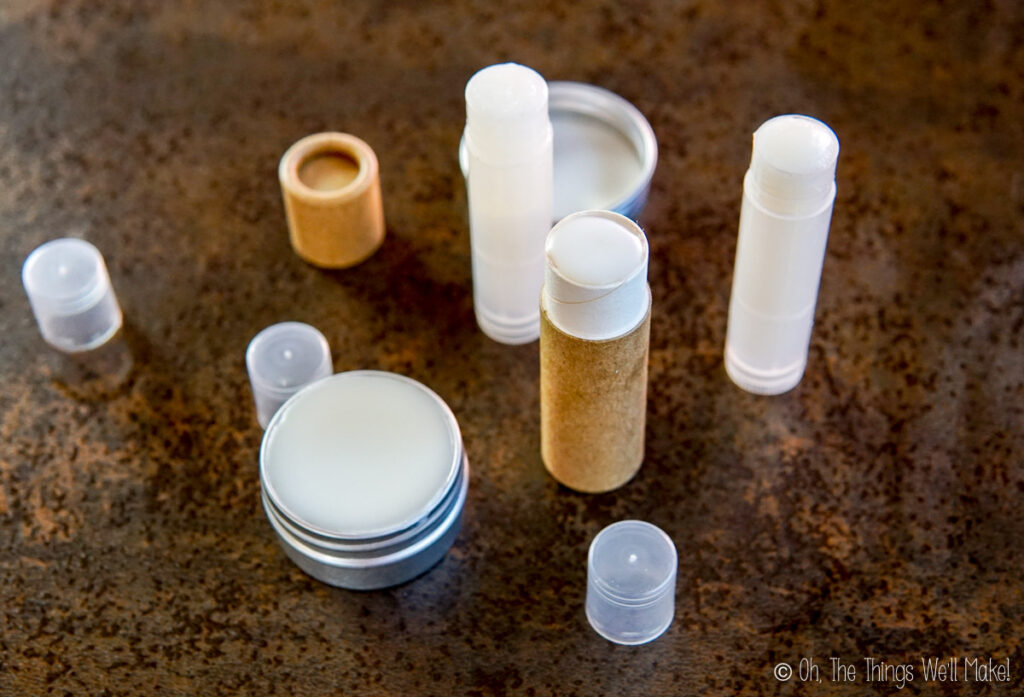
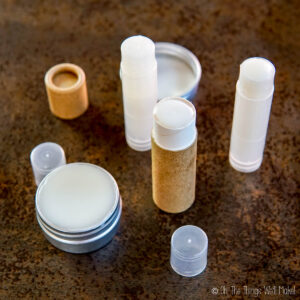
Packaging
The most expensive part of this recipe is probably the packaging, but even that is generally very inexpensive. I recommend using lip balm tubes for easy use application. Both lip balm tubes and small metal tins are cheap and convenient to use. They can also be cleaned and reused if you’re super frugal.
These days, though, you can also find cardboard lip balm tubes that are even more eco-friendly.
Small metal tin containers can be found online or at some craft and hobby stores. If you want to be extra thrifty, you can also repurpose old mint tins or cosmetic containers.
When reusing packaging, make sure to fully remove any residue from the old product and then sanitize the container with alcohol (70% or above) or boiling water. A dishwasher can also help clean and sanitize, but be especially careful with plastic packaging as it can melt under the extreme heat of either the dishwasher or boiling water.
Why make it?
This may be the quickest and easiest recipe on my entire blog and it costs pennies to make.
Making your own lip balm is a great way to avoid the unnecessary ingredients that are often found in store-bought products. Plus, you can create custom blends with natural and organic ingredients tailored to your specific needs. With this recipe, you don’t need any special equipment or skills. All you need is a few simple ingredients and a few minutes of time.
Making your own lip balm is also a great way to save money. Tallow and beeswax are both relatively inexpensive ingredients, so you can make a large supply of lip balm for a fraction of what it would cost to buy it. (I looked up tallow lip balm online and saw it being sold for $6 a tube!) Plus, you can customize it however you’d like with different essential oils and flavors.
This recipe is also incredibly versatile. Feel free to experiment with different ratios of tallow, beeswax, and oil to find the texture that you like best. You can also add other nourishing ingredients like cocoa butter.
Procedure
Making your own lip balm is really easy and only takes a few minutes. All you need to do is measure out the tallow and beeswax in a double boiler insert or a bowl that you can place over a simmering pot of water. Heat them together in a double boiler until fully melted.
Once melted, remove the mixture from the heat. Add a few drops of essential oils (if desired) and combine everything with a fork or small whisk. Pour the mixture into lip balm containers or small tins and allow it to cool completely before use.
During the cooling process, the upper surface of the lip balm mixture will form a small indentation in the center. This is normal. If it bothers you, you can remelt any remaining lip balm mixture in the double boiler and pour a few drops over the top of each tin to fill in the indentation.
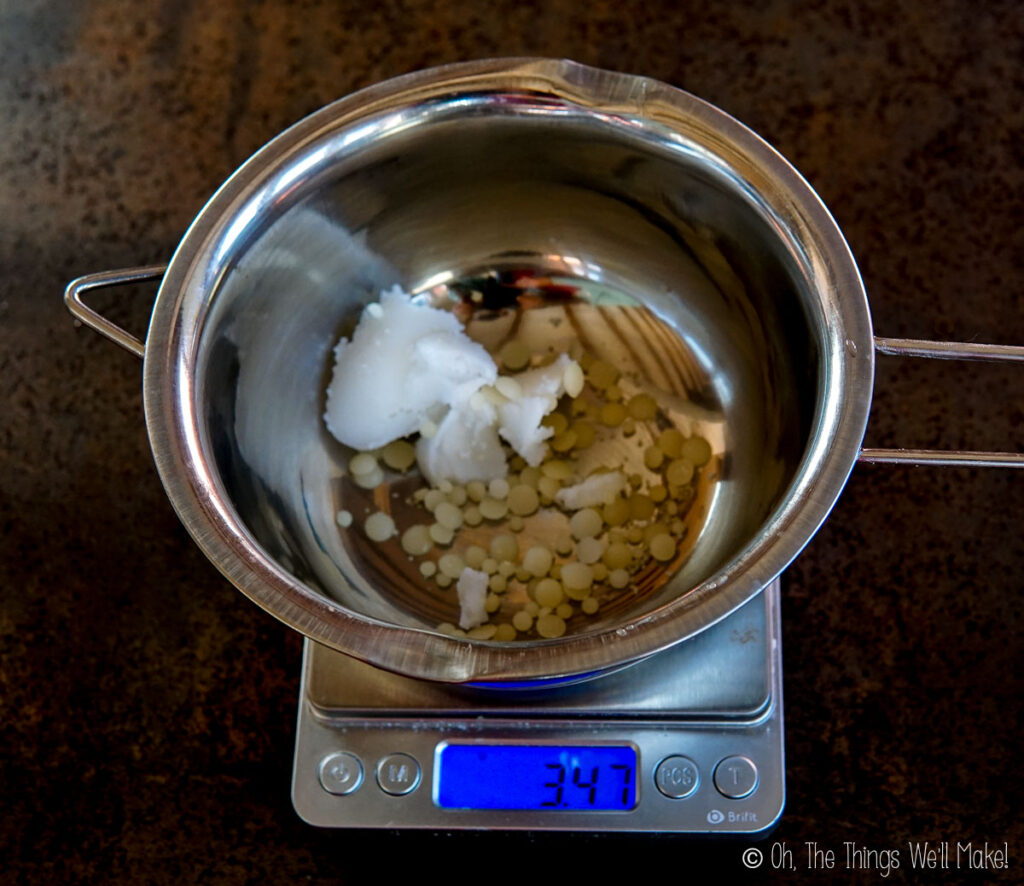
Weigh out the ingredients 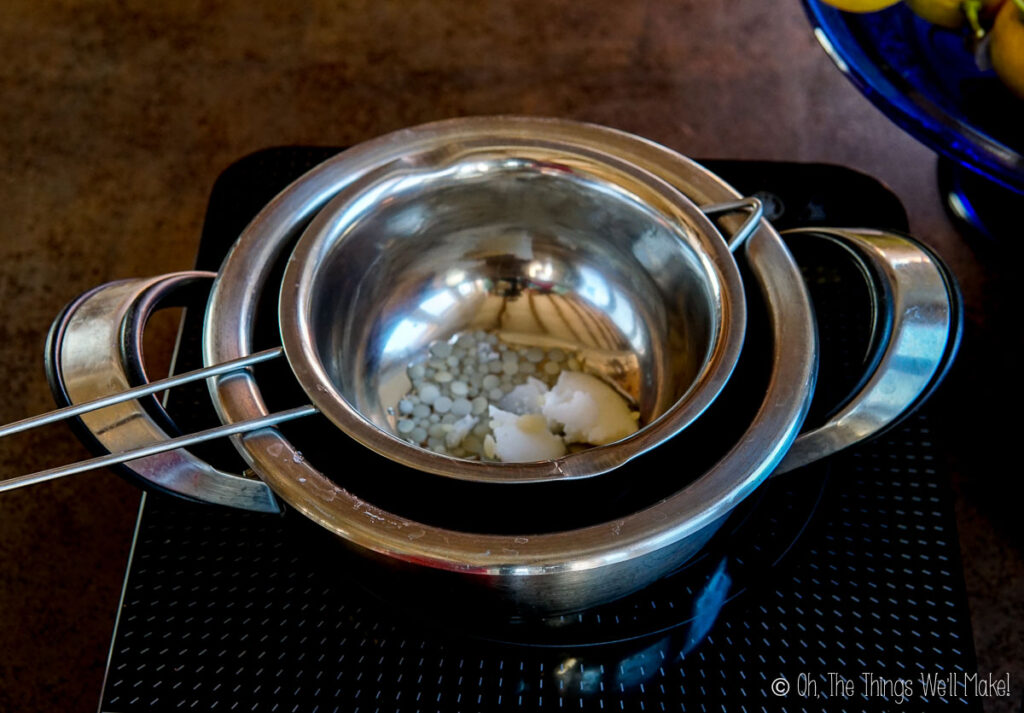
Melt them in a double boiler 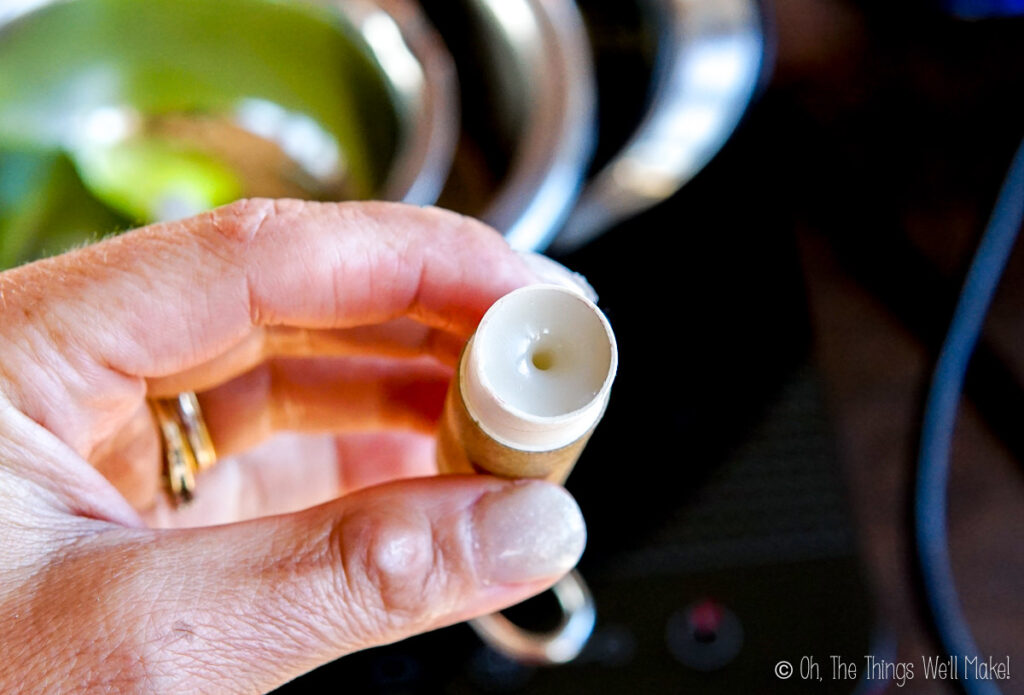
Indentation 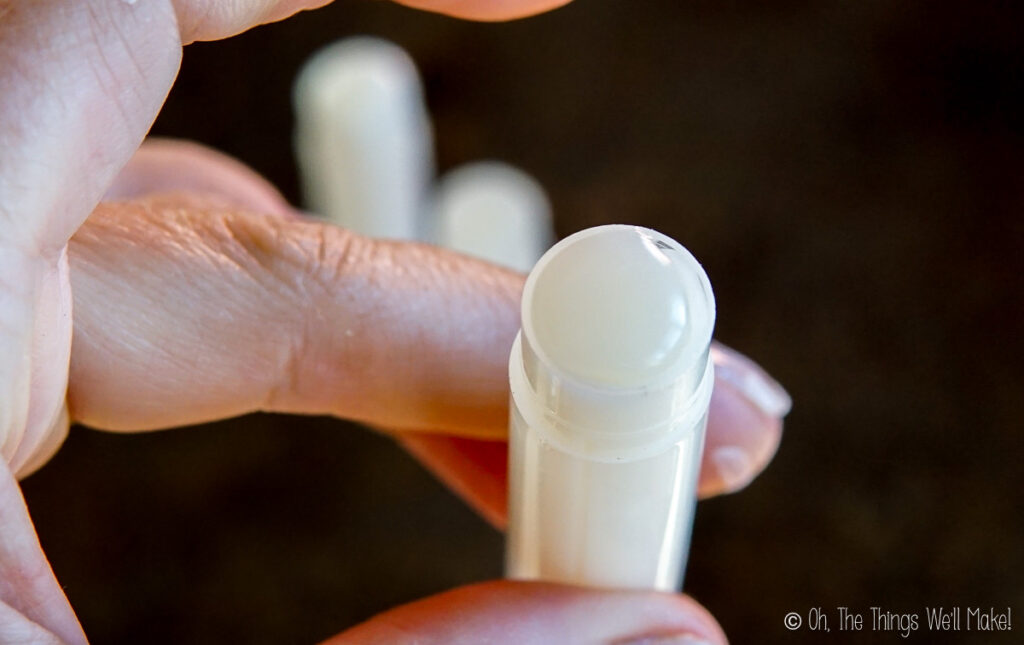
Finished balm after covering the indentation
Customizing the texture
Customizing the texture of your lip balm is easy. To make a softer balm, simply reduce the amount of beeswax and increase the amount of tallow. For an even softer lip balm, consider adding a liquid oil like avocado oil or jojoba oil.
To make a firmer balm, add more beeswax. You can also adjust the texture by playing around with adding different oils and butters. Adding cocoa butter, for example, will result in a firmer lip balm with emollient properties.
Using a scale or not?
I normally formulate all of my cosmetics recipes using a small, inexpensive digital scale. In the case of small batches like this one, I usually use a jeweler’s scale. A jeweler’s scale allows you to get accurate measurements under a gram.
Using a scale is important in most recipes because it is very important to get the amount of preservative correct. Using too much preservative can be damaging to the skin and using too little can lead to contamination.
However, for this recipe, you do not need a scale. Because this recipe doesn’t have any water-based ingredients, no preservative is necessary. (That said, try not to get it wet and cap it with moisture inside!)
The advantage of using a scale, in this case, is that you can be more precise in filling your tubes. Most chapstick tubes hold around 5 grams of the product. So, depending on how many tubes you want to make, you could weigh out your ingredients and divide them accordingly without much leftover waste.
Recipe by volume
I used a 3:1 ratio of tallow to beeswax by weight in my recipe.
If using volume, try using 1 Tablespoon of tallow for every teaspoon of beeswax. The main disadvantage to using volume is that beeswax is difficult to measure by volume. That said, this recipe is very forgiving. The recipe doesn’t have to be super precise.
The other problem is that I have no idea how many tubes that amount of mixture would make.
Using Your Lip Balm
Now that you’ve made your homemade tallow lip balm, it’s time to put it to use! To apply from the tin, take a small finger-sized portion of the balm and massage it into your lips. For best results, use the balm regularly throughout the day. Applying before bedtime is especially beneficial for keeping lips hydrated and protected.
Enjoy your homemade tallow lip balm and the nourishing benefits it provides!
Video
Tallow Lip Balm
Instructions
- Weigh out the tallow and the beeswax in a double boiler insert (or a bowl).
- Gently melt them over a pot of simmering water.
- Optionally add in a few drops of an essential oil for scent and flavor and mix them with the other ingredients.
- Pour the mixture into lip balm tubes or tins.
- Allow to cool and solidify before capping the finished lip balm.
Notes
Recipe by Volume (if no scale is available)
- 1 Tablespoon tallow
- 1 teaspoon beeswax
Essential oil ideas
- Sweet orange (distilled)
- Mint
- Cinnamon
- Chamomile


Hey there
What is the longevity of the recipe? Does it ever spoil or go rancid? If so what is a good way to store excess tubes before use? I tend to use lip balm very frequently so would like to make a large batch and have a few lip balms handy at all times and then store some for later. Do they melt when exposed to warm temperatures? I live where it gets very hot in the summer.
Thank you!
Hi Brandi,
Because this lip balm is made only with tallow and beeswax, it keeps quite well. There’s no water in it, so you don’t have to worry about microbial spoilage the way you would with lotions. If your tallow was fresh when you made it, the balm should easily last a year or more before you’d notice any rancid smell.
For storing extras, keep them in a cool, dark place. If you’re making a large batch, you can store the unused tubes in the fridge and just take one out as needed. That will slow down oxidation and help them stay fresh longer.
As for heat, yes, they can soften or melt if exposed to high temperatures. The beeswax helps raise the melting point, but in very hot summer weather or in a car, they may still liquefy. They’ll firm back up once cooled, though repeated melting can sometimes affect texture slightly.
Hi. My question is can we use shay butter, or is this nut butter not truly a healthy butter?
Hi Stacey,
That’s a great question. Shea butter comes from the fat of the shea nut, but it’s not a seed oil in the same sense as things like sunflower or canola. It’s a rich, natural fat that’s usually cold-pressed and quite stable.
I make this balm with tallow because I render my own tallow and love finding good uses for it. Plus, a lot of people like tallow since it’s so similar to the natural fats in our skin. That said, I have nothing against using shea butter in this kind of recipe.
Hi, Im hesring that nut oils sre not truly healthy…i.e. sweet almond oil, shea butter, etc. Many lip balm recipes call for bith items…what are your thoughts?
Hi Stacy,
That’s a really good question. Personally, I avoid seed and nut oils for eating, since I don’t think they’re the healthiest choices food-wise. For skincare, though, I don’t worry about them as much.
That said, with a lip balm, you do end up ingesting a tiny bit, so I understand wanting to be more selective. Some oils, like sunflower, are often solvent-extracted, so you may want to skip those. Shea butter and sweet almond oil are cold-pressed and less processed, so I’m okay using them. However, you can also use olive oil or avocado oil if that feels better to you.
Do you ever use shea butter with the tallow and beeswax?
Hi Dani,
I haven’t actually tried combining shea butter with the tallow and beeswax myself, but it should work well. You’ll have to adjust the recipe accordingly to get the texture you’re looking for. (You may need to add more beeswax.)