

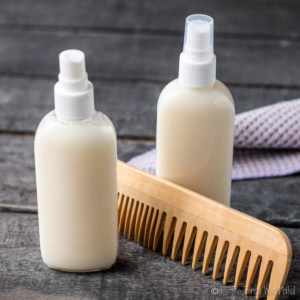
Easy DIY Hair Conditioner (That Actually Works)
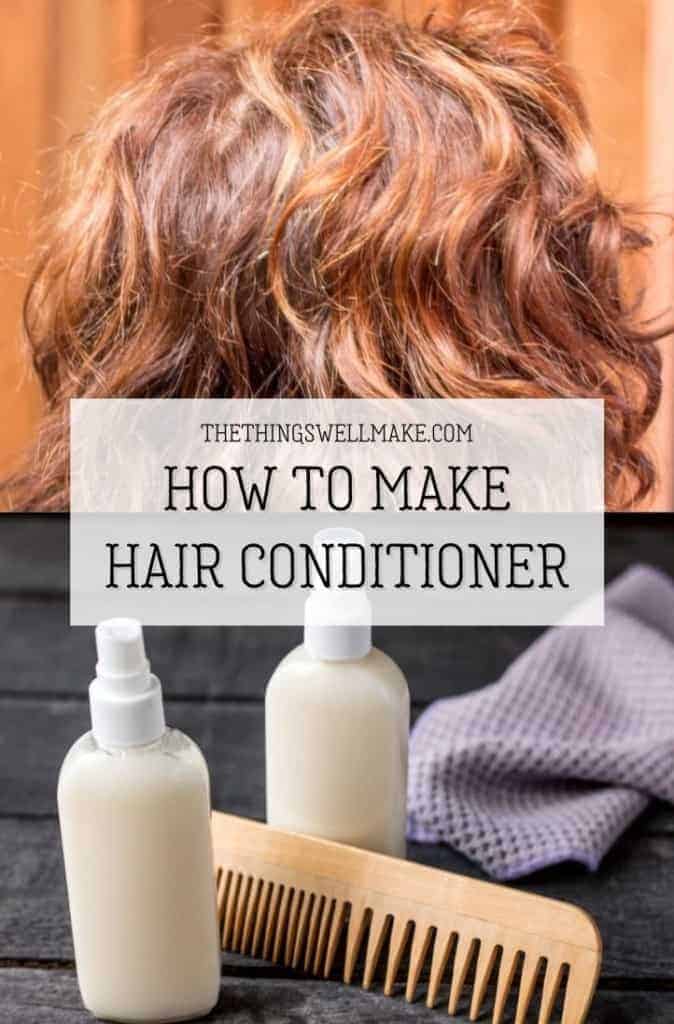
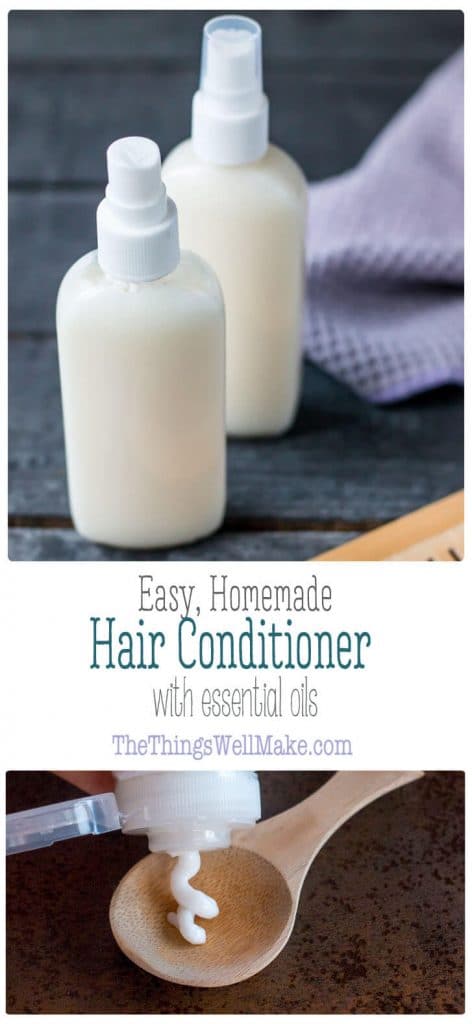
Make your own DIY hair conditioner with simple ingredients you can customize. This real conditioner leaves your hair soft, smooth, and easy to detangle and can even be used as a leave-in.

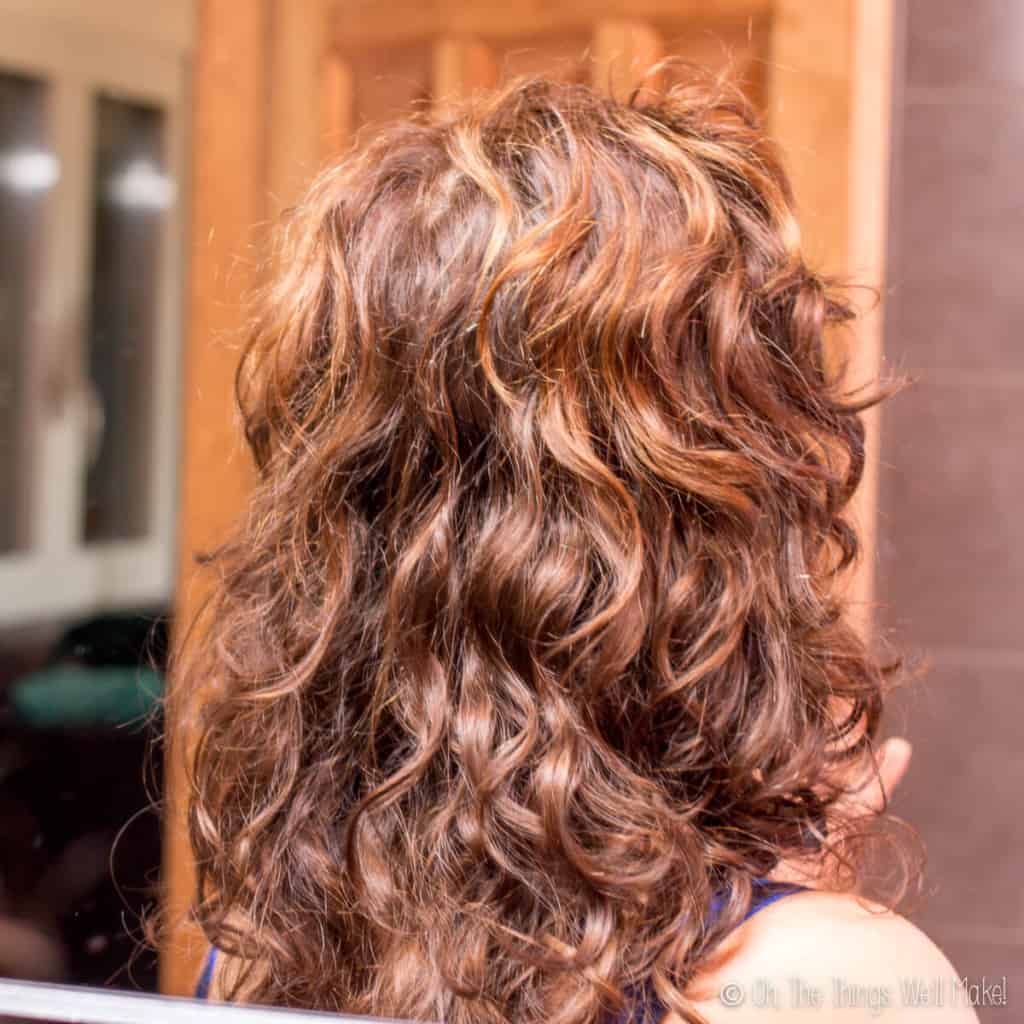
When I first wrote this post, I had just taken the Dressing Your Truth® course, and it changed how I was doing my hair.
Up until then, I had been straightening it all the time. It helped me realize I didn’t need to fight my natural texture, so for the first time in over 20 years, I started letting my hair do its natural curly and wavy thing.
To help support my waves, I started washing my hair less often and using a homemade flaxseed hair gel. I used this conditioner as a co-wash during the week and my homemade clarifying shampoo about once a week. The difference was immediate. I started seeing waves and curls I didn’t even know I had, and now I can just let it do its thing and I love how it looks.
This isn’t just a mix of oils or a quick DIY shortcut. It’s a real conditioner, similar to what you’d buy in a store, but you get to control what goes into it and adjust it to suit your hair.
Watch the full tutorial
Here’s exactly how I make it step by step, along with ingredient tips, troubleshooting, and customization ideas.

Why make a homemade conditioner?
There are a lot of reasons to make your own conditioner.
When you realize that most conditioners are mostly water, it starts to make sense. You can make something very similar at home for much less, even when using high-quality ingredients.
A lot of products highlight a specific oil or “miracle” ingredient, but in reality, those are often only used in small amounts. The rest of the formula may include ingredients you may not love or may prefer to avoid.
When you make your own, you get to decide exactly what goes into it and what to leave out. That’s always been my main reason for making things myself. I like knowing what I’m using and being able to adjust things depending on what my hair needs.
It’s also surprisingly affordable, and you can reuse your containers to cut down on waste. If you’d rather skip bottles altogether, you can also try my homemade conditioner bar.

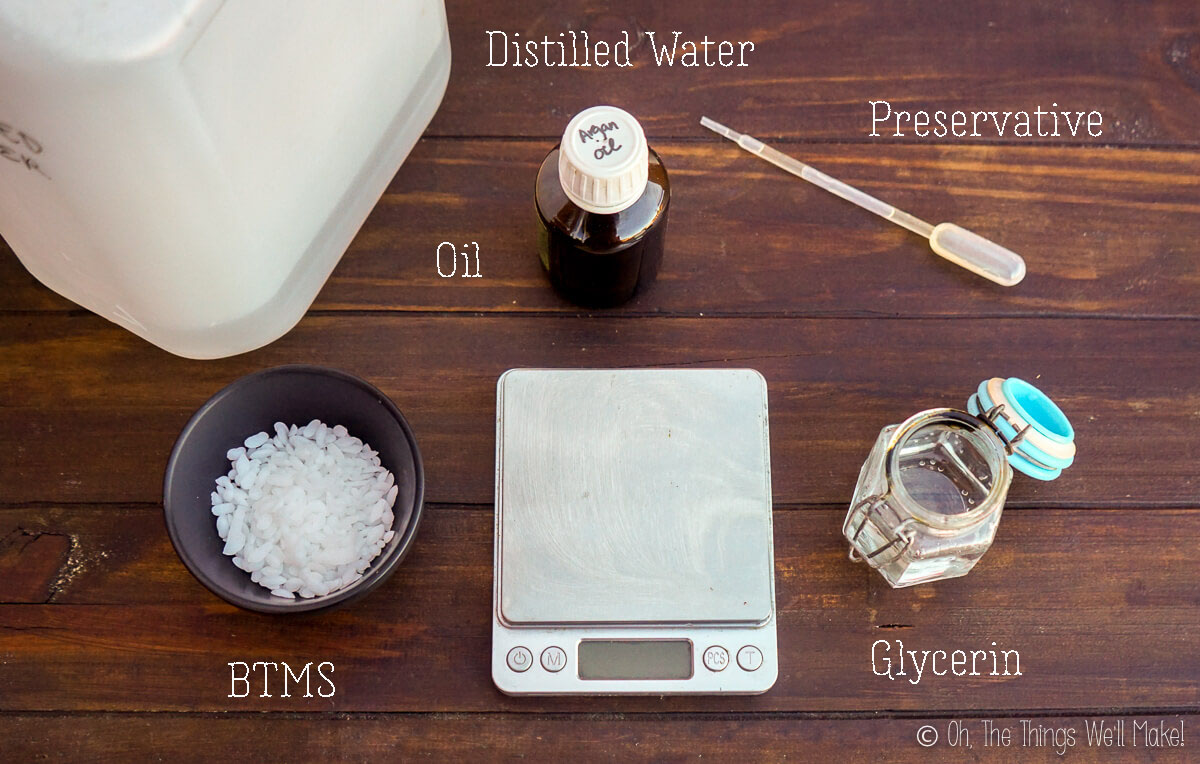
The ingredients
A basic conditioner only uses a few simple types of ingredients: water, oil, an emulsifier, and a preservative. From there, you can keep it simple or customize it with things like vitamins or essential oils.
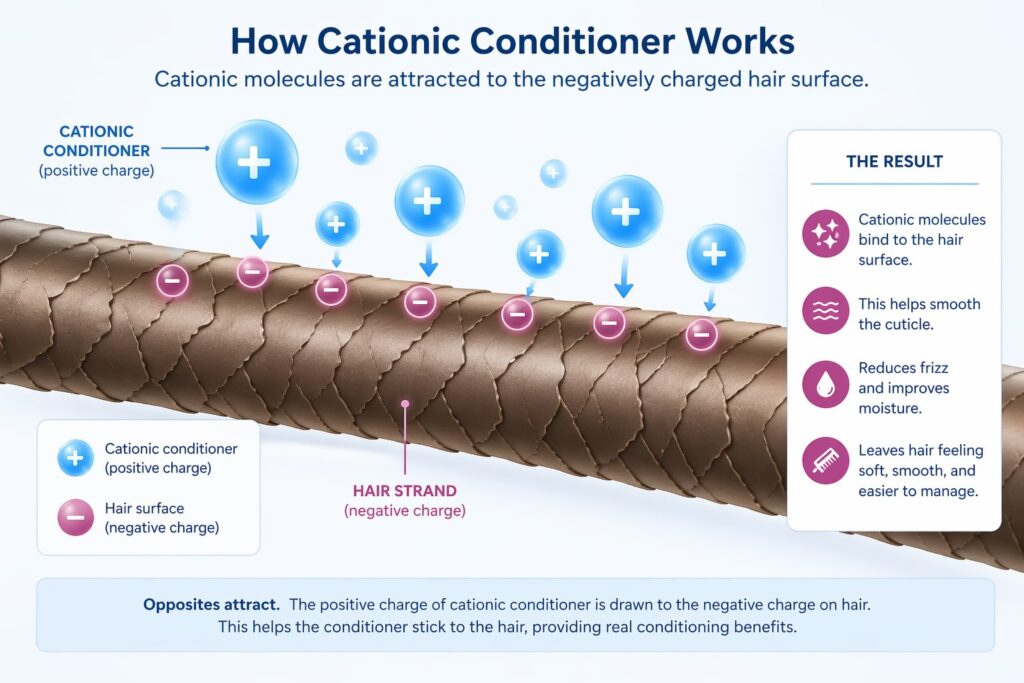
To make a conditioner, we’re making a simple emulsion. It’s just like making a simple lotion. The main difference is the type of emulsifier used. In this case, we’re using a cationic emulsifier, BTMS, which is what gives this conditioner its conditioning properties.
What is BTMS?
The main ingredient that makes this a true conditioner is BTMS (Behentrimonium Methosulfate).
This is what gives the conditioner its slip and makes it easier to detangle your hair. Without it, you’d end up with something more like a lotion, which won’t have the same feel or work nearly as well on hair.
BTMS is what’s called a cationic emulsifier, which just means it has a positive charge. Hair has a slight negative charge, so the BTMS is attracted to it. It lightly coats the hair and helps smooth it so the strands don’t catch on each other as much. That’s what gives you that soft, slippery feel and makes it easier to comb through.
When I first shared this recipe, I described it as a “natural” conditioner because I had taken a course that used BTMS in their formulas. Since then, I’ve learned that not everyone considers BTMS to be natural, especially when it comes to stricter certifications.
That said, this is still the version I reach for most often because it simply works better for my hair. I’ve tried other options, but they just don’t give the same slip or leave my hair feeling as soft.
Substituting BTMS
If you’d rather not use BTMS, there are other cationic emulsifiers that can be used to make a conditioner.
That said, they don’t all give the same results. In my experience, BTMS gives the best slip and leaves the hair feeling the softest.
I’ve experimented with a few alternatives, and I’ll be sharing more details about those options in a separate post.
BTMS-25 vs. BTMS-50
When I first wrote this post, I didn’t even realize that BTMS was sold in different versions. My supplier just called it “BTMS,” but after looking into it more, I realized I had been using BTMS-25.
BTMS-25 is a combination of Behentrimonium Methosulfate and cetearyl alcohol, which acts as a co-emulsifier. The amount of the active conditioning ingredient is lower, but it tends to give a thicker, creamier conditioner.
BTMS-50 has a higher percentage of Behentrimonium Methosulfate, along with cetyl alcohol and butylene glycol. Because of that, it usually makes a slightly lighter conditioner.
Some people prefer BTMS-25 because it has fewer ingredients, while others choose to avoid BTMS-50 due to the butylene glycol. While it’s generally considered safe, some people prefer to avoid glycols or more processed ingredients.
You can use either one in this recipe, just keep in mind that the final texture may be a little different.
The oil phase
In this recipe, I use a small amount of oil to help soften the hair and add a bit of shine. I often use argan oil, but you don’t have to use it.
You can swap it out for another oil or even use a combination of oils, depending on your hair type and what you have on hand. Just try to keep the total amount about the same so the consistency stays similar.
Some oils are lighter, like jojoba or argan oil, while others like coconut, olive oil, or avocado oil can feel heavier. Shea butter can also be used, especially for thicker or curlier hair, but it may be too much for finer hair.
The water phase
The main ingredient in most conditioners is water, and this recipe is no exception.
I like to use distilled water because it doesn’t contain minerals or impurities that can affect the final product. If you don’t have distilled water, you can use filtered water that has been recently boiled and cooled.
You can also replace part of the water with something like a hydrosol or aloe juice if you want to customize it a bit.
If you start adding a lot of things like aloe, hydrosols, or other botanicals, just keep in mind that they can make the conditioner a bit harder to preserve, so it’s best to keep things fairly simple.
About glycerin
Glycerin is a humectant, which means it helps draw moisture into the hair.
That said, it doesn’t work well for everyone. In very dry or very humid climates, it can sometimes make hair feel dry or sticky instead.
If you’d rather not use it, you can simply leave it out and replace it with more water.
Adding a preservative
Because this conditioner contains water, it needs a preservative. There’s really no safe way around this if you plan to store it at room temperature.
Without one, it can grow bacteria or mold, even if you can’t see it right away. So this is one step you don’t want to skip.
The good news is that there are several preservatives available for home use that work well in recipes like this. I’ve used options like Cosgard (Geogard 221), Sharomix, and others over the years.
If you want to learn more about the different preservative options, I have a post about natural preservatives that goes into more detail.
Beginner’s Guide to Natural Preservatives
Just make sure to use a broad-spectrum preservative and follow the recommended usage rate for the one you choose. Most are used at around 1% of the recipe, but always check your specific product.
It’s also important that the pH of your product works with your preservative, since some only work within certain ranges. I go into more detail about that in my post about pH in cosmetics.
Optional ingredients
You can also customize this conditioner with a few optional ingredients.
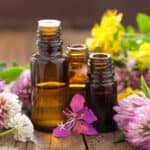
For scent, I usually add essential oils. I like lavender and rosemary, but you can use whatever you prefer. Keep the total amount low, usually around 0.5–1% of the recipe.
You can also add things like d-panthenol or proteins like rice or wheat protein to help support the hair.
If you’d like to see a full example of how this recipe can be customized, I’ve shared an example of a customized conditioner using aloe juice, different oils, and added ingredients like panthenol and protein.
How to make it
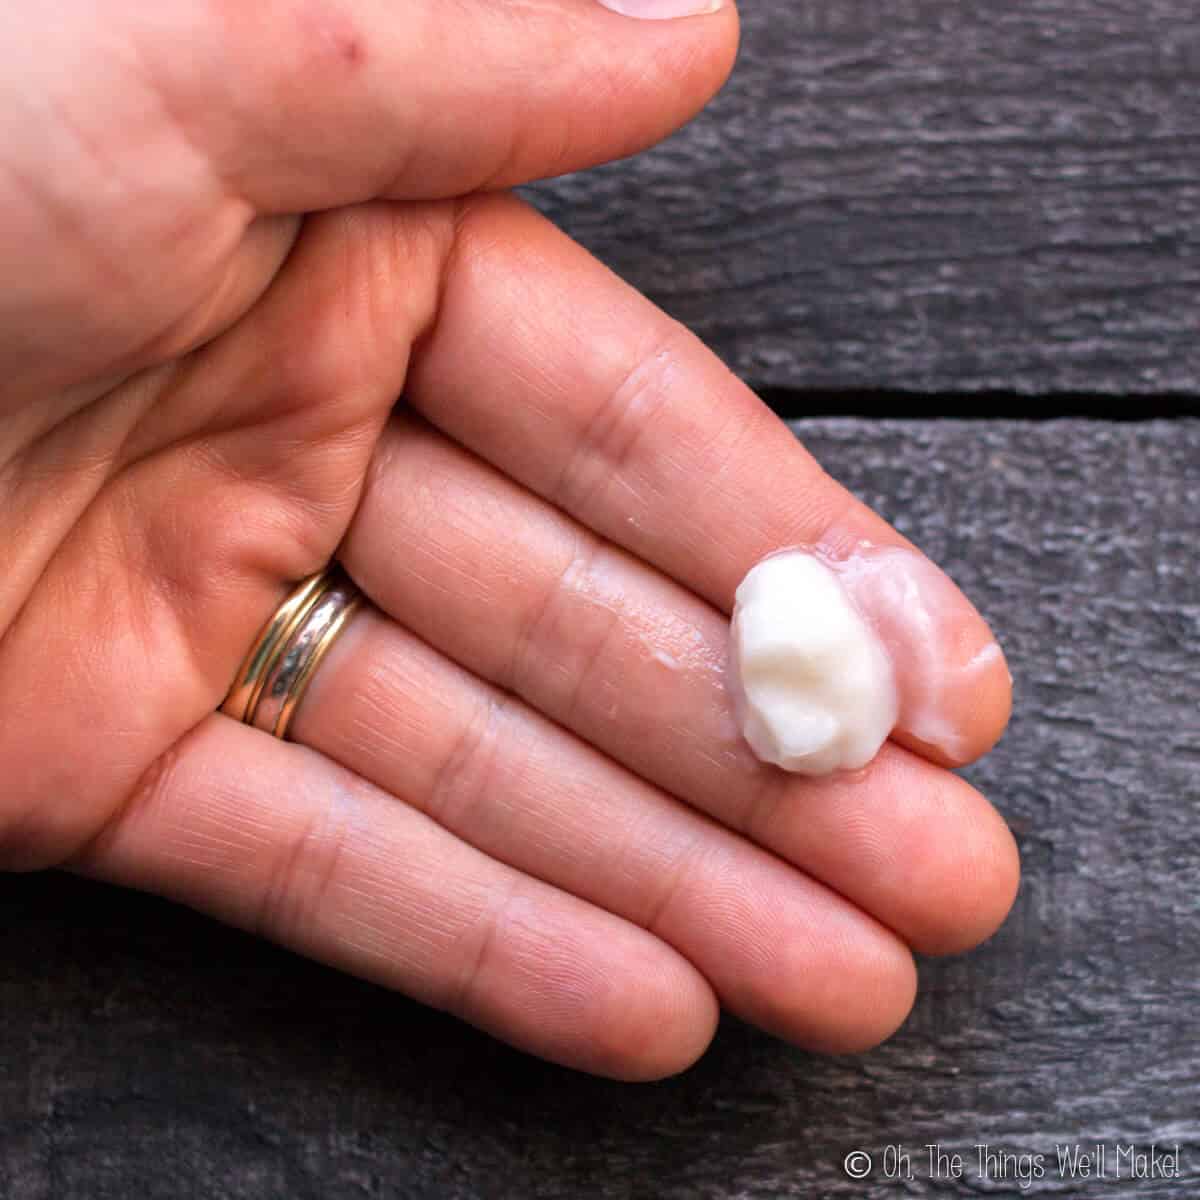
Making this conditioner is very similar to making a simple lotion. You’ll heat the water phase and oil phase separately, combine them, and then blend everything together until it forms a smooth, creamy emulsion.
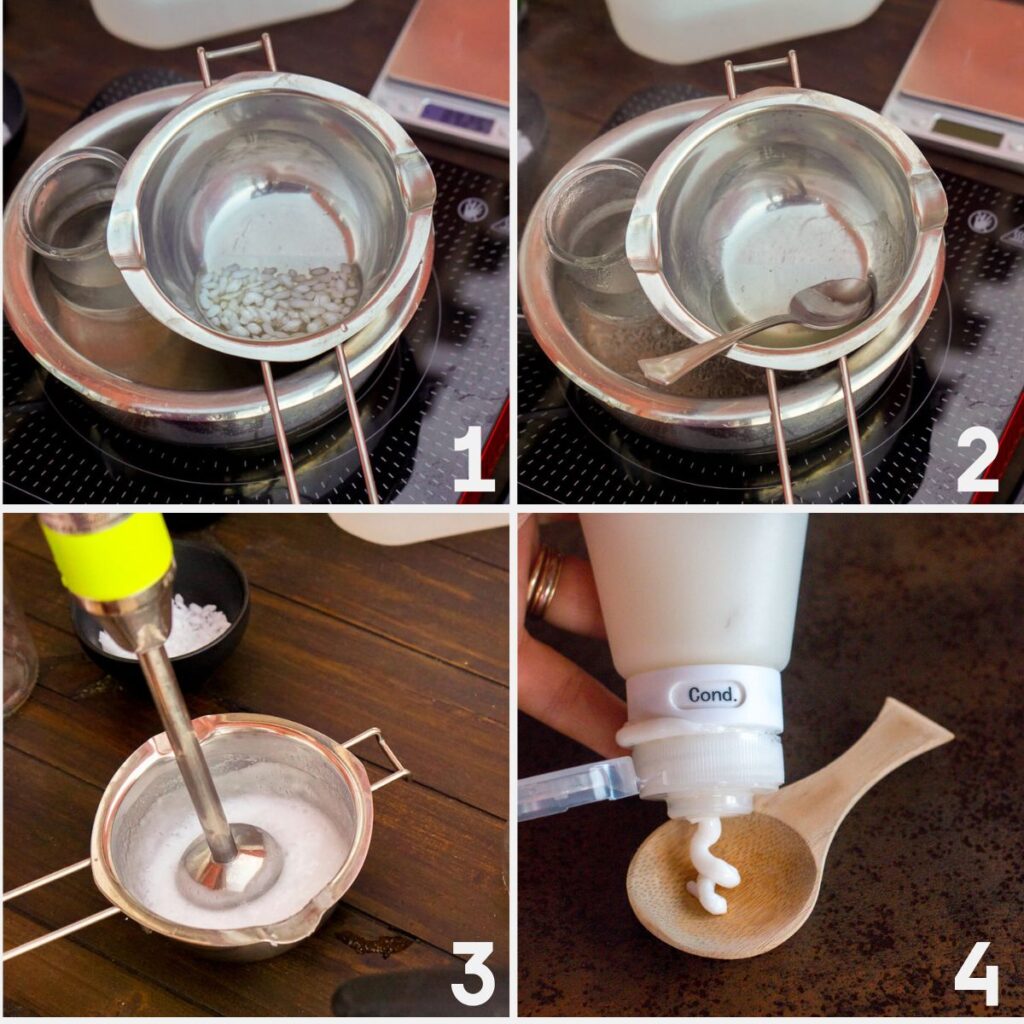
Start by heating the distilled water in a double boiler. (1) At the same time, in a separate heat-safe container, combine the oil and BTMS and heat them until the BTMS has fully melted. (2) Once both phases are hot and roughly the same temperature, slowly pour the water into the oil mixture while blending or stirring.
At first, the mixture will look thin, but as you continue blending, it will quickly turn creamy and opaque. It will continue to thicken as it cools. Once it has cooled down to around 30°C/90°F, you can add the preservative, essential oils, and any other heat-sensitive ingredients.
After that, check the pH and adjust if needed. Then transfer the finished conditioner to your container and let it cool completely before closing it.
How long does it keep?
With a preservative, this conditioner should last around 3 months when stored properly. It will probably keep longer than that, but since we’re not doing formal stability testing at home, I like to stay on the safe side.
I still prefer to make smaller batches so it’s always fresh, and I keep an eye on it and remake it if anything seems off.
If you choose not to use a preservative, you’ll need to treat it more like a food. Keep it in the refrigerator and use it within about a week.
How to use it
I usually use this as a rinse-out conditioner after washing my hair.
Apply a small amount to the ends of your hair, work it through, and comb it through to help detangle. Then rinse it out.
You can also use a small amount as a leave-in conditioner, especially on damp hair. Just be careful not to use too much, as a little goes a long way.
You can also use it as a co-wash if you’re trying to wash your hair less often. Just massage it into your scalp and rinse it out well.
I’ve also used it between washes to help refresh my curls. I lightly mist my hair with water, then mix a small amount of conditioner with a bit of homemade hair gel (or flaxseed hair gel) and scrunch it through to bring the curls back.
You can store this in a pump bottle or another reusable container. I also like using silicone travel tubes since they’re easy to squeeze and work well if you’re taking it with you.
If your hair is very fine, start with a very small amount and adjust as needed.
FAQs
You can, but it won’t really be the same. BTMS is what gives the conditioner its slip and detangling ability. Without it, you’ll end up with something more like a lotion, which doesn’t work nearly as well on hair.
Yes, but results will vary. Other cationic emulsifiers can work, but in my experience, they don’t give the same softness or slip. BTMS is still the one that consistently works best.
If you’re storing it at room temperature, no. Because this recipe contains water, it needs a preservative to prevent mold and bacteria growth.
If you really want to skip it, you’d need to keep it in the fridge and use it within about a week.
It’s best to use distilled water. Tap water can contain minerals or impurities that may affect the final product or reduce shelf life. If needed, you can use filtered water that’s been recently boiled and cooled.
This usually happens if:
The oil and water phases weren’t at a similar temperature
It wasn’t blended enough
The emulsifier wasn’t fully melted
Try blending a bit longer next time and make sure everything is fully heated before combining.
Small changes can affect the texture:
Too thick: reduce the BTMS slightly or increase the water
Too thin: increase the BTMS a bit
It will also thicken more as it cools, so don’t judge it too early.
Yes, but use a very small amount. A little goes a long way, especially for finer hair.
Absolutely. You can swap the oil for something else or use a blend. Just keep the total amount about the same so the consistency doesn’t change too much.
Yes, but keep it simple at first. Adding more ingredients can make the conditioner harder to preserve, so make sure your preservative can handle the final formula.
With a preservative, about 2–3 months is a safe estimate. Without one, about a week in the fridge.
Prefer a faster overview?
Easy DIY Hair Conditioner
Equipment
- pump bottle
Materials
- 83 g distilled water
- 5 g BTMS
- 5 g glycerin
- 5 g argan oil or other oil(s)
- 1 g preservative (or use your preservative at its recommended rate)
- 1 g lavender essential oil or other essential oils
- lactic acid (for pH adjustment, optional)
Instructions
- Clean your work surfaces, utensils, and packaging. (You can use alcohol to better sanitize surfaces.)
- Weigh out the distilled water.
- Heat the water over a double boiler while you measure out the oil(s) and emulsifier.
- Weigh out the oil (or oils) in a double boiler insert.
- Tare the scale and add the BTMS (or another cationic emulsifier) to the oil(s).
- Heat the oil and BTMS mixture over the double boiler until the BTMS has melted. Fully stir the ingredients together until well combined and remove from the heat.
- Slowly add the hot water to the hot oil mixture while stirring or blending, keeping both phases at a similar temperature (around 70–75°C / 160–170°F).Blend with an immersion blender (or stir vigorously) until the mixture comes together and begins to thicken.
- Allow the mixture to cool, stirring occasionally, until it reaches around 90ºF/30ºC. Then add the preservative, essential oils, and any other heat-sensitive ingredients. Mix well to fully incorporate.
- Test the pH of the conditioner. Ideally, you want the pH to be in a good range for both your hair (around 4.5–5) and for the effectiveness of your preservative. (It’s easiest to choose a preservative that works in that range rather than adjusting the whole recipe.) Adjust the pH down with a couple of drops of lactic acid (or, less likely, up with a solution of NaOH).
- Bottle your conditioner. Wait until fully cooled to cap the bottle to prevent condensation from forming above the conditioner. You can now use it as needed!
Notes
- Make small batches and use within about 3 months.
- You can substitute the argan oil with another oil or a blend of oils.
- Glycerin is optional and can be replaced with more water if preferred.
- If your conditioner feels too thick, you can reduce the BTMS slightly or increase the water a bit in your next batch.
- Use a broad-spectrum preservative suitable for water-based products and follow its recommended usage rate. Most are used at around 0.5–1%, but always check your specific product.
- Make sure your preservative works within the pH range of this recipe (around 4.5–5).
- For a full example of how to customize this recipe, see my example of a customized conditioner.
This post was originally published on March 9, 2017. It has been updated with new photos, clearer instructions, and a step-by-step video.


Hey there I read in one of your previous comments that you are taking a course about shampoos and conditioner or had sometime in the past. I am extremely interested in doing something like that as I take a lot of ingredient knowledge classes now. Is that something open to the public to take?
Hi Reba,
There are several of these types of classes available online. They tend to be a bit pricey and are geared towards people who want to formulate and sell products, but, yes, anybody can take them.
This Recipe has been a Godsend for living tangle free for my young long hair daughters and myself! Moisturized without greasy! I was a bit hesitant on using a not Absolutely Natural ingredient but it is still a simple natural recipe and I am very happy I gave a try. Thank You!
Hi Jackie,
I’m so happy it’s working for you.
I understand what you are saying completely! I have come to love BTMS, though, too, and it appears to be quite safe. Being able to avoid parfums and other more problematic ingredients (and avoid plastic waste) makes it worthwhile for me.
I’ve been hearing mixed information about BTMS-25 (vs. BTMS-50) lately, but haven’t confirmed if this is really true or not. I use BTMS-25, which I buy from a supplier that normally only sells “natural” type ingredients. In a forum I read that while BTMS-50 can’t be used in certified natural conditioners, that BTMS-25 can be. BTMS-50 includes butylene glycol, which isn’t included in BTMS-25. (Glycols tend to be contraversial in use in natural products.) Again, that may not be accurate information. Online searches aren’t really confirming either way. (And I’m not even sure what countries have a specific “natural” certification, vs. something like ECOCERT, etc.)
Anyway, I’m really glad you enjoy it as much as I do. I think with time, we’ll find that more cationic emulsifiers will become available. There is definitely a demand for ECO certified cationic ingredients!
Could you please tell me approx how many fluid ounces this recipe makes? I’m thinking about making it but would like to compare the price of making it to another conditioner I use before buying ingredients. Thanks so much.
Hi Jessica,
It makes somewhere near 100ml. That’s somewhere around 3.4 fluid ounces.
(This is a general estimate as the recipe is in grams. 1g of water=1ml, but oils weigh slightly less, so you’ll probably end up with slightly more than that.)
Could this be turned into a solid conditioner bar if the water was left out or is it more complicated than that? If it can be turned into a solid bar would you need to use a preservative as there is no water?
I’m studying conditioners right now and haven’t gotten to the solid conditioner part, but I can take a look and let you know. It should be some time this week.
Off the top of my head, though, I can give you my best guess… I think you’d need to use some solid fats (like butters) and use the cationic emulsifier like I used here.
If you’re interested in a recipe, I can prioritize formulating one once I learn the basics of it.
That would be very much appreciated – Thanks!
Could I use Decyl glucoside instead of BTMS as an emulsifier? I’ve been looking on EWG Skin Deep to try and find ingredients with a low as possible score, and Decyl glucodise scores 1 compared to BTMS which scores 4.
However, as I’ve never made a conditioner before I have no idea if this is possible.
I’ve also looked into Leucidal that you suggest as a preservative and I would be happy using that – how much longer would the conditioner last using that?
My aim is to make products as natural as possible, that are also environmentally friendly. However, the more I research it, the more I become confused and overwhelmed with trying to understand the process of making the product, along with ensuring the ingredients that I will use are ecocert approved – maybe I am making things more difficult than need be?…
Hi Debbie,
That’s a great question.
Unfortunately, that wouldn’t work as decyl glucoside is a surfactant (without much emulsifying ability), but for conditioners you want to use cationic emulsifiers. I have been wanting to update this post with ideas for switching out the BTMS, as I know it is an issue for some, but meanwhile, let me give you some ideas…
When I first bought the BTMS, I bought it from a supplier that basically only sells natural type products, so I was convinced that it was very natural.
I have since learned that, while a lot of natural cosmetics use it because it’s the easiest cationic emulsifier to find, easiest to work with, and makes a wonderful conditioner (with probably the best feel), it can not be used in a product that will be certified organic.
I’m taking a course in natural haircare formulation right now, and despite that issue, they often use BTMS in their formulations, probably because they feel the pros outweigh the cons. That said, they specify that you can’t ceritify your product as organic if you use it.
So, what’s the alternative?
You can do several things…
You could…
1. Use a non-cationic emulsifier. I tried using Olivem, to make a very natural type conditioner. The problem with that? Because it isn’t cationic, it doesn’t have the same conditioning feel. It feels like you are running lotion through your hair- because, well, basically that’s what you’re doing!
You could make up for that by adding in other cationic ingredients, but they are few, and many are difficult to find.
2. There are some other natural cationic emulsifiers available (or so I’m told), but they are also hard to come by, and they can be expensive. I bought Plantasens® HE20 by recommendation of one of the courses I took. They claimed it was a natural cationic emulsifier, but I haven’t found much information to back that up, really. I bought a lot of it, excited to use it instead of BTMS, but once I tried it, I have to admit that I’m just not in love with it.
I don’t want to recommend something that I don’t like that much (although I could make a note of my findings thus far.)
I have just heard of another one that I haven’t been able to find for buying here in Spain. I can’t remember the name off the top of my head. I’ll continue to try to get some and test it so that I can fully update this post with a better option.
For now, I have to admit that I’m sticking with BTMS. I really love the feel it gives this conditioner. I like it so much better than any I have bought in the past! The way I see it, by cutting down on fragrances and other additives, you’re still making a pretty natural product.
A couple of other things to keep in mind…
1. My supplier sells BTMS-25 and not BTMS-50. I’ve since read in some places that BTMS-25 is Behentrimonium Methosulfate (and) Cetearyl Alcohol, while BTMS-50 is Behentrimonium Methosulfate (and) Cetyl Alcohol (and) Butylene Glycol. Many people avoid the glycols, so sticking with BTMS-25 may make for a more natural product. (That said, butylene glycol is a low hazard humectant overall and different from propylene glycol, so I’m not sure you’re necessarily making a safer product.)
2. EWG isn’t always a perfect source. I check there a lot myself, so I’m not criticizing looking there 😉 , but I’ve noticed weird things and read about issues with them in the past. (I can’t remember specifics.) Here, though, I can say that it’s weird that they only have one listing for BTMS when there is more than one type of it available!
I could be wrong, but I feel like I looked up BTMS in the past and could have sworn it used to be listed as a 3 or lower. I wish I had saved the info so I could compare now.
Thanks for you detailed and informative reply!
I think it’s worth me giving BTMS a go then ?. If I were to make a solid bar. Would I just need to leave the water out and all other ingredients stay the same?…I would feel more comfortable if it were solid, saves using bottles.
Thanks
Well, you may not like this answer, but I just got through that part of the course and the main ingredient in the bars is the BTMS. (Or another cationic emulsifier)
You combine with hard butters, a bit of oil, you can also add some fatty acids. I was going to try to play with it and come up with a good recipe for the blog this weekend. I’m not sure how quickly I can get it up as I’ve been really overwhelmed with other stuff lately, but I’m doing my best to get things published. I’m about to publish my Hyaluronic acid serum and was planning on doing the solid shampoo next. I can try to prioritize the conditioner, too, if you like.
Another thing to keep in mind: they still recommend using a preservative as the product gets wet and can get contaminated that way.
The solid conditioner recipe is finally up on the blog. I hope you enjoy it!
Please could you also advise me on the conditioner bar for both human and pets pse? Love your doggie shampoo bar and we have short and longish hair dogs (pekingese) problem is the hardness and preventing it from going all mushy…
Hi Riana,
You can definitely use the conditioner bar that I have up on the blog on your dog. I’ve done it myself and it works well. I do find the liquid application a bit easier with my dog (she doesn’t sit still). On the other hand, I find using a bar on her easier than using a liquid shampoo. (I’ve also used the shampoo bar recipe on her, but that is softer than the soap based bar.)
Any of the combinations have worked well with my dog’s hair, though.
You would love your baby’s tresses after using natural and organic hair conditioners. Initially, I was using a store brought hair conditioner which has led to a skin infection on my baby’s scalp.
Good Day,
I have recently made this 100g recipe, turned out great,
I then just made it again only 5X the ingredients, but used Rice Bran Oil.
with Lavender and a little peppermint oil, adding some Ylang Ylang fragrance oil.
its amazing, AND the wife likes it.
Thank you for a fantastic Recipe
Hi Don,
I’m so happy you liked it!
Yes, this is also one of my favorite recipes. I had a hard time finding a conditioner I liked, and this works really well on my hair without the extra parfums and other questionable ingredients.
Hi,
I absolutely love al of your recipes. I’ve been struggling to find the preservatives you suggest but have come across a natural one called Iscaguard PFA. I was just wondering if you have heard of it or know if it is a suitable alternative? I’m finding all the information on them so overwhelming as a novice!
As an aside question I was wondering if you have any recipes for those with eczema which is very itchy? I’ve managed to avoid steroid creams at all costs but need something for my son that will take away the itch which often keeps him up at night.
Thanks so much!
Best wishes
Hi Gemma,
Thanks so much! 🙂
I wasn’t familiar with that one, but it should be fine.
This is some information that I found about it: It’s stable and active over a pH range of 4 to 8, and typical use levels for Iscaguard®PFA range from0.5% to 1.5%.
So, you could use it at around 1g for every 100g of conditioner.
Unfortunately, I haven’t been so successful with itchy eczema myself. My son had bad bouts of it when he was a bit younger and I tried a lot of different things. Some helped somewhat, but none were 100% effective.
I found blue tansy oil to help with clearing up the rashes around his mouth more quickly. (Or at least it seemed that way to me.)
That oil really is really blue, though, and makes a blue-ish cream. Adding b-panthenol to products with water also seemed to help.
These aren’t really in reference to the itch, though- more about maybe helping the general curing process.
Great recipe,
Can I refrigerate or freeze my batch ?
I suppose you could, but what is your reasoning?
If it’s to avoid using a preservative, the fridge would only extend its life by a few days (maybe up to a week?)
I’m also not sure how the freezing would affect the texture.
Hi Tracy,
I’m very new to all this. I really appreciate your blog ^_^ It’s been a godsend for explaining difficult things like this. I always thought that formulating my own products was daunting, but I’ve wanted to do so for ages because the country I moved to recently bc my parents got a job in doesn’t have access to nice products but they have nice raw native ingredients that I’d love to somehow incorporate into my own shampoo/conditioner/whatever formula.
Anyways, I do have a couple of questions and would love if you could answer them for me.
1) is Optiphen plus a good preservative? It’s the first one I heard of. And if I were to use it, how much would I put in?
2) Sorry this will contradict the last one, but I don’t really mind about whether or not I can get Optiphen into my mixture – I just really like learning so I can make the best decision, however I like the ideas of both the leucidal and the cosgard. Can I mix the two of them for my mixture and at what weights each?
3) for the argan oil, if I’m adding Jojoba oil should I just split them into 2.5g each (sorry I know this sounds stupidly obvious).
And lastly
4) is the glycerin a humectant in this recipe and could I swap it out for a film-forming humectant like okra/flaxseed gel? And at what weight? Glycerin does bad stuff to my hair I think.
Oh and just an extra none, there’s an indigenous powder here that acts as a conditioner/moisture retention agent. I’m not sure the ins and outs of it. I don’t think it’s sealant, but I’m not sure how much of that I can put in or if I can formulate it into a leave-in. I know it’s kinda hard to tell me how much to put in if you don’t know the ingredient :/ but maybe if you could give me suggestions on like a safe range of grams (like 3-5) that you think I could try out and then find which is the best.
Anyways thanks in advance and apologies if some of this was quite vague lol I’m really stumbling blindly into this a little :/
Hi Lauren,
I’m sorry I missed this before.
I’m happy to help as best I can.
1) Optiphen- you can use any broad spectrum preservative you choose. Some people avoid it because it is comprised of Phenoxyethanol and Caprylyl Glycol. (Many avoid any glycols, for example- although in this case I’d say that the caprylyl glycol is the milder of the 2 ingredients.). I’ve never used it, but I think it’s pretty middle of the raod- no parabens or formaldehyde, at least. Anyway, when you buy any preservative, the supplier normally tells you the percentage at which to use it and the pH range at which it is effective. I’m pretty sure it’s normally used at around 1% of the recipe by weight, but check with your supplier, just to be sure.
2) There is no need to use more than one. I think Cosgard is better as a broad-spectrum one, and you don’t need to use as much (1% vs. 4% for Leucidal).
I’m actually working on a post about natural preservatives and will be updating all of my posts with a link to it (and changing a few of my older thoughts) as soon as I get it up.
3) Yes- just keep the total oil amount constant and you’re good to go.
4) Yes, glycerin is a humectant and, yes, you could try another, but I’ve never tried any of those in this recipe, so you’d have to experiment and see if it makes any negative changes. (I wouldn’t think so, but you never know!)
You could just leave it out, too, and switch it for more water.
Lastly- the powders—
I’d start with consulting the supplier of said powder- they would have a much better idea of how it should be used. It’s impossible for me to guess without knowing more. 😉
Happy excperimenting! 😉
Some times the BTMS one comes out thick. Some times watery. I have to shampoo my hair twice after conditioning. My hairdresser just told me the other day it looked like I had some sort of buildup and she had to shampoo my hair twice too. I won’t make again. Too much oil.
Hi Elizabeth,
I’m sorry to hear that.
I haven’t had a problem with any of the problems you are describing.
If you haven’t given up and would like to remedy the situation, there are a few things you can do…
1) What BTMS are you using? If using BTMS-50, you can try BTMS-25 instead. You can also lower the amount used.
2) You can also reduce or completely eliminate the oil used in the recipe.
I hope those suggestions help.
I’m fairly new to DYI hair products and I had been struggling with finding a conditioner that wasn’t too heavy, or oily. Let me say, this recipe is amazing and I totally LOVE it!
I used the recipe that you had tweaked I actually used only aloe, as I had no distilled water on hand and wasn’t going to the store. I keep it in the fridge and take it out when I need it. The batch is small enough that it hasn’t been a problem going bad, although I’m doubling the batch this time so we’ll see (and of course I keep forgetting the distilled water).
Thank you so much!
Hi Stacey,
I’m so happy you like it.
With a preservative, you’ll probably be fine leaving it out of the fridge with a store bought aloe juice (not homemade), but you just have to be conscious that it won’t last as long. (I made my first batches that way and never saw anything bad either.) The problem with our DIY stuff is that it’s very difficult to know if bacteria is building up ina product because you won’t be able to see it. Luckily, most molds are visible. 😉
Anyway, it’s just good to be conscious of that sort of thing. I like to err on the side of being too safe.
Have a Merry Christmas!!