

Activated Charcoal Face Soap Recipe
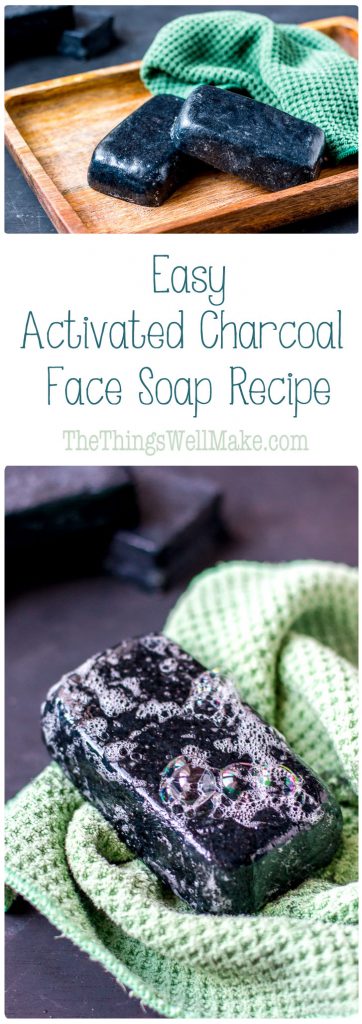
This activated charcoal face soap recipe is simple enough for beginner soapmakers, yet results in an impressive bar of cleansing, yet moisturizing face soap.

I’m really excited to share with you today’s new soap recipe. I’ve been doing more studying on the oils used in soapmaking, along with some of the other ingredients, and think that I’m getting better at developing soaps that have a good balance of cleaning, moisturizing, and lather.
Just because I’m using a few more oils and ingredients than I did in my easy beginner soap recipe doesn’t mean that this soap is difficult to make by any means. This recipe is simple to make, but looks super impressive if you want to get ahead of the game and make some bars as nice Christmas gifts.
I have to admit that I studied BEAUTYCOUNTER’s Charcoal Cleansing Bar ingredients when I was looking to formulate my own activated charcoal face soap recipe.
At the time I was one of their consultants, and wasn’t trying to copy their formula; I just used it as a bit of inspiration. There were people asking me to come up with a cheaper alternative to that specific bar, and I was curious as to what was so special about it.
Watch me make this activated charcoal face soap:
Should you buy the Beautycounter charcoal bar or make your own charcoal face soap?
Well, it all depends. If you aren’t already making your own products, and don’t have a lot of the ingredients on hand, you may not save much money, at least not in the first batch. The Beautycounter charcoal soap bar should last you at least for several months, so it really isn’t a big expense on a daily basis.
I chose to make my own activated charcoal face soap because I love making soaps to begin with. Elaborating new soap recipes has become a creative outlet for me, and I take each new recipe as a bit of a challenge. Seeing as I had most of the ingredients already, and knew I’d be able to use all of the ingredients in other recipes, it wasn’t much of an expense for me.
So, why did I study the ingredients in the Beautycounter charcoal bar?
1. While I haven’t tried it myself, I’ve heard from friends that it works really well on blackheads and breakouts, and that the soap is one of their best sellers because everybody loves it so much!
2. From what I studied when I was a consultant with them, it seemed to me that they spend a lot of time investigating their ingredients, looking for the safest yet most effective ingredients in all of their products. Knowing that, I figured that using their ingredients as a guideline would really help me formulate my own great soap.
Why haven’t I tried their Charcoal Cleansing Bar yet to compare it?
Unfortunately, Beautycounter doesn’t sell to Europe as of yet, so I have to order and send to my parents’ houses in the US whenever I want a new product. My last order of products was placed in June when I travelled to the US to pick it all up. As much as I love using those trips to stock up on new products, I try not to go overboard either. As it was, we had to pay for another suitcase on the way home this trip! 🙂
When I did buy from them, I chose products that are more difficult to make at home. A bar of soap is probably the easiest and most inexpensive product for me to try to make myself.
While I haven’t compared them myself, I was super excited to get the following comment from a reader:
You nailed the charcoal bar!! I cannot tell the difference between my boughten charcoal bars from Beautycounter and my DIY bars ( other than price) The quality of these bars are superb, you did an amazing job!! My girls’ and I are extremely grateful!! That recipe is like gold to us!!
She was wondering when I was going to try to make a copycat of the cleansing balm. 🙂
Hmmmmm- I guess I’ll have to put that on my “to-do” list.
What’s in the Beautycounter Charcoal Cleansing Bar?
Here is the list of ingredients: Sodium Rapeseedate, Sodium Cocoate, Aqua/Water/Eau, Glycerin, Charcoal Powder, Sodium Citrate, Hamamelis Virginiana (Witch Hazel) Water*, Carthamus Tinctorius (Safflower) Seed Oil*, Cocos Nucifera (Coconut) Oil*, Alcohol*, Camellia Sinensis (Green Tea) Leaf Extract*. Tocopherol.
*Organic
Comparing the ingredients in the charcoal face soaps…
Beginning form the top of their ingredient list, sodium rapeseedate and sodium cocoate are basically just the already saponified rapeseed and coconut oils. That means they have already been reacted with lye.
Coconut oil in soaps is great because it cleans well and adds a great, bubbly lather. I had never used rapeseed oil in soap before, though, so this was a new one for me.
I always avoided rapeseed oil in soap in the past, partly because it’s a difficult oil to find here in Spain, and partly because I had read that it could go rancid more quickly if used in large amounts in a soap. After further study, though, I read that it can a great oil to use in soap, in limited percentages, because it is moisturizing and gives a creamy lather (as opposed to the bubbly lather from the coconut oil). Plus it makes a pretty, shiny, smooth bar of soap.
Here come the first differences:
Because making a soap out of only rapeseed oil, coconut oil and safflower oil was out of my comfort zone, I decided to add some olive oil to my recipe. (Plus, olive oil is inexpensive and easy to find here in Spain.) I added olive oil for its moisturizing qualities, castor oil because it helps make the lather last longer, and shea butter because it’s high in “unsaponifiables,” leaving conditioning oils which I thought would be great for face moisturizing.
Going back to their ingredient list…
I, of course, also added water to my soap. I skipped over the glycerin, and added the charcoal powder, my version of the sodium citrate (citric acid, because sodium citrate is basically the sodium salt of citric acid), and some witch hazel.
Perhaps next time I may try substituting part of the water with glycerin as I’ve since found that it helps give a nice moisturizing quality to soaps, even when they aren’t highly superfatted. That helps give a moisturizing soap that doesn’t feel like it’s leaving a film on your skin. I really love the added glycerin in my recipes for glycerin soap, liquid castile soap, and liquid coconut oil soap.
I wasn’t sure why they would add citric acid to the soap, but after some investigation, I learned that not only does it serve to prevent oxidation of the ingredients which could lead to the “Dreaded Orange Spots,” commonly known as “DOS” in soap making forums, but it also possibly works as a chelator to help fight soap scum buildup. (Dreaded orange spots are a discoloration that can appear in soaps, especially when using certain oils or rancid fats. While it’s a mostly cosmetic problem, it can also affect the scent making the soap smell less fresh. In this case, the black coloring of the charcoal soap would hide any orange spots, but it’s still best to avoid them from forming.)
As for the witch hazel, I used a distilled witch hazel without any added alcohol. Alcohol can react with the lye, and can also affect the final outcome of the soap, so if you aren’t sure about the witch hazel you have, you can skip using it. Just make sure to replace the witch hazel with the same amount of distilled water.
Because safflower oil isn’t something I can readily find here, I decided to use olive oil, and the other oils mentioned above, instead.
Continuing down their list, I’m not sure about the addition of alcohol. I’m sure they have a great reason for adding it, but since I’m already using different ingredients and don’t know how or why to add it, I didn’t.
I did decide to go with the last two ingredients they added to their bar, though. Green Tea Leaf Extract and Tocopherol (aka. vitamin E) are great antioxidants that are not only great for your skin, but they help preserve the oils in your soap to keep them from going rancid.
amzn_assoc_placement = “adunit0”;
amzn_assoc_search_bar = “true”;
amzn_assoc_tracking_id = “ohththwellma-20”;
amzn_assoc_ad_mode = “manual”;
amzn_assoc_ad_type = “smart”;
amzn_assoc_marketplace = “amazon”;
amzn_assoc_region = “US”;
amzn_assoc_title = “My Amazon Picks”;
amzn_assoc_asins = “B003VFWWWU,B001EDBEZM,B00TJTASYG,B00YBRTZFY”;
Why use activated charcoal in a face soap?
Activated charcoal has become increasingly popular in beauty products lately because it is thought to absorb toxins, excess oils, and help better cleanse the skin.
One of the most common findings after using activated charcoal products is that pores become less visible and smaller, and blackheads start to disappear.
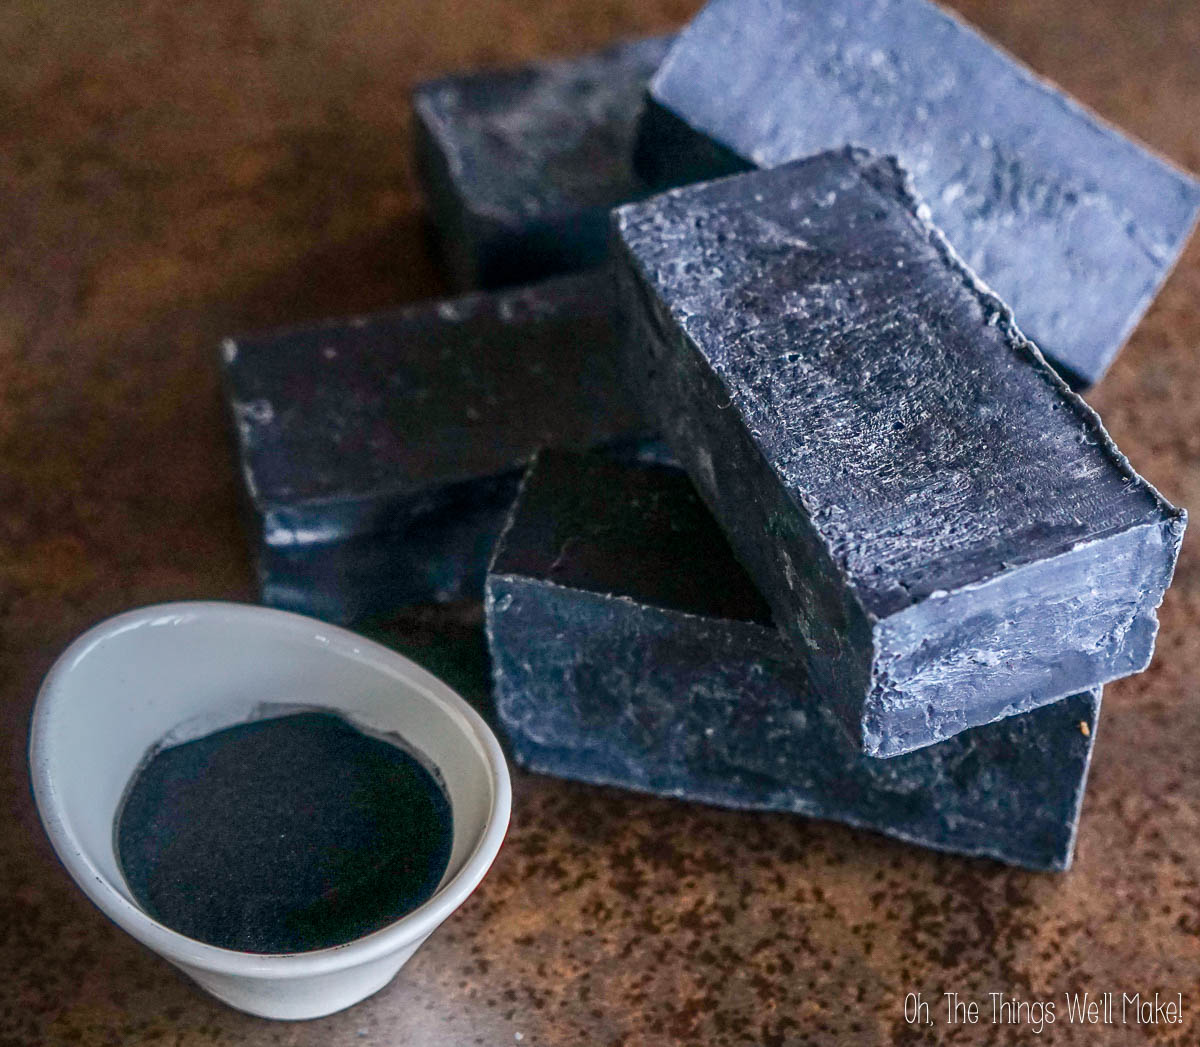
It may also help absorb excess oils in people with oily skin. Plus the black color makes a pretty slick looking black soap!
How do I like my homemade charcoal face soap?
I actually am loving this soap so far. I had planned on adding some rosemary essential oils to my soap bar, but forgot until it was too late, so my bar ended up being unscented.
Rosemary oil extract is used quite often by soapmakers as another natural additive that helps keep the oils in the soap from going rancid, and helps prevent the dreaded orange spots (DOS) I mentioned above. The extract doesn’t have much of a scent, but the essential oil itself does. Rosemary essential oil gives off a nice, natural fragrance and is a potent antioxidant for fighting off rancidity in oils.
If you don’t want to add a scent, though, you don’t really need to add much oil to help preserve your soap longer. A few drops should be enough. You could also leave it out if you wanted, like I accidentally did. 🙂
Activated Charcoal Face Soap Recipe
Activated Charcoal Face Soap Recipe
for an 800g mold.
Materials
- 225 g olive oil
- 125 g coconut oil (Type that solidifies below 76ºF, not fractionated.)
- 100 g rapeseed oil (If you use canola oil instead, use 69g of lye)
- 25 g castor oil
- 25 g shea butter
- 100 g distilled water
- 90 g witch hazel (distilled, no alcohol)
- 68 g lye
- 1 Tbsp. activated charcoal
- 1 tsp. green tea extract
- 1/2 tsp. citric acid
- 5 drops vitamin E
- 20 drops rosemary essential oil (optional)
Instructions
- Measure out the water in a large glass or ceramic bowl, and add the measured lye to the water (and NOT the other way around). It’s a good idea to use gloves and a mask for this part of the process, and to mix together outside, avoiding the fumes. If you haven’t made soap before, or have questions about the process, I’d suggest you check out my first post about how to make an easy, beginner soap.
- Carefully mix together the lye and water until the lye is completely dissolved. It will get cloudy at first, and will begin to warm up. Leave the mixture alone to cool in an area where it won’t be touched by other people, children, or animals. You’ll notice that the mixture becomes more transparent again as it cools off.
- Meanwhile begin to measure out and combine the olive oil, rapeseed oil, coconut oil, castor oil, and shea butter. The easiest way is to accomplish this task is to tare the empty bowl before adding the first oil and taring again between additions of the oil. (I tend to make less soap in the winter when the coconut oil is solid, but since you are measuring by weight, it doesn’t make a difference if the oil is solid or liquid when you add it.)
- Combine the oils together with a hand held blender. The solid shea butter should easily combine into the liquid oils, forming a smooth, thick liquid. If you are working in cold temperatures and are having a hard time combining all of the oils, you can slightly warm them to make the process easier.
- Add the witch hazel to the lye-water mixture and stir it together carefully.
- You can now carefully combine the water-witch hazel-lye mixture with the oil mixture. I do this by pouring the lye mixture into the oil mixture and combining slowly with a metal spoon.
- Once everything is well combined, you can begin to use a hand held blender to continue to mix together all of the ingredients. We are looking to keep blending until reaching what is called “trace,” the point in making the soap when it will begin to thicken like a mayonnaise.
- When you start to reach a light trace (a thin, runny mayonnaise consistency), begin adding in the rest of the ingredients and combine them well.
- When you have a more normal mayonnaise consistency, pour the soap into the prepared molds.
- I’ve gotten into the habit of covering the soap with plastic and covering it with a towel for the first 24 hours or so, but it’s not really necessary. Leave your soap alone in the molds to completely set before removing them.
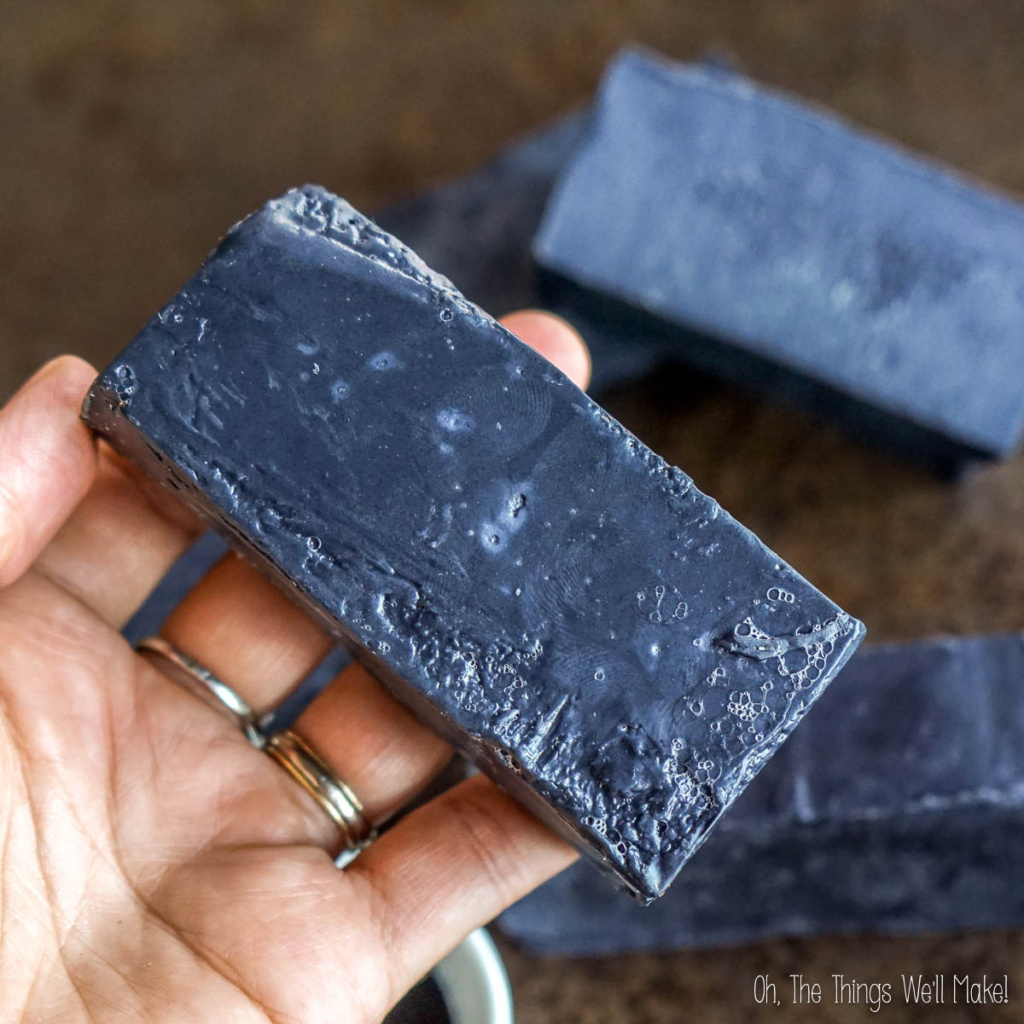
- This soap takes longer to set than my basic beginner soap, so you will need to wait longer before unmolding your soaps. I found it possible to unfold them after a few days, but the soap was still very soft and distorted and lost details. My best looking soaps had been left in the molds for a week or so before trying to unmold them.
- Once you have removed the soaps from the molds, leave them out to air dry and further harden. Ideally, you should turn the soaps occasionally so they dry equally on all sides, and you should also wait around a month before using the soap so that it is harder and lasts longer. (If you use the soap when it’s soft, it will easily dissolve and be used up much more quickly.)
- You can now use your soap, or package it for gift giving. Enjoy!


This looks awesome and just what my skin needs..
Could I make this using hot process?
Hi Sam,
I’m sure you could, but I’m not exactly sure why you’d want to.
the soap won’t come out looking as pretty, the process is messier and more complicated (at least that’s how I see it), and I’m not sure if the heat would affect the more delicate ingredients. (I always add in essential oils, etc. after trace when things have mostly cooled down so that they won’t be affected and their scent will last longer.)
I know a lot of people do hot process to get the saponification process to finish before molding because they want to use the soap earlier, but really soap made by either method benefits from setting and drying out. Once properly dried, the soap will last longer and just is better overall. The saponification process from the cold process soap is finished after 2-3 days, at most, from what I understand, so you can technically use either almost right away. Either way, I think they both really are best with a proper wait time.
Hi Tracy. Thanks for your wonderful recipes!. I have a question please, this soap is good for oily skin and also good for acne?
Hi Ruwayda,
I have always had oily, acne prone skin, and I’ve been using it on my face for several months now and my skin is pretty clear lately. I am getting older, though, (I’m 42) and my skin isn’t as oily as it once was. This soap does have extra oils to keep it from severely drying your face. If you use a warmer water and a washcloth, you’ll end up taking more of those leftover oils off if you find they cause you issues. I haven’t had a problem with them.
I think that most real soaps tend to be good for oily and acne prone skin because they do a pretty good job of combining with the oils on the face to help dissolve them to remove excess oils with the dirt. Soaps also naturally have a slightly high pH which may inhibit bacterial growth to a certain extent. (That, though, is really just a guess on my part.) If anything, soaps can be too drying to people with dry skin. That’s why it’s important to superfat the soap, as I did, to help keep the soap from being too drying.
This soap also uses the activated charcoal to help purify the skin. Whether or not activated charcoal actually does that is, of course, debatable, but I have personally been very happy with this soap.
Best tutorial I have read, EVER, for ANYTHING! I am a huge “why?” person so I thoroughly appreciate all your explanations.
Hi Kandace,
Thanks so much for your comment! I love hearing that!
I give things a lot of thought when I make recipes, and like to explain why I’ve chosen certain ingredients so that people don’t think that I’m just randomly throwing things together for fun. Sometimes it looks that way if you don’t give an explanation. 🙂
Some recipes have taken me years to perfect, like my deodorant recipe, so I really want people to understand how I got to the final recipe.
If you end up making it, I hope you enjoy it.
I’m about to finish up my first bar now. I gave most of them away, and hope I saved myself at least one more. 😉
Where I can watch your video for making this soap?
Hi Monina,
The video is embedded in the post right above the comments section.
Or you can watch it directly in YouTube here: https://www.youtube.com/watch?v=Ur3Hl82J68A&list=PL_VJWKWxCW0c_iKByHg0tYlXayYUoPb7S&index=9
🙂
what is a green tea extract? thank you.
Hi Patty,
Green tea extract is a liquid that includes the antioxidants, mainly the catechins, from green tea leaves. Green tea is high in antioxidants and is anti-inflammatory. I already had it at home for other projects, and some people take it as a supplement, either in liquid form or in capsules. That said, if you don’t have it and don’t want to buy it, you can make the soap without it.You could also substitute it with a less potent version by adding in a bit of matcha or even infuse some green tea into the water instead.
This is an example of a green tea extract to get a better idea.
Can I use this recipe but leave out the witch hazel and citric acid?
Hi Pam,
Yes!
Just make sure you replace the witch hazel with an equal amount of distilled water.
You should be fine leaving the citric acid out of the soap, too. I’d think that the citric acid would be more necessary in the original bar with a much higher concentration of rapeseed oil. The rapeseed oil gives a very conditioning bar of soap because of the linoleic acid, but is supposedly more prone to spoiling or getting “dreaded orange spots.” I think the citric acid is probably there to help prevent that, and maybe lower the pH of the soap slightly.
This soap is black, so even if you were to get orange spots, you probably wouldn’t see them. 😉
Hi, I just wanted to point out that I the note you put in parentheses next to the Olive Oil (in the ingredients list) really belongs next to the Coconut oil. It;s coconut oil that will solidify at that temperature and also comes in a fractionated variety.
Love the recipe- I may try it tomorrow!
Hi Toya,
Ooops! Nice catch!
Thanks so much for letting me know! I just fixed the error.
I had added the note at the last minute because someone had used fractionated coconut oil in another of my recipes, and, of course, it affected the entire recipe. I pasted the note into the wrong line in my haste, I guess.
You may have prevented someone from ruining their recipe, so thank you very much!
I hope the recipe goes well for you.
Deb here again. I watched the charcoal video.
Rapeseed? Do you mean grape seed oil?
Hi Deb,
Rapeseed oil is very similar to canola oil. Canola was made in Canada by cross breeding in order to remove a couple of fatty acids from the rapeseed which were thought to be inedible in large doses. If you were to use canola oil instead, you’d actually need a little bit more lye to get a balanced soap, otherwise it would be highly superfatted, which means it would have a lot of unreacted fats. Superfatting is good to a certain extent. It makes a bar of soap conditioning, and ensures that all of the lye has been reacted, so there is none leftover to irritate your skin. Too much superfatting, though, can lead to a soft bar of soap that doesn’t make you feel clean, and that can go bad more quickly. I’ll run the recipe through a lye calculator to check on the amount that would be needed.
I never use canola oil for cooking, but I had heard a lot of positive things about using it in conditioning soaps, like those for the face, so this was a first for me in using it.
As for the activated charcoal, it has become quite popular in beauty products lately because it is thought to draw out toxins and help you achieve clear skin. I’ve seen a few articles that refute that claim, but I’ve also seen many testimonies of people who’ve been helped by it. Being an inexpensive (and pretty) addition to soap, I decided to add it to mine. I love the pretty black color, and I’ve been really happy with this soap so far. 🙂
I just ran it through a lye calculator. If you use canola oil instead of rapeseed oil, you’d need to add another gram of lye to the recipe. (I just updated the note behind the rapeseed oil in the recipe to reflect that.) 🙂
I’m trying to get going on making my own products for myself. Thank you for your blog site.
Can you tell me how charcoal is good for your face please? Thank you.
Tracy you are an absolute genius! Thank you for teaching us how simple it is to make your own natural products 🙂