• Skip to main content
  • Skip to header left navigation
  • Skip to header right navigation
  • Skip to site footer
es_ES Español
  • About
    • Meet Tracy!
    • Contact Me
    • Disclaimers & Disclosures
    • Terms and Conditions
    • Cookie Policy
    • Privacy Policy
  • Holidays
    • New Years Eve
    • Valentine’s Day
    • St. Patrick’s Day
    • Easter
    • Fourth of July
    • Halloween
    • Thanksgiving
    • Christmas
  • es_ES
Oh, The Things We'll Make!

Oh, The Things We'll Make!

Make it yourself so that you control the ingredients!

  • Recipes
    • Appetizers & Snacks
    • Soups & Salads
    • Breakfast
    • Lunch & Dinner
    • Desserts & Sweets
      • frozen treats
    • Breads & Wraps
    • MIY Pantry Basics
    • Condiments & Sauces
    • Beverages & Smoothies
    • Story Archives
  • Make it Yourself
    • Arts & Crafts
    • Face & Body
      • Cleansers, Soaps, & Gels
      • Deodorants
      • Hair
      • Skin Care
      • Oral Care
      • Baby & Toddler Care
    • Home & Garden
      • Cleaning & Laundry
      • Garden & Hens
    • Soap Making
    • Upcycling
  • About
    • Meet Tracy!
      • More About Me
    • Contact Me
    • Disclaimers & Disclosures
    • Cookie Policy
    • Privacy Policy
  • Recipes
    • Appetizers & Snacks
    • Soups & Salads
    • Beverages & Smoothies
    • Breakfast
    • Lunch & Dinner
    • Desserts & Sweets
      • frozen treats
    • Breads & Wraps
    • Condiments & Sauces
    • MIY Pantry Basics
    • Story Archives
  • Make it Yourself
    • Arts & Crafts
    • Natural Face & Body
      • Cleansers, Soaps, & Gels
      • Natural Skin Care
      • Natural Hair care
      • Oral Care
      • Deodorants
      • Baby & Toddler Care
    • Soap Making
    • Home & Garden
      • Cleaning & Laundry
      • Garden & Hens
    • Photography
    • Upcycling
  • Holidays
    • New Years Eve
    • Valentine’s Day
    • St. Patrick’s Day
    • Easter
    • Fourth of July
    • Halloween
    • Thanksgiving
    • Christmas
es_ES Español
Top view of an open jar of pickled ginger that has been colored pink with beetroot. It's next to a small bowl filled with pickled ginger slices and some chopsticks.

Pickled Ginger for Sushi (Gari)

Last Modified: November 8, 2020 // by Tracy Ariza, DDS // May 28, 2020 I may receive a commission if you purchase through links in this post. Learn more here.

es_ES Español

Jump to Recipe Print Recipe
This homemade pickled ginger is the perfect companion to any sushi dish you can dream up! Free of additives, preservatives, and colorings in store-bought pickled ginger, this version is much healthier and tastier! #thethingswellmake #pickledginger #ginger #sushi #sushirecipes

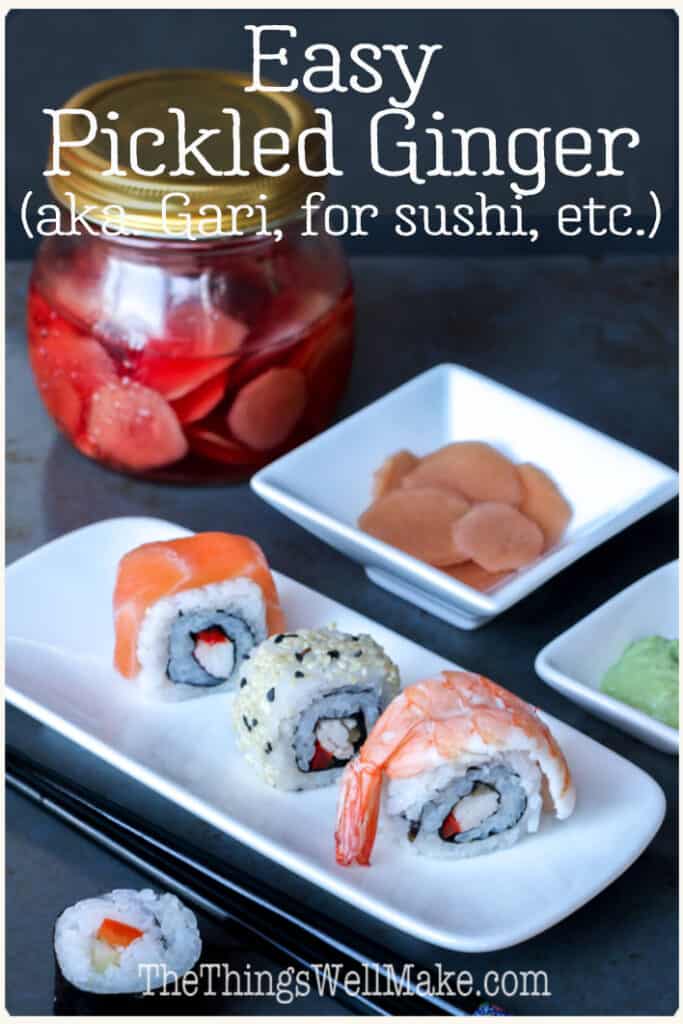
Tangy yet sweet, pickled ginger pairs perfectly with sushi and a variety of other foods. While you could buy it, it’s easy to make from scratch and is tastier and healthier than the store-bought varieties.

A jar of homemade pickled ginger for sushi next to some sushi and chopsticks
Pin this recipe for later!

My son is absolutely obsessed with sushi. He’s constantly begging us to go to a local sushi restaurant, where he happily scarfs down at least a dozen avocado rolls on each visit.

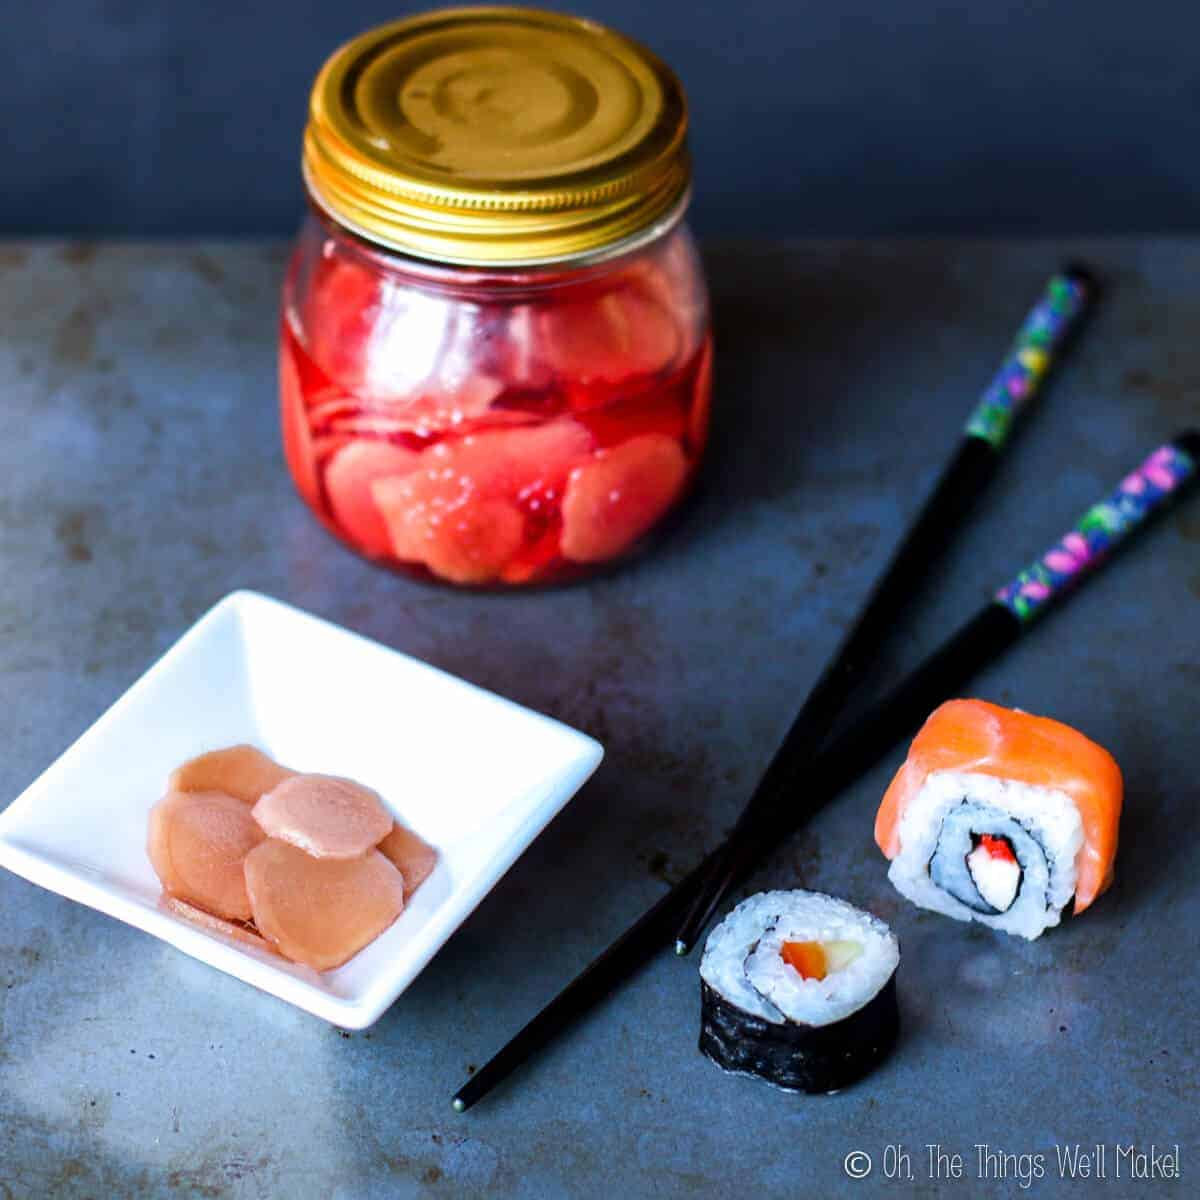
While there are other restaurants that I prefer, I have to admit that I quite like sushi myself. Perhaps my favorite part of the meal, though, is a simple condiment served on the side, pickled ginger.

What is it?

Pickled ginger is a condiment, normally served alongside sushi, that is marinated in vinegar, sugar, and salt. It has a very pleasant combination of flavors, and the combination of sweet, sour, and pungent pair wonderfully with rice and seafood.

It is sometimes referred to as gari, which is the name for pickled ginger in Japanese. (Gari also refers to tapioca starch in some areas, so keep that in mind when looking for it.)

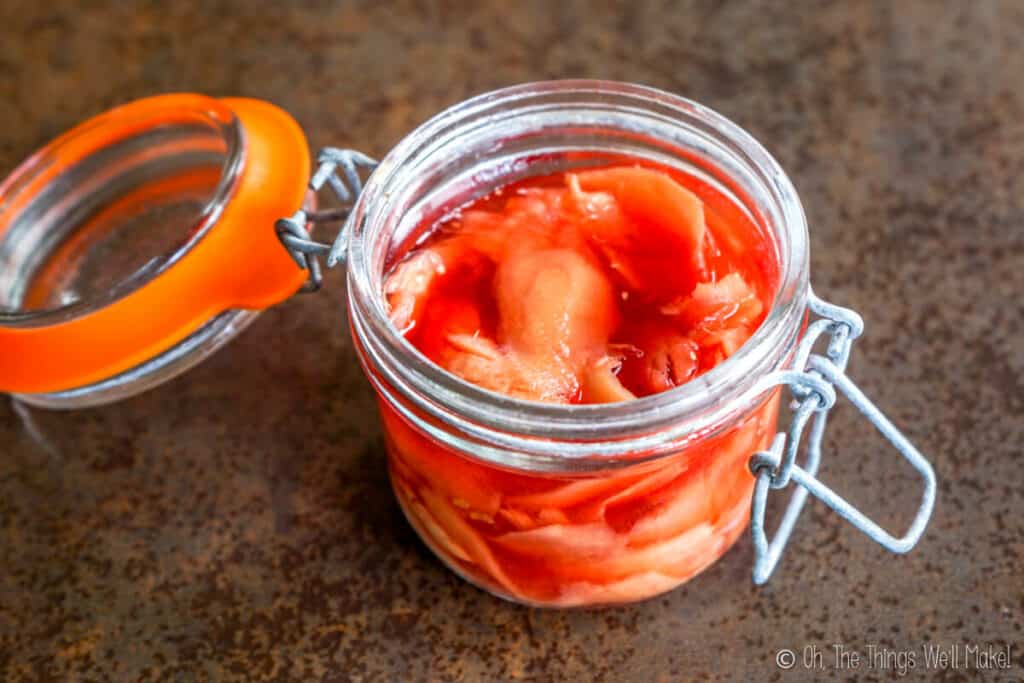
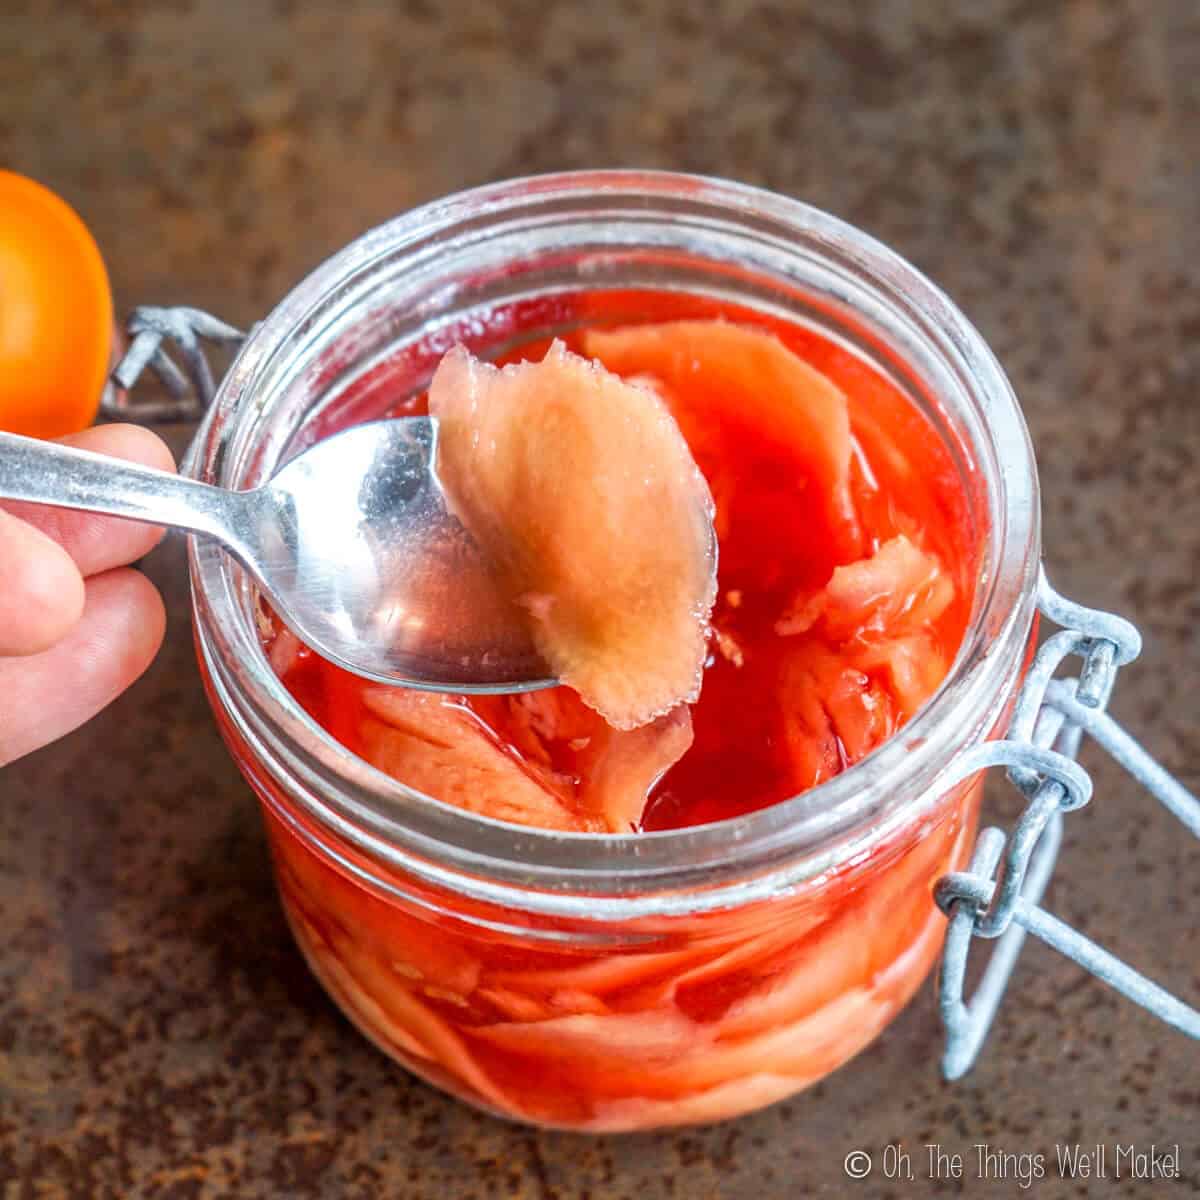
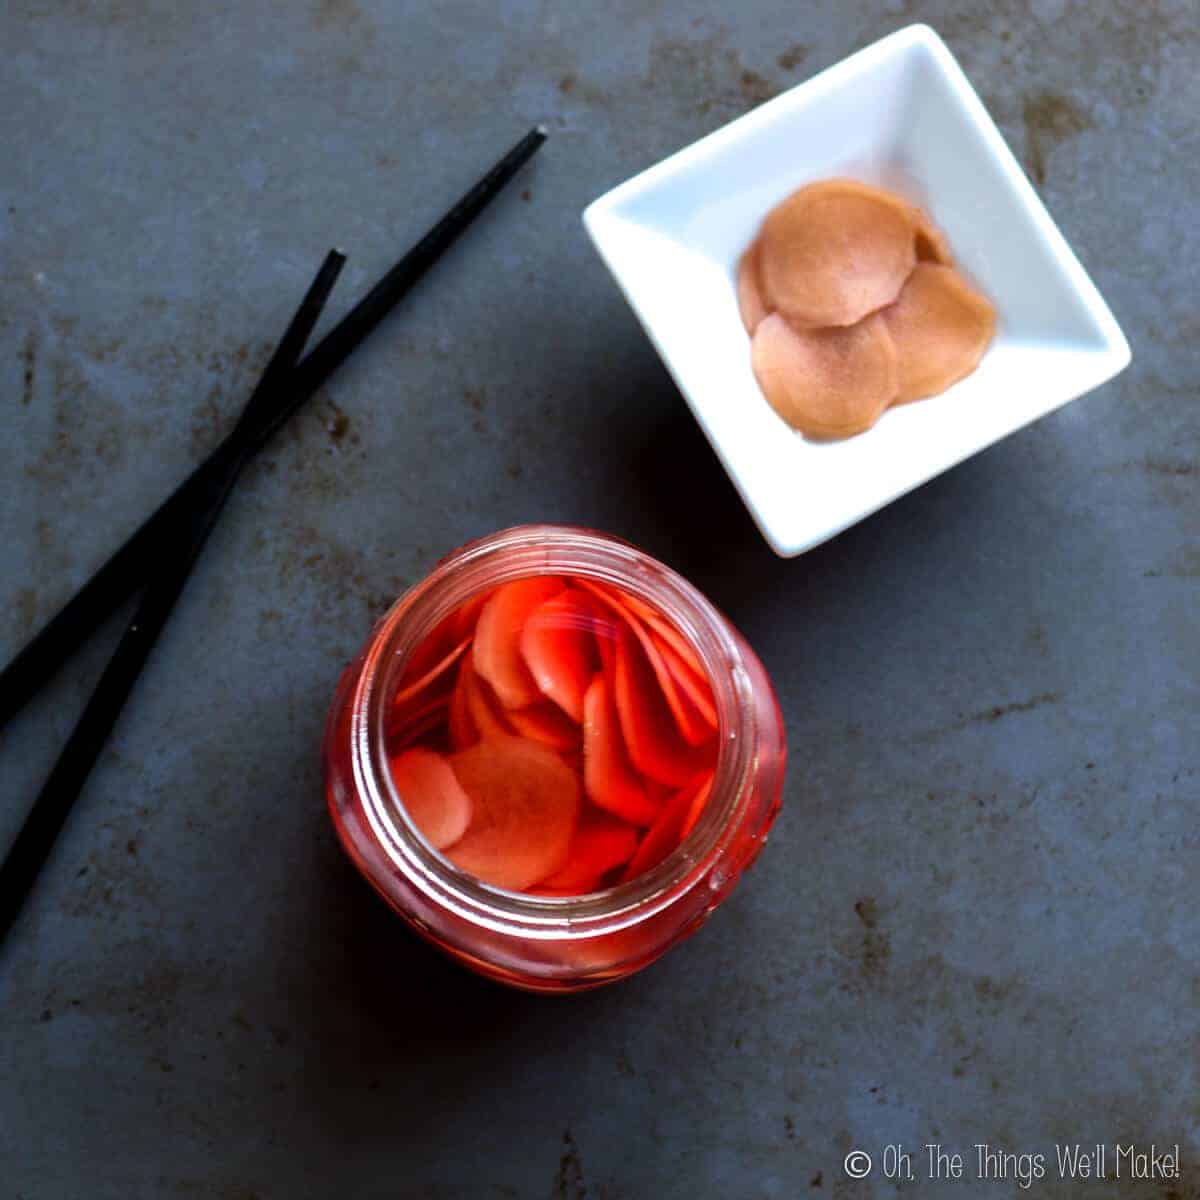
Pickled ginger can be found in a light, off-white color, but it normally is seen with a characteristic light pink color.

Young ginger with pink tips on a woven tray.
Young ginger with pink tips

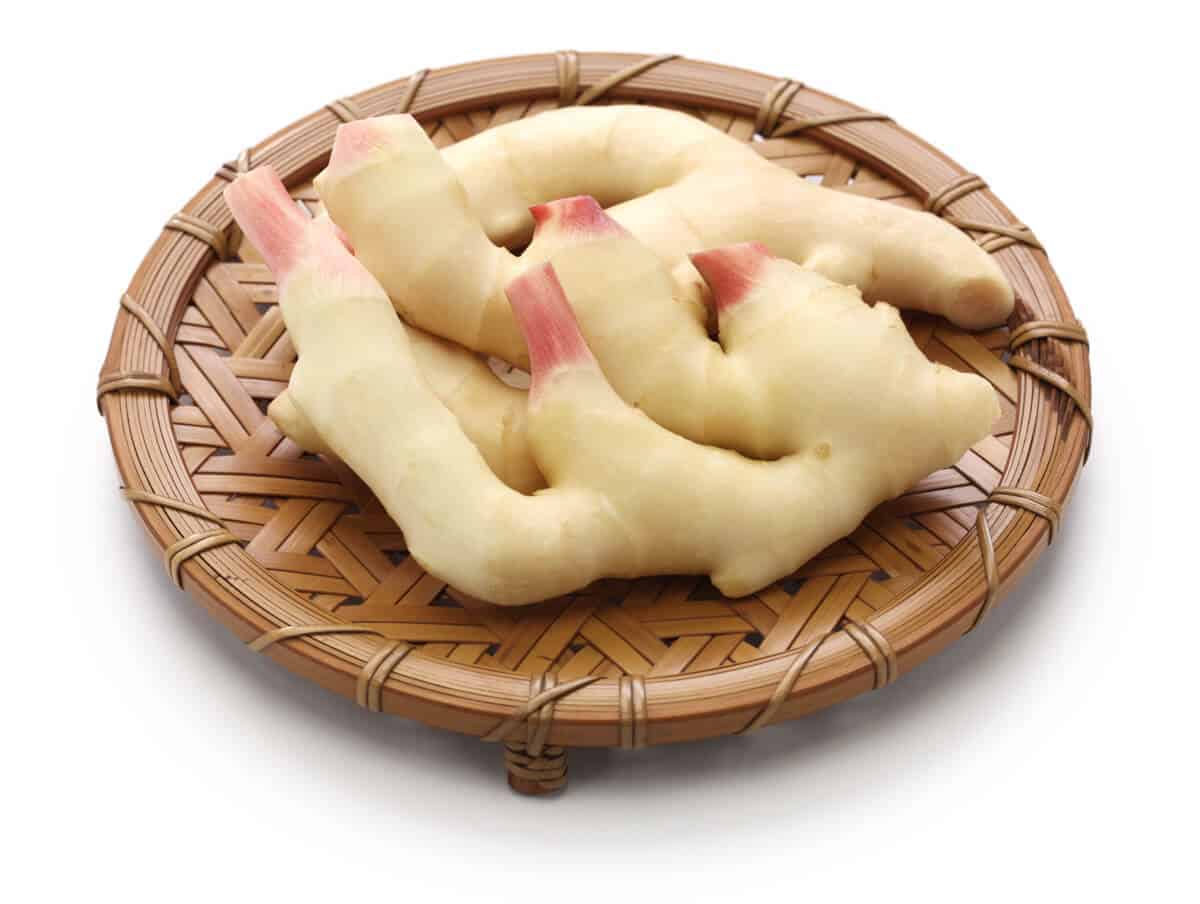
The light pink color can be naturally obtained from pickling very young ginger roots, the ones that have pink tips. Young roots are said to be preferable anyway as they are sweet and mild in flavor. Mature roots are easier to find, though. They will stay true to their color when pickled unless you add a colorant.

  • overhead view of an open jar of uncolored pickled ginger.
    Uncolored pickled ginger
  • overhead view of an open jar of pickled ginger that has been colored pink with beetroot. It's next to a small bowl filled with pickled ginger slices and some chopsticks.
    Pickled ginger tinted pink with beetroot

Why make it?

Most modern pickled gingers are colored with artificial dyes. They also, sadly, often include artificial sweeteners and preservatives. While the added coloring didn’t surprise me, seeing the artificial sweeteners and preservatives on the label did.

Once I realized that I didn’t especially like the ingredient list, I knew I wanted to try to make it myself. Plus, it ends up being a lot cheaper to make it than to buy it.

If you make it yourself, you can also choose to make a raw, more pungent version. Or, you can cook the ginger to obtain a milder flavor.

Ingredients

This simple recipe has only a few main ingredients, mainly ginger and vinegar. It is then sweetened with sugar or another sweetener, and salt is added to taste.

While rice vinegar is the most commonly used, you can choose to try it with other kinds of vinegar too. I have used both my homemade apple cider vinegar and my homemade ginger vinegar. They both worked well in this recipe.

Overhead view of ingredients for pickled ginger for sushi: ginger, rice vinegar, salt, and sugar

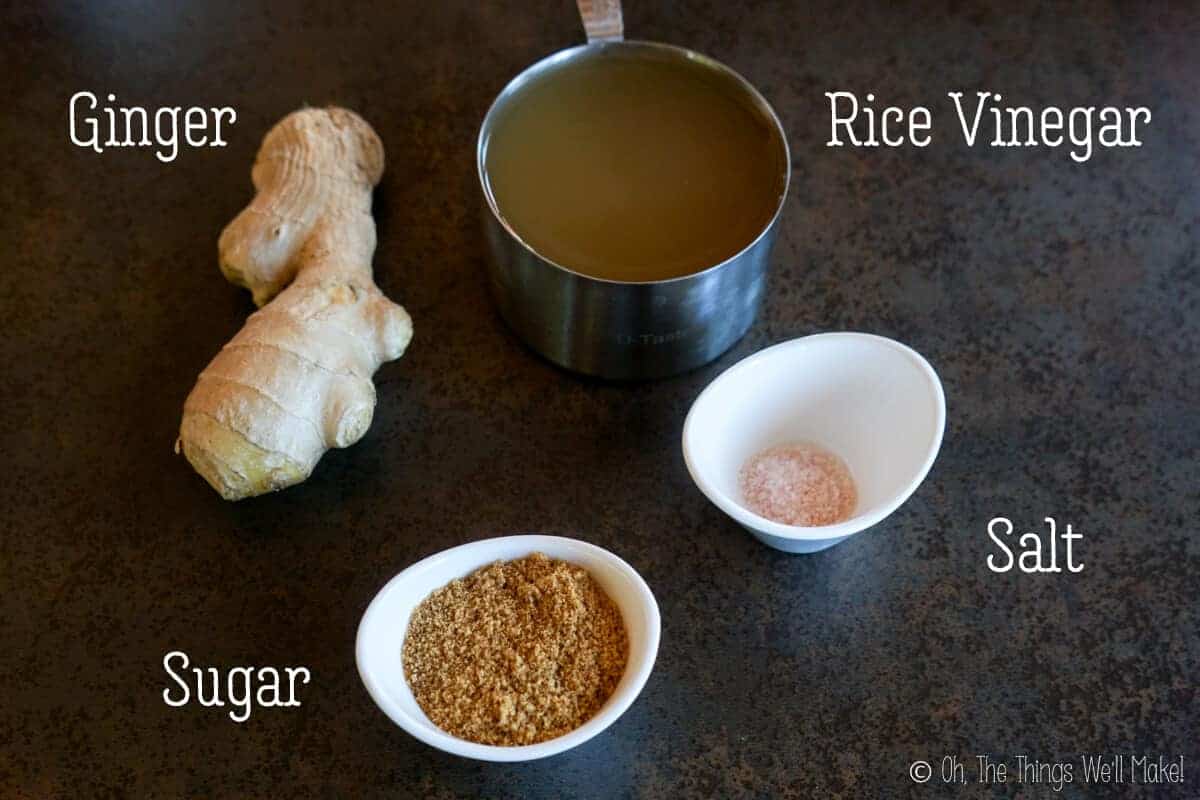
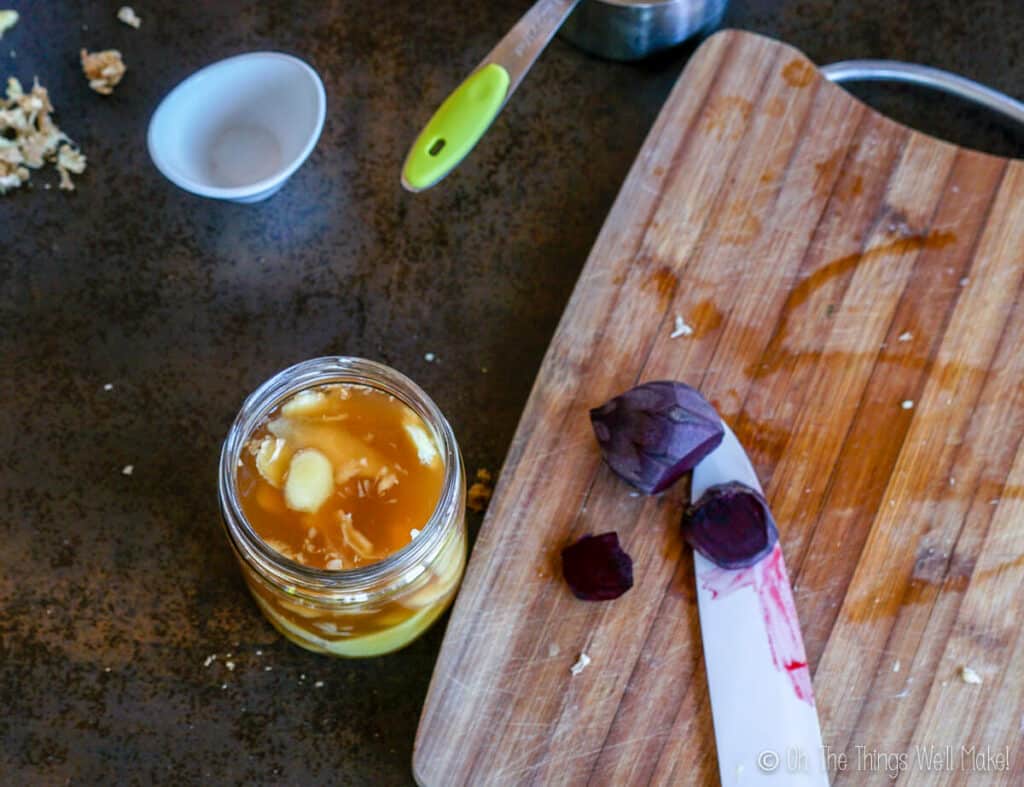
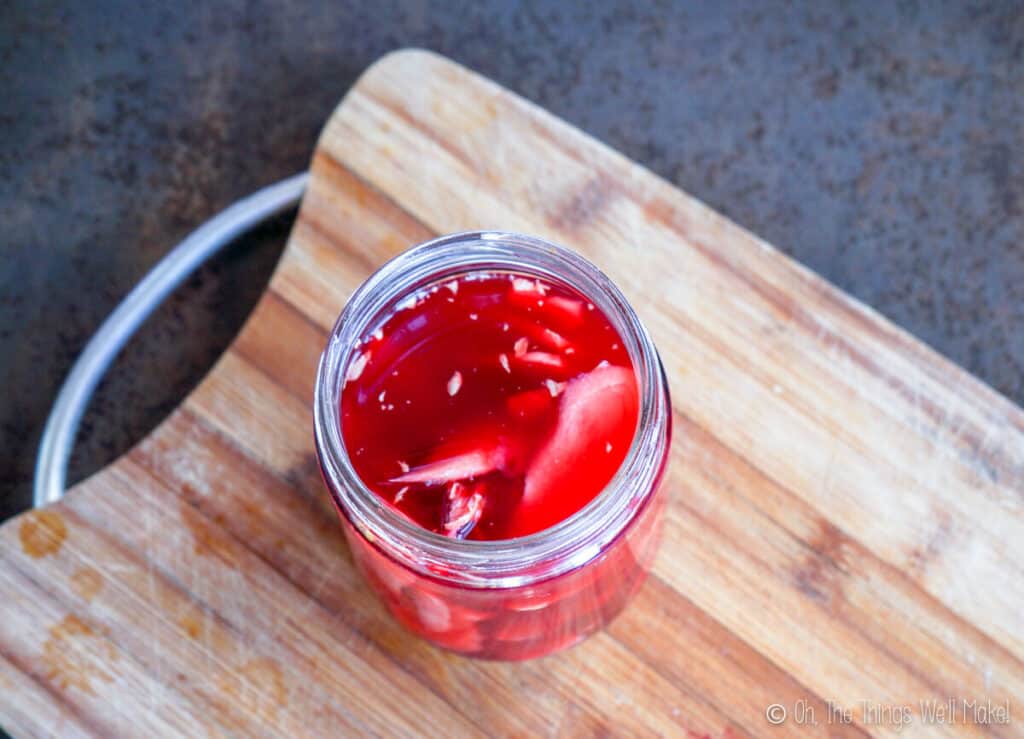
If you aren’t using young ginger roots and want to make pink-colored gari, you can add some pink food coloring. I have done this successfully in several ways.

  • Use a dash of homemade food coloring (or store-bought).
  • Add some homemade beetroot powder or beetroot juice to the jar.
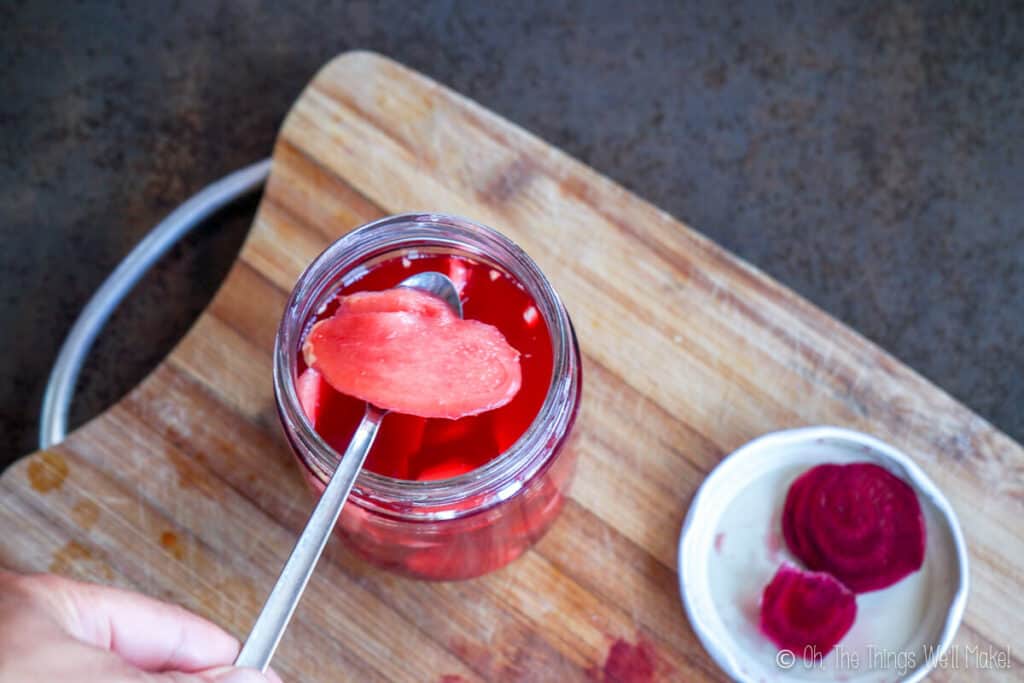
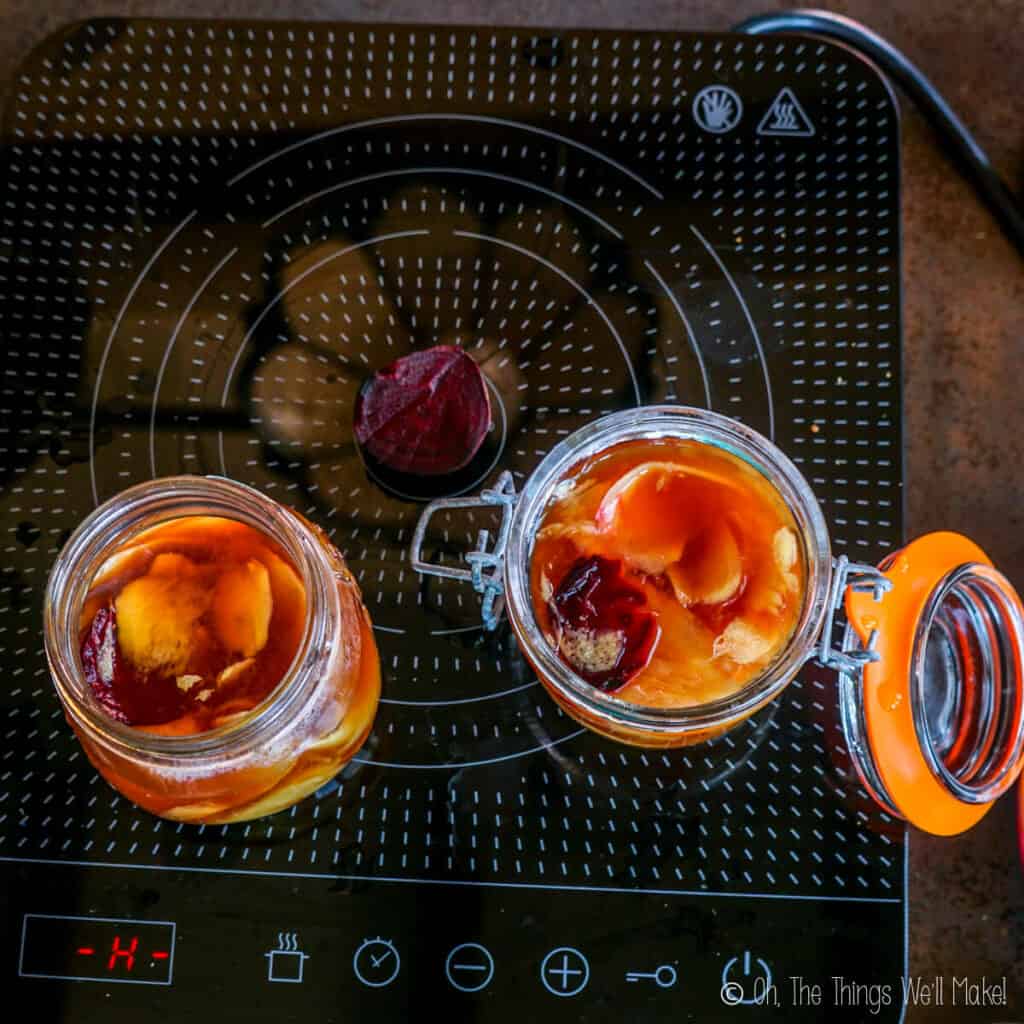
  • Add a tiny piece of beetroot or radish to the ginger and vinegar mixture. (Remove it before the color gets too intense.)
  • Slicing beetroot on a bamboo cutting board next to the jar of pickled ginger.
    Add slices of beetroot
  • Overhead view of sliced ginger in vinegar which has been tinted pink with beetroot slices.
    to turn the ginger and vinegar pink.
  • Spooning out a pink ginger slice from a jar of pickled ginger.
    Remove the beetroot when the color is intense enough.

Which sweetener should be used?

Most recipes call for white sugar and cook it together with the vinegar. While I have made it that way before, I have also successfully made an uncooked version by dissolving the sugar directly in the vinegar solution.

I have also made several batches using alternative sweeteners like panela, honey, or maple syrup. These unrefined sweeteners result in darker, golden brown ginger slices. While that doesn’t sound desirable, it actually combines well with the more purple-ish shade of beetroot to make a pretty coral pink-colored ginger.

Preparation

Make sure the jar is fully clean before beginning. Ideally, run it through a hot dishwasher to help kill off unwanted bacteria.

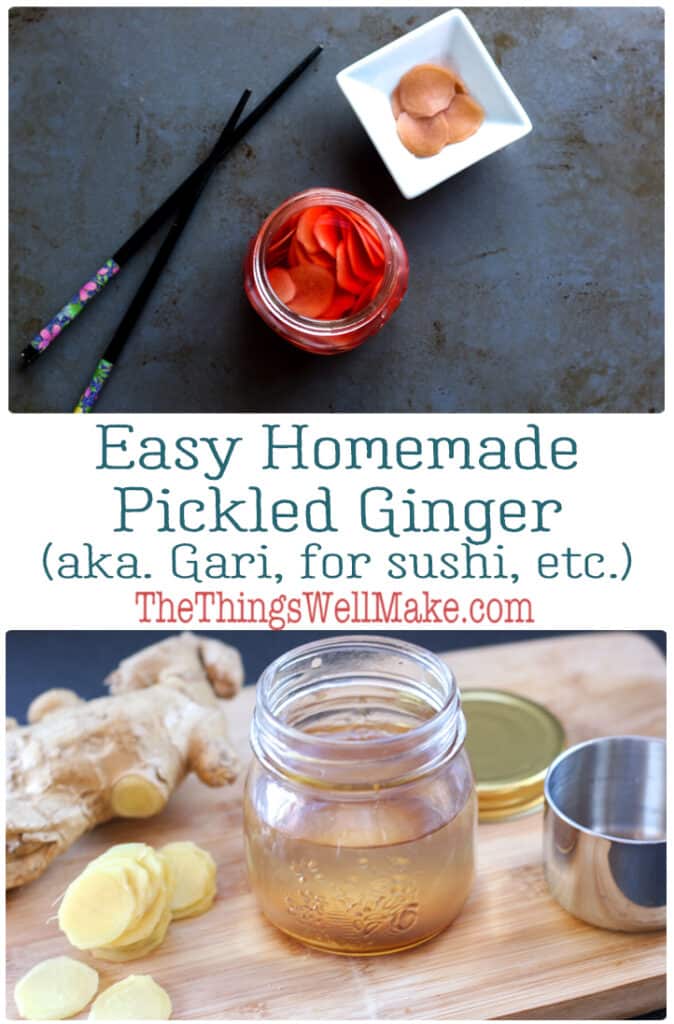
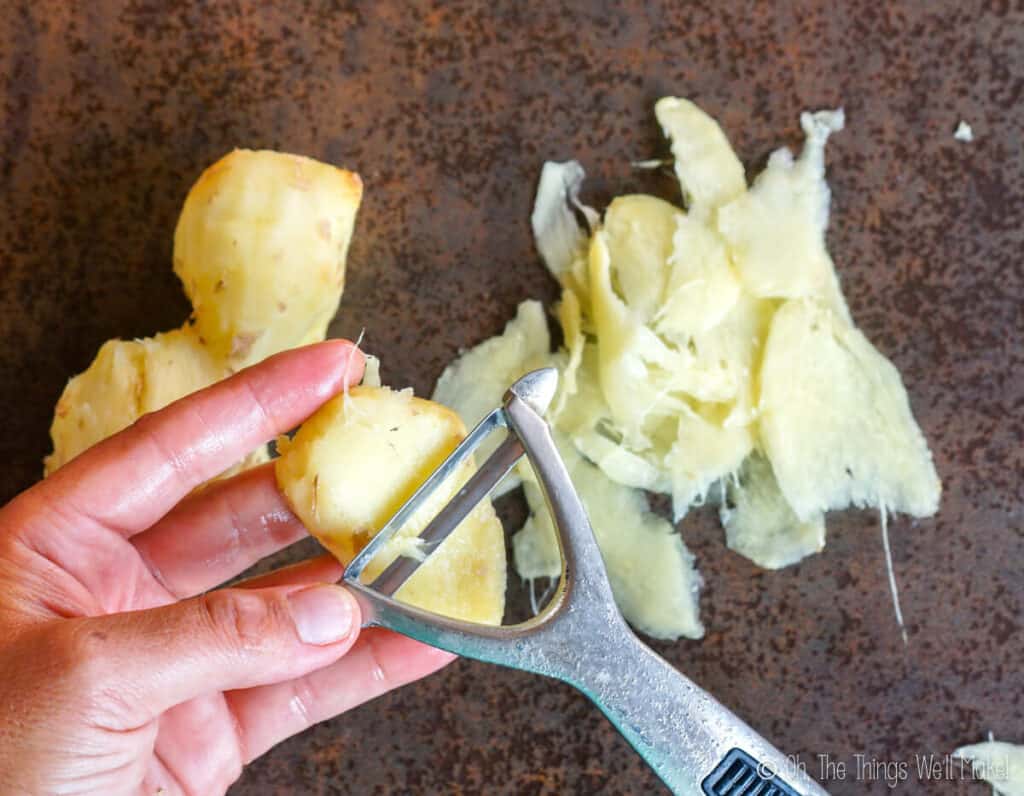
Rinse a large ginger root. Then, peel and slice it. Ginger can be easily peeled by scraping the skin off with the edge of a spoon. If you are using young ginger with pink tips, leave the pink tips on. Don’t scrape them off.

  • A piece of ginger root whose skin is being peeled with a spoon. Pieces of the skin are scattered around it.
    Peel the ginger.
  • Slices of ginger root on a bamboo cutting board next to a slicing disk for a food processor.
    Slice it.
  • A jar with vinegar and sugar next to vinegar slices on a bamboo cutting board.
    Mix the sugar, salt, and vinegar.
  • Overhead view of a glass jar filled with sliced ginger in vinegar.
    Add the ginger slices.

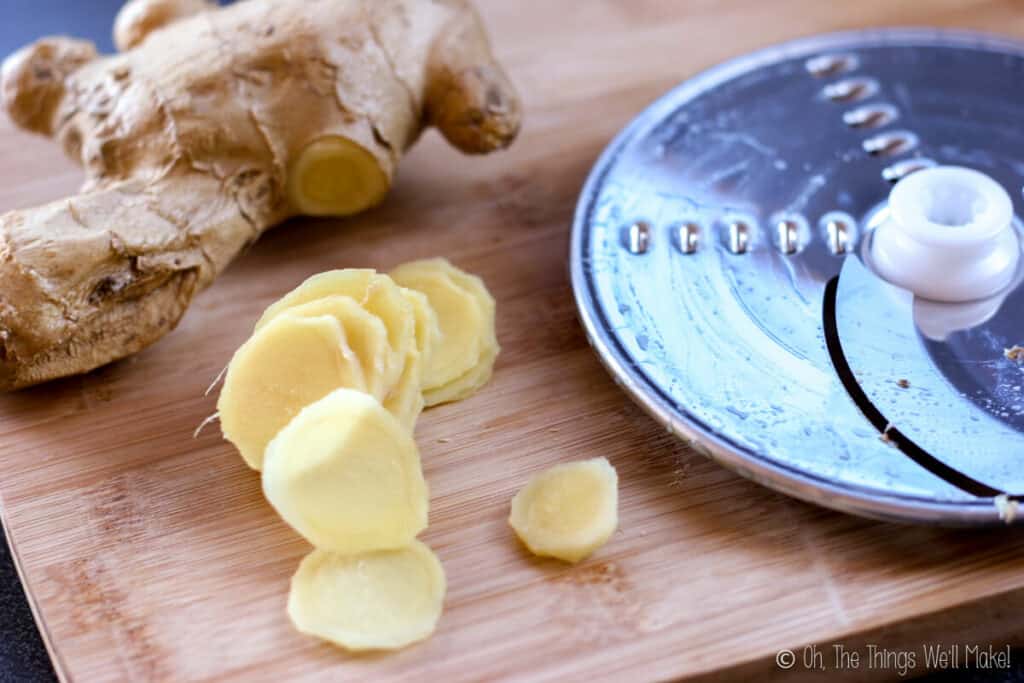
Once peeled, slice the ginger as thinly as possible. You can use a vegetable peeler, a knife, a mandoline (veggie slicer), or a food processor. (I like the thin slices obtained by using a vegetable peeler best.)

Raw pickled ginger

Raw gari is very pungent. Those who love a strong ginger flavor will appreciate the simplicity of this version.

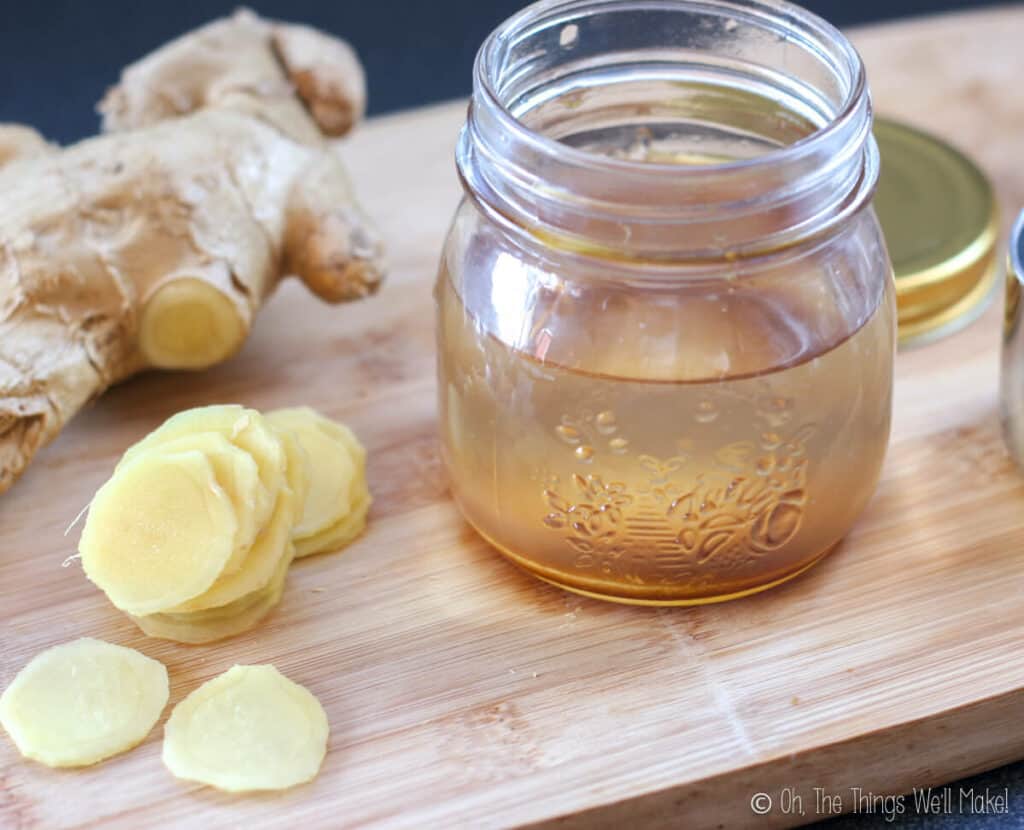
It’s as easy as dissolving the sugar and salt in the vinegar, and then adding the ginger slices.

Cooked version

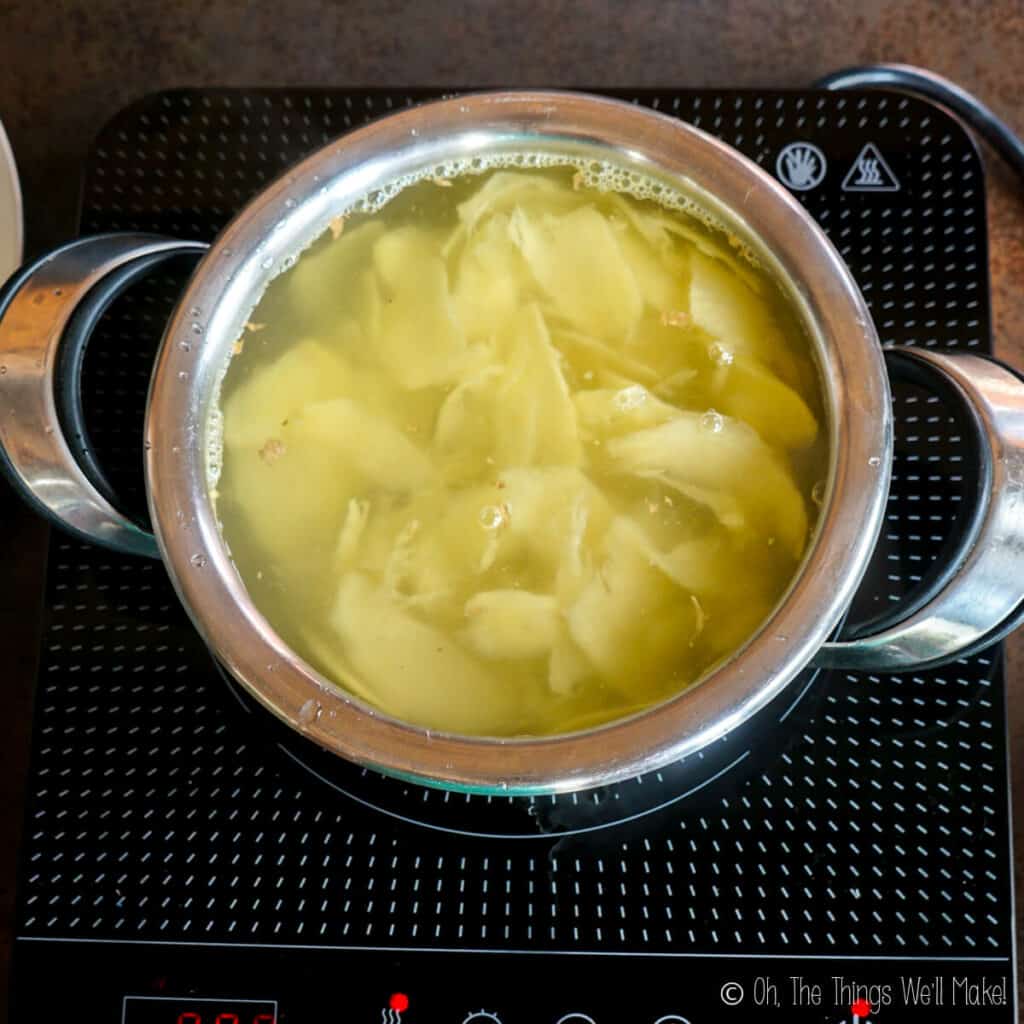
A more traditional gari can be made by salting the ginger and then cooking it in boiling water. By cooking it for only around a minute or so, you’ll still end up with a very strong, pungent ginger flavor. Cook it longer if you prefer a milder condiment.

  • slicing a ginger root with a vegetable peeler
    Slicing the ginger with a vegetable peeler
  • Boiling the ginger in water in a stainless steel pot.
    Cooking the ginger in boiling water
  • Straining out the cooked ginger from the water in a pan.
  • Cooking a sugar and vinegar mixture.
    Cooking the vinegar mixture
  • Pouring the vinegar mixture into a jar with the cooked ginger.
    Pouring the vinegar mixture over the cooked ginger
  • Adding slices of beets to 2 jars filled with ginger in a vinegar mixture.
    Adding slices of beets for color
  • Overhead view of the finished pickle ginger in a glass jar.

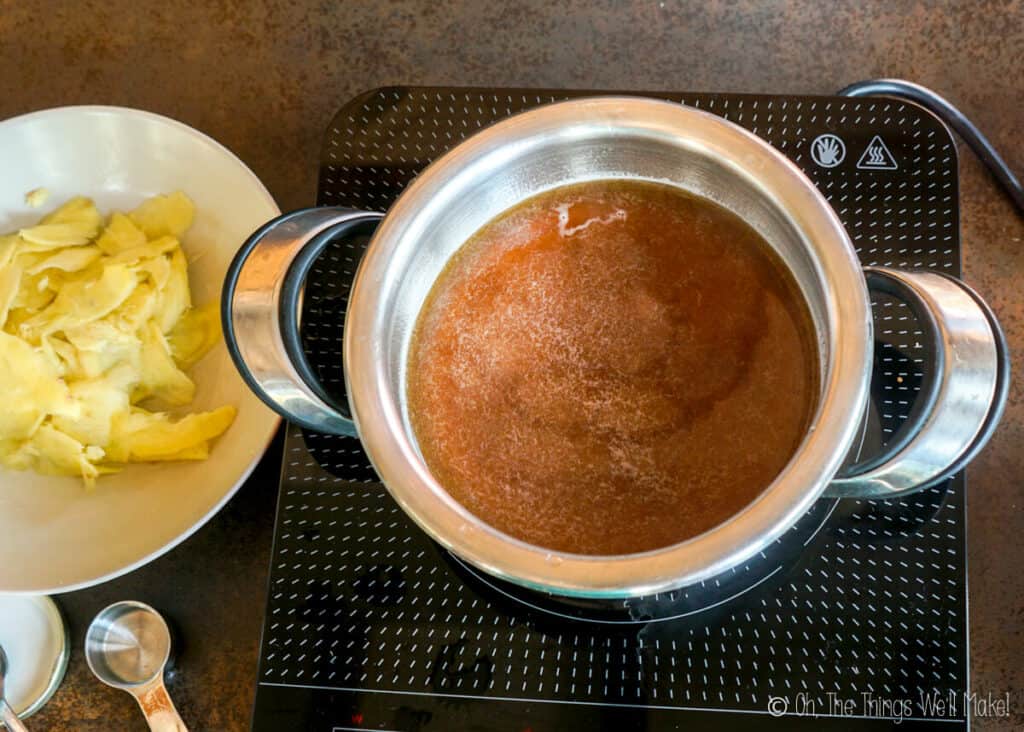
Meanwhile, cook together the vinegar, sugar, and salt until the sugar is completely dissolved. You can cook stronger vinegars slightly longer to remove some of their acidity. (Don’t cook it for too long, though, as the acidity is important for picking the ginger.)

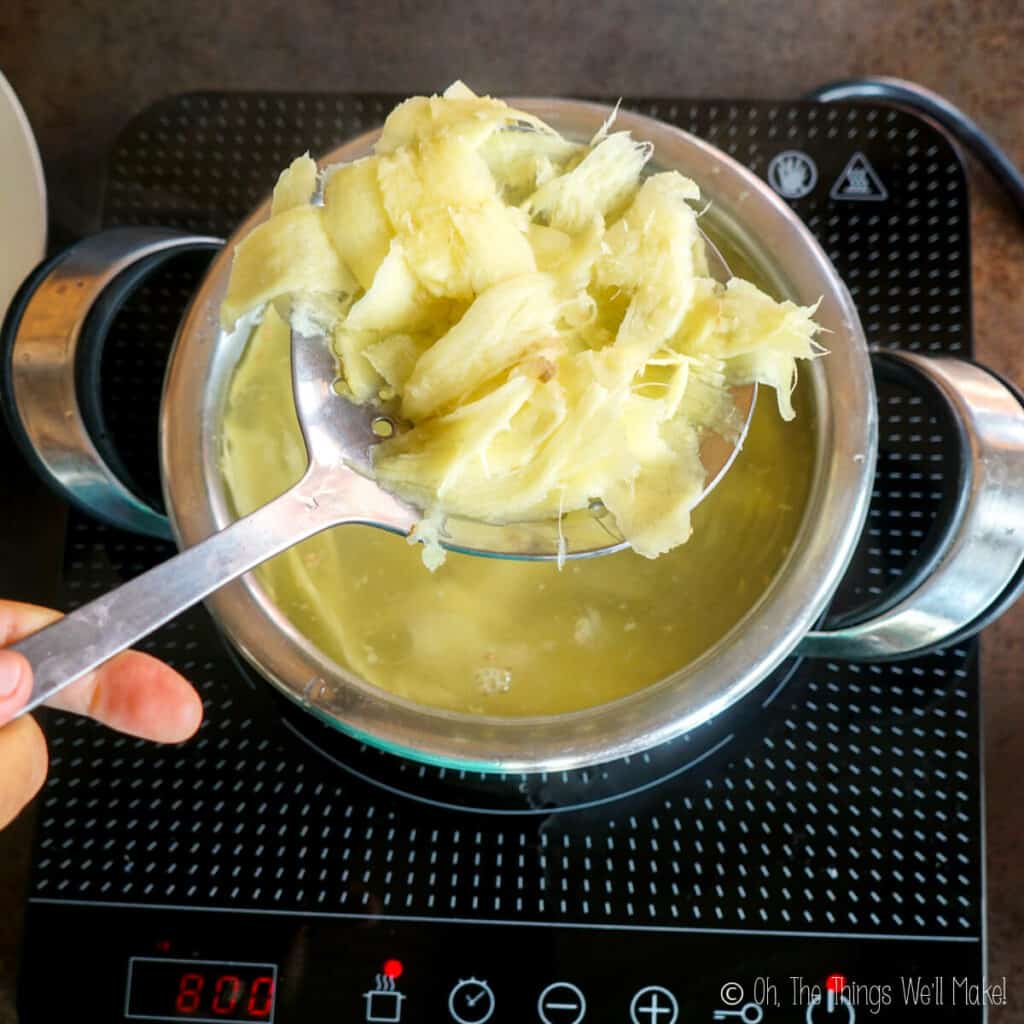
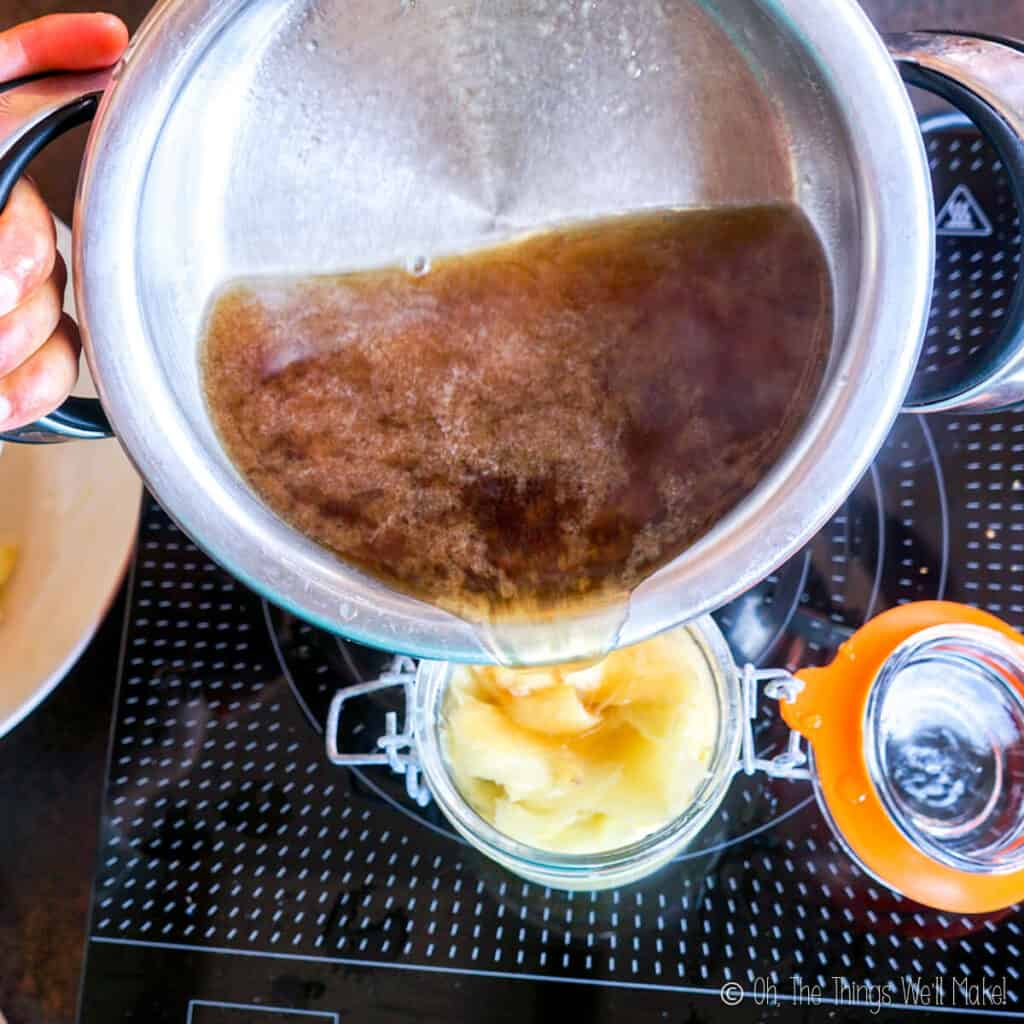
Once the ginger and vinegar mixture have been cooked, strain the ginger and add it to the vinegar mixture.

Storage

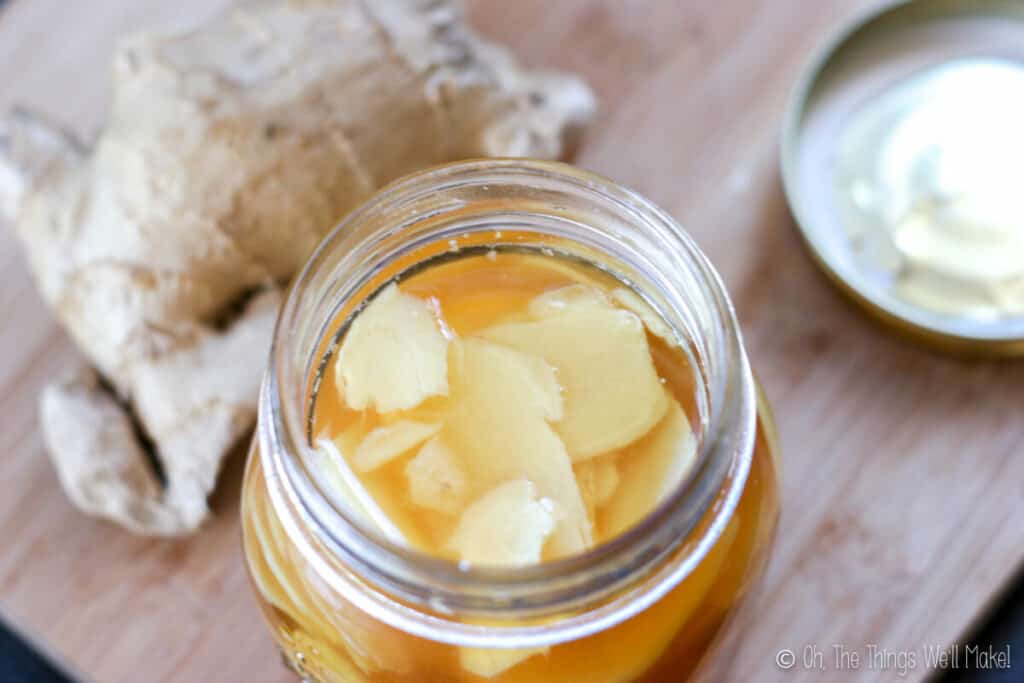
Store the mixture of ginger and vinegar solution in a clean, well-sealed container. Optionally, add some beetroot or food coloring if you want to make pink ginger slices.

After several hours, the ginger should already have picked up the sweet and sour flavor of the pickling solution. It’s best, though, after having been left in the solution at least overnight.

The vinegar, sugar, and salt all work well to help preserve the pickled ginger. While it should keep fine at room temperature, it’s best kept in the refrigerator. (It should keep for many months.)

Discard it if you see any unusual changes in color or flavor.

Removing a slice of pickled ginger from a jar of it with a spoon

Video

Craving more?Subscribe to my newsletter for the latest recipes and tutorials!
Top view of an open jar of pickled ginger that has been colored pink with beetroot. It's next to a small bowl filled with pickled ginger slices and some chopsticks.

Pickled Ginger for Sushi

Tangy yet sweet, pickled ginger pairs perfectly with sushi, but you can use it to enhance the flavors of a variety of dishes. While you could buy it, it's simple to make from scratch at home.
5 from 3 votes
Print Pin Rate
Prep Time: 15 minutes
Cook Time: 10 minutes
Total Time: 25 minutes
Servings: 15 teaspoons, approximately 10g
Calories: 17kcal
Author: Tracy Ariza, DDS

Ingredients

  • 150 g ginger root (1 large root)
  • 1 cup rice vinegar (Or other vinegar)
  • 2 Tablespoons sugar (Or sweetener of choice)
  • 1/2 teaspoon salt
  • 1 slice beetroot Or beet juice – optional- for color

For cooked ginger

  • 1 teaspoon salt for salting the ginger before cooking it

Instructions

  • Peel the ginger root. This can be easily accomplished by using the edge of your spoon to help scrape the skin off.
  • Slice the ginger as thinly as you can. You can use a knife, vegetable peeler, or a food processor/slicer like I did.

For traditional cooked pickled ginger

  • Sprinkle a teaspoon of salt over the ginger slices and coat them well with the salt. Allow the coated ginger to rest while you fill a small pot with water and bring it to a boil.
  • Add the salted ginger to the boiling water and cook it for a short period of time. Remove after 1-2 minutes for a stronger, more pungent ginger. Leave it to cook longer for milder ginger.
  • Remove the ginger from the boiling water.

Prepare the pickling solution

  • Combine the vinegar, sugar, and salt in a small saucepan, and heat over low to medium heat, mixing together until the sugar dissolves. If using a strong vinegar, you can cook slightly longer to decrease the acidity slightly. Remove from the heat.
    (For raw version, you can dissolve the sugar in the vinegar without cooking the solution.)

For raw or cooked ginger

  • Place the sliced ginger (cooked or raw) in a clean jar, and pour the vinegar solution over it.
  • Optionally add a slice of beetroot or radish to color the ginger pink.
  • Remove the beetroot once you've achieved the desired level of color.
  • Cover and store in the refrigerator.

Notes

For sweetener, you can use regular white sugar, unrefined sugar (like coconut sugar or panela), or use alternative sweeteners like honey, maple syrup, or stevia.
While rice vinegar is traditionally used, you can try using other kinds of vinegar like apple cider vinegar or a homemade ginger vinegar.
While you can store the finished pickled ginger at room temperature, it will keep longer in the refrigerator or in a cool, dry place. (Store up to a year.)
 
Course Condiments, DIY Pantry Foods
Cuisine Asian
Special Diets Gluten Free, Low Fat, Low Lactose, Vegan, Vegetarian
Keyword pickled ginger, sushi ginger
Other Diets Dairy free
Tried this recipe? Tag me today!Mention @thethingswellmake or tag #thethingswellmake!
Serving: 1teaspoon (10g) | Calories: 17kcal | Carbohydrates: 3g | Protein: 1g | Fat: 1g | Saturated Fat: 1g | Sodium: 235mg | Potassium: 42mg | Fiber: 1g | Sugar: 2g | Vitamin C: 1mg | Calcium: 3mg | Iron: 1mg

I would also like to note that I used less sugar and salt than most other recipes. I didn’t feel that it needed that much, and quite like the way it turned out. If you want it sweeter or saltier, though, by all means, feel free to add more!

Update Information

This post was originally published on August 26, 2014. It was completely rewritten with the addition of new photos and video in May of 2020.

Category: Condiments & Sauces, MIY Pantry Basics, Recipes

About Tracy Ariza, DDS

Tracy Ariza, B.A., D.D.S., left dentistry and the United States to found Oh, The Things We’ll Make!, writing to you from the Spanish Riviera. She loves making things herself in order to keep control of what goes in them. While far from perfect, she strives each day to live a healthier, more sustainable lifestyle.

Previous Post: « A mason jar mug filled with ice and a ginger switchel drink, garnished with a sprig of spearmint. There is a carafe of switchel in the background. Ginger Switchel: A Natural Electrolyte Drink
Next Post: How to Make Soda Water (And Ways to Use it) Closeup of a glass of carbonated water with ice, garnished with a slice of lime. »

Reader Interactions

Comments

  1. Natalie

    October 13, 2014 at 6:43 AM

    Yumm. Cant wait to try it!

    Reply
    • Nikki

      July 31, 2022 at 2:39 PM

      5 stars
      Just love this recipe! My husband and I are now addicted to pickled ginger… So simple, quick, utterly delicious – and pretty healthy, too.
      The sweet/saltiness ratio is perfect. I followed the recipe to the letter using rice vinegar. Even added the sliver of beetroot for the natural colouring.
      Currently making another batch – this time with cider vinegar, just because we’ve run out of rice vinegar.
      Thank you for such a lovely recipe.

      Reply
      • Tracy Ariza, DDS

        September 5, 2022 at 1:44 PM

        Thanks Nikki!
        Yes, I love it too!
        Perhaps you should give the ginger vinegar and ginger beer recipes a try if you like ginger as much as I do. 😉

        Reply

Leave a Reply Cancel reply

Your email address will not be published. Required fields are marked *

Recipe Rating


Sidebar

Search

  • Email
  • Facebook
  • Instagram
  • Pinterest
  • Twitter
  • YouTube

Hello, I’m Tracy!

I love making my own natural products like soaps and lotions and my own pantry items like yogurt and salad dressings.
Why do I do it? Sometimes to save money, sometimes because it's healthier, but I always love having control of the ingredients!​
Oh, the things we'll make!...

More about Tracy

I am a participant in the Amazon Services LLC Associates Program, an affiliate advertising program designed to provide a means for us to earn fees by linking to Amazon.com and affiliated sites.

Featured on Buzzfeed, Lifehacker, Fitness, Shape, Country Living, Healthline, Redbook, Redfin

Closeup of 4 bars of homemade soap. Two of them have been wrapped in brown paper and wrapped with ribbons. One soap is wrapped with red ribbon and the other with white ribbon.

Making an Easy, Basic Beginner Soap, and Then Making it Fun!!

Homemade prawn crackers on a plate in front of uncooked homemade prawn crackers and a roll of prawn crackers dough.

Prawn Crackers from Scratch

Impress your friends and save money by making your own soy sauce from scratch. Today we'll learn how to make a homemade shoyu, a fermented Japanese soy sauce made from soybeans and wheat berries. #shoyu #soysauce

How to Make Soy Sauce (Homemade Shoyu)

Two bottles of a homemade conditioner next to a wooden comb and a washcloth.

Easy DIY Hair Conditioner for Natural Hair

A small glass jar filled with an emulsified sugar scrub with a wooden spoon in it.

Easy Emulsified Sugar Scrub

Over head view of a spoon full of tomato paste over a jar full of it. A couple of fresh tomatoes lay next to the jar.

Easy Homemade Tomato Paste Recipe

Featured on Buzzfeed, Lifehacker, Fitness, Shape, Country Living, Healthline, Redbook, Redfin

White logo for Oh, The Things Well Make! website

Copyright © 2023 Tracy Ariza · Disclaimers and Disclosures · Privacy Policy · Cookie Policy