

Easy Comfortable DIY Enderman Costume (Minecraft)
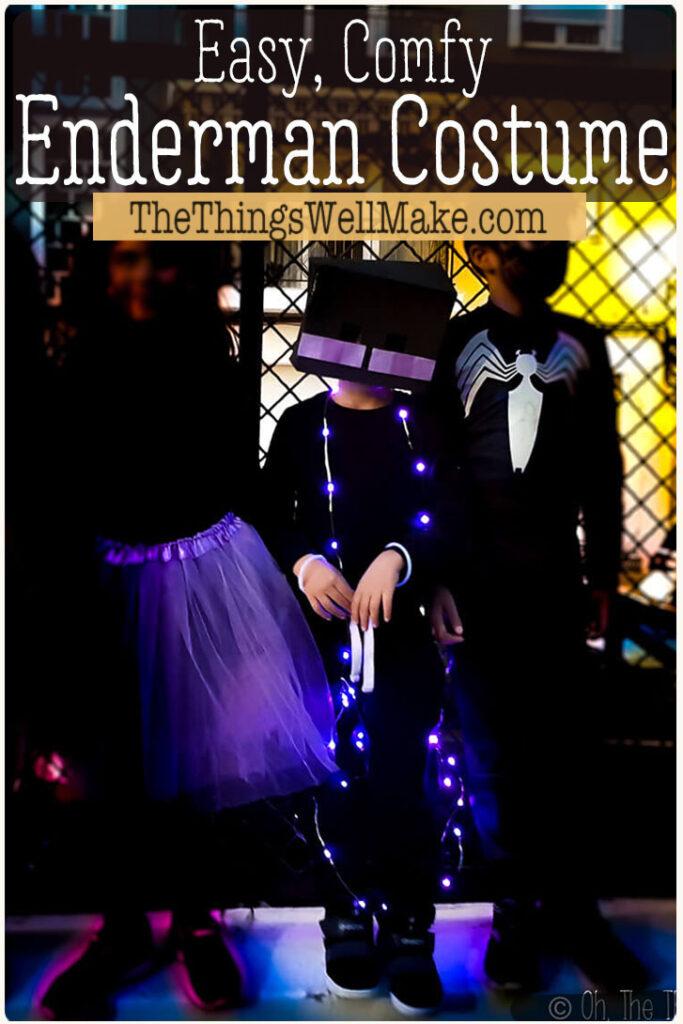
Easy to make and comfortable to wear, this fun enderman costume can be made quickly without any sewing! It’s the perfect costume for Minecraft enthusiasts!

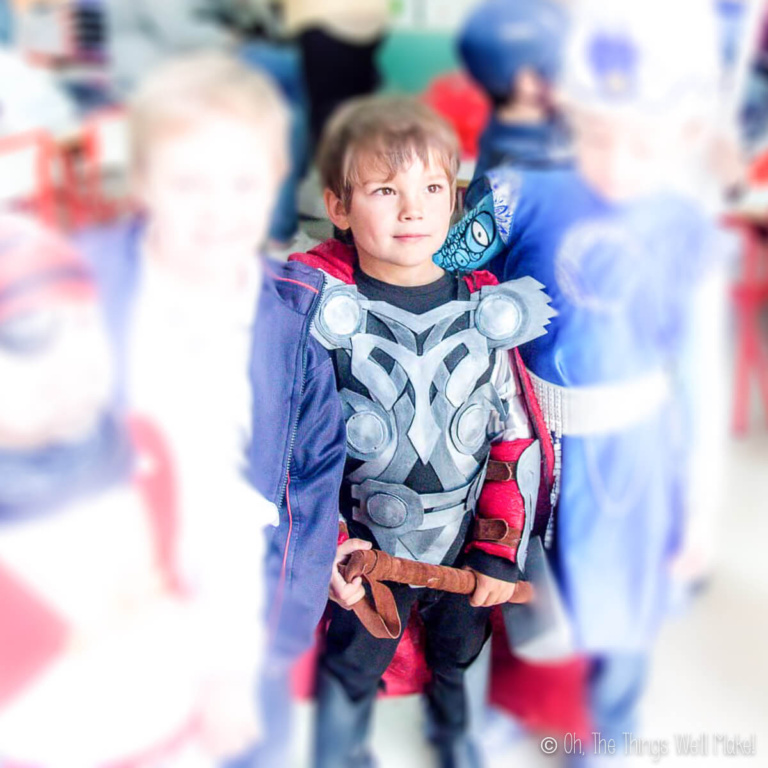
In the past, I have shown you how I made homemade costumes for my son for Halloween and carnival here in Spain. When he was younger, he enjoyed dressing up as Thor, Captain America, and other superheroes like Batman and Superman. As he gets older, though, his tastes are changing. He enjoys playing Minecraft with his friends and wanted a Halloween costume to reflect that.
His favorite Minecraft character is probably the enderman. At least, that’s what he wanted me to try to make. I was actually quite happy about that because I imagined I could replicate it quickly and easily. (As far as DIY Minecraft costumes go, It definitely sounded like a simpler monster than a creeper with their many pixelated squares.)
I did some research online and found lots of costumes made with a medium-sized cardboard box which, of course, makes sense as everything in Minecraft is quite boxy. I didn’t want to make something that heavy and uncomfortable, though. Luckily, I had a few ideas of my own!
What is an enderman?
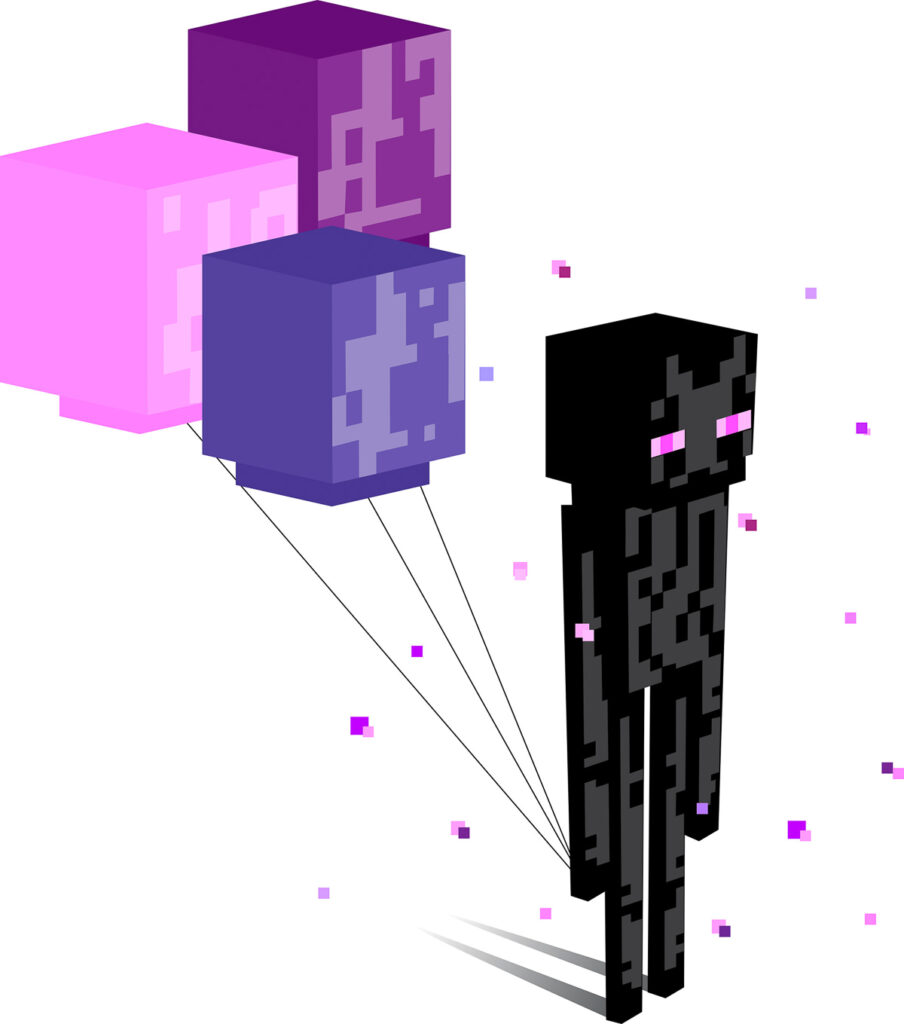
The enderman is one of the most popular characters in all of Minecraft. They’re tall and skinny black creatures with purple eyes. I’m definitely not a Minecraft expert, but from what I understand, they’re generally peaceful unless you stare right at their eyes. Then, when you look away, they come to attack you. They also have teleportation abilities.
Endermen have the unusual characteristic that they can pick up certain blocks in Minecraft, so, depending on where you will be wearing the costume, you could make a separate block to hold as part of the costume.
Making the enderman mask
The most difficult part of making the enderman costume is making his head. Don’t worry, though. We were able to whip ours out in less than an hour! (And we were figuring things out as we went along.)
Materials:
- 2 large sheets of black craft foam (40×60 centimeters or about 16 x 23.5 inches)
(If you can’t find that exact size, cut craft foam sheets to size) - Scissors or a box cutter and a ruler
- Glue gun
- Glue sticks (black or transparent)
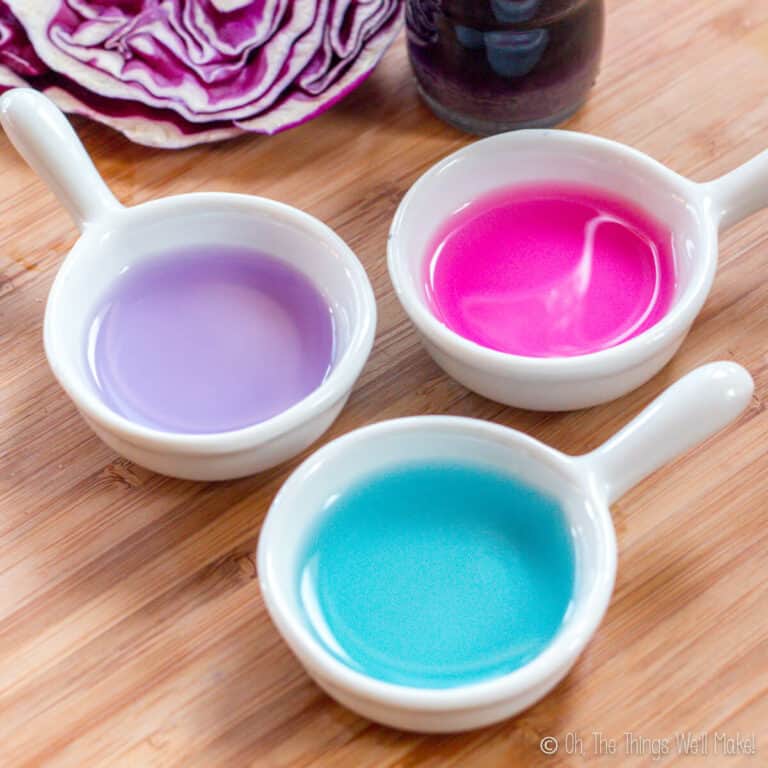
- Photo paper and printer or craft pain in two shades of violet
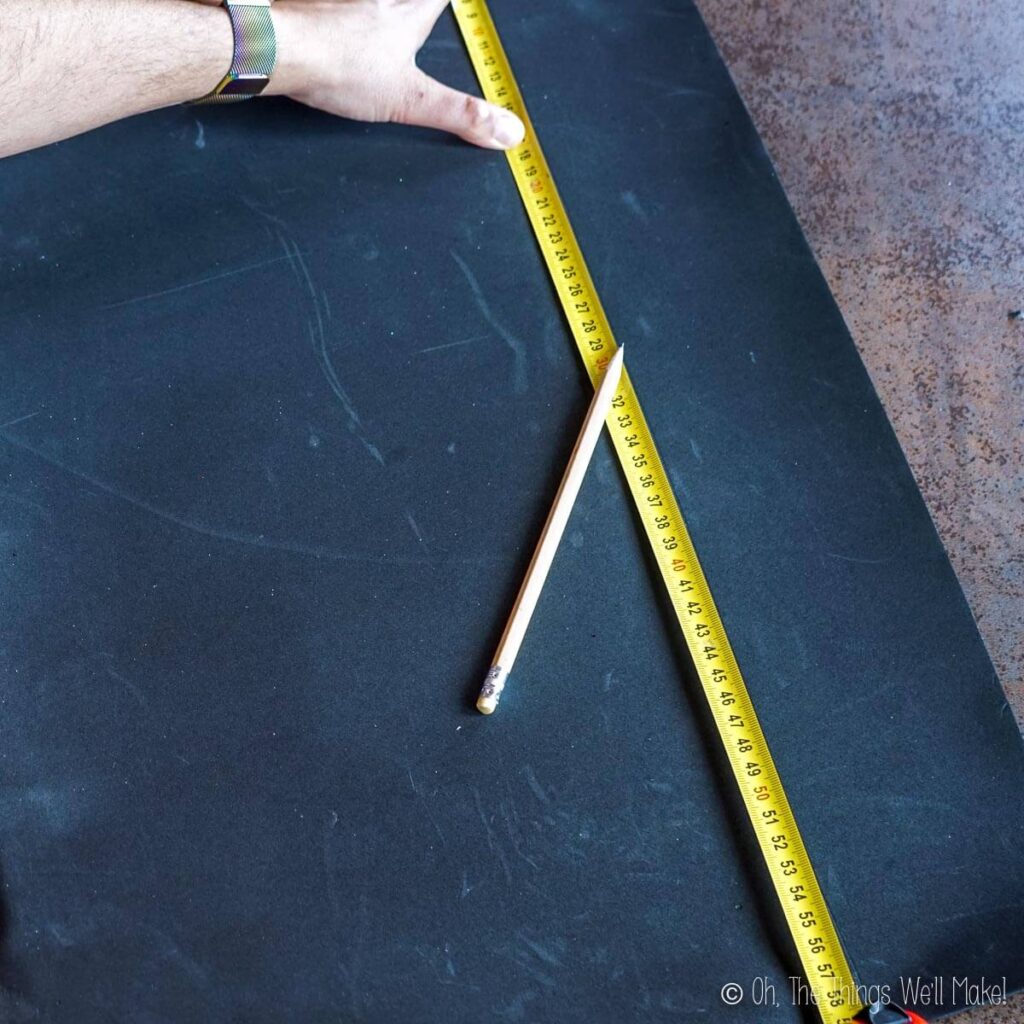
Cutting out the craft foam
Begin by marking a line down the center of one of the sheets of black craft foam lengthwise and then, again, widthwise. Cut down each of the lines. This will form 4 smaller rectangles of 20 x 30 centimeters. (If your large craft foam sheets aren’t the exact same size, it doesn’t matter. Just make a similar-sized box.)
On the other sheet of black craft foam, mark off a square that is 30 centimeters by 30 centimeters. Use the long edge of one of the rectangles for the exact measurement of the sides. (This is especially important if your craft foam sheet isn’t exactly 40×60). Cut it out without cutting across the strip of 10cm below the square on your sheet. (We’ll need a long strip of craft foam for the inside of our head.)
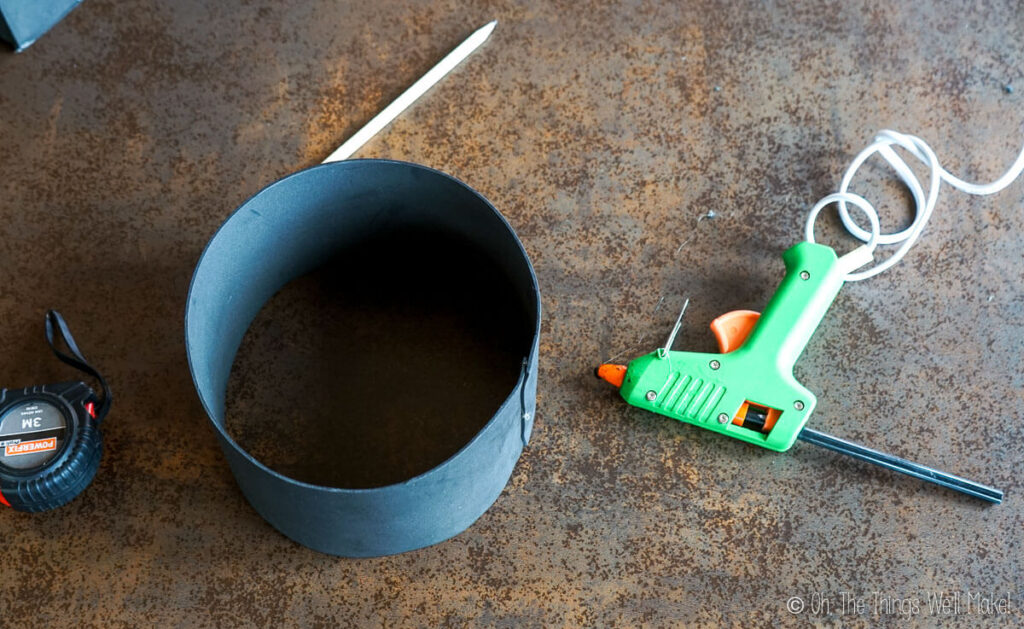
For the last piece of craft foam, cut a long strip of craft foam that is 9 centimeters wide. (Measure from the top of the head of the person who will wear the costume to the point just above their eyebrows for a more exact measurement. In the case of my son, it was 9 centimeters.) Wrap the strip around their head and cut it to a length just past where the circle overlaps (leaving room to glue the pieces together).
Forming the box
Once all of the pieces have been cut to size, plug in your glue gun and get ready to glue the pieces together.
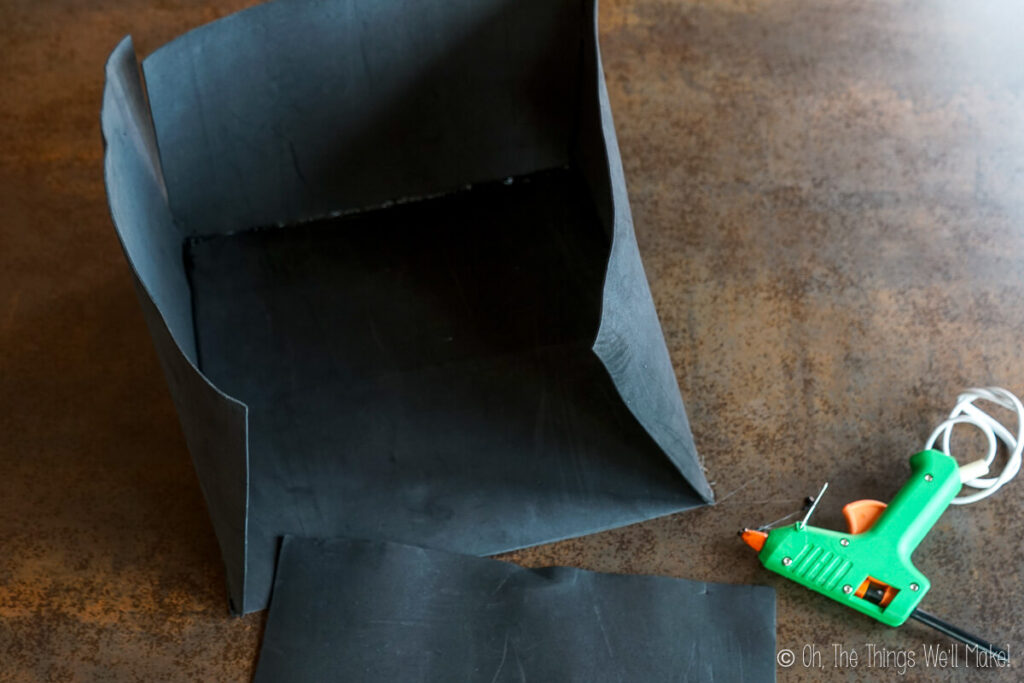
Begin with the square piece and one of the craft foam rectangles. Dispense some of the hot glue along one of the edges of the square and then place the edge of the rectangle perpendicularly into the hot glue. Make sure to use the side that’s 30 centimeters long and line up the edges on either side with the square piece. The idea is to form one side of a “box”. It may be easiest to work in small sections, dispensing about ten centimeters of glue, pushing the craft foam in place, and then continuing until the whole side has been attached.
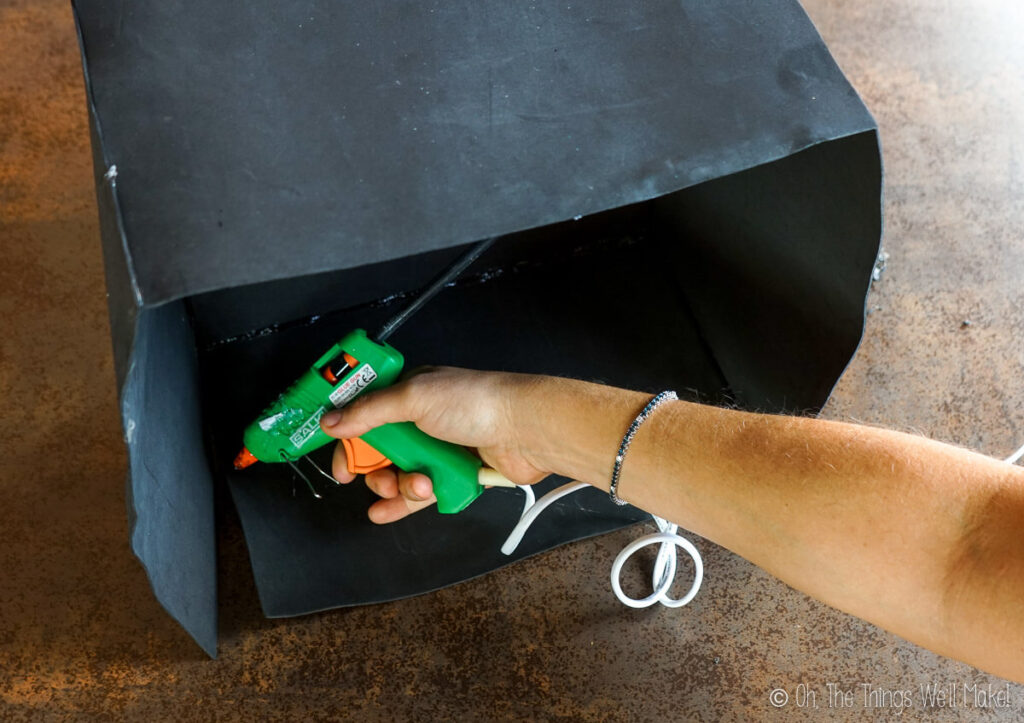
To reinforce the side, dispense some hot glue down the entire seam along the inside of the seam.
Continue with the next side. Dispense the hot glue down the adjacent side of the square, adding a new rectangular piece in place. Make sure it lines up with the edges of the square and with the adjacent rectangle (at a 90º angle). Once it’s glued to the square, you can also glue it to the rectangle perpendicularly along the short edge. Again, reinforce the seams by dispensing hot glue down them along the inside of the box.
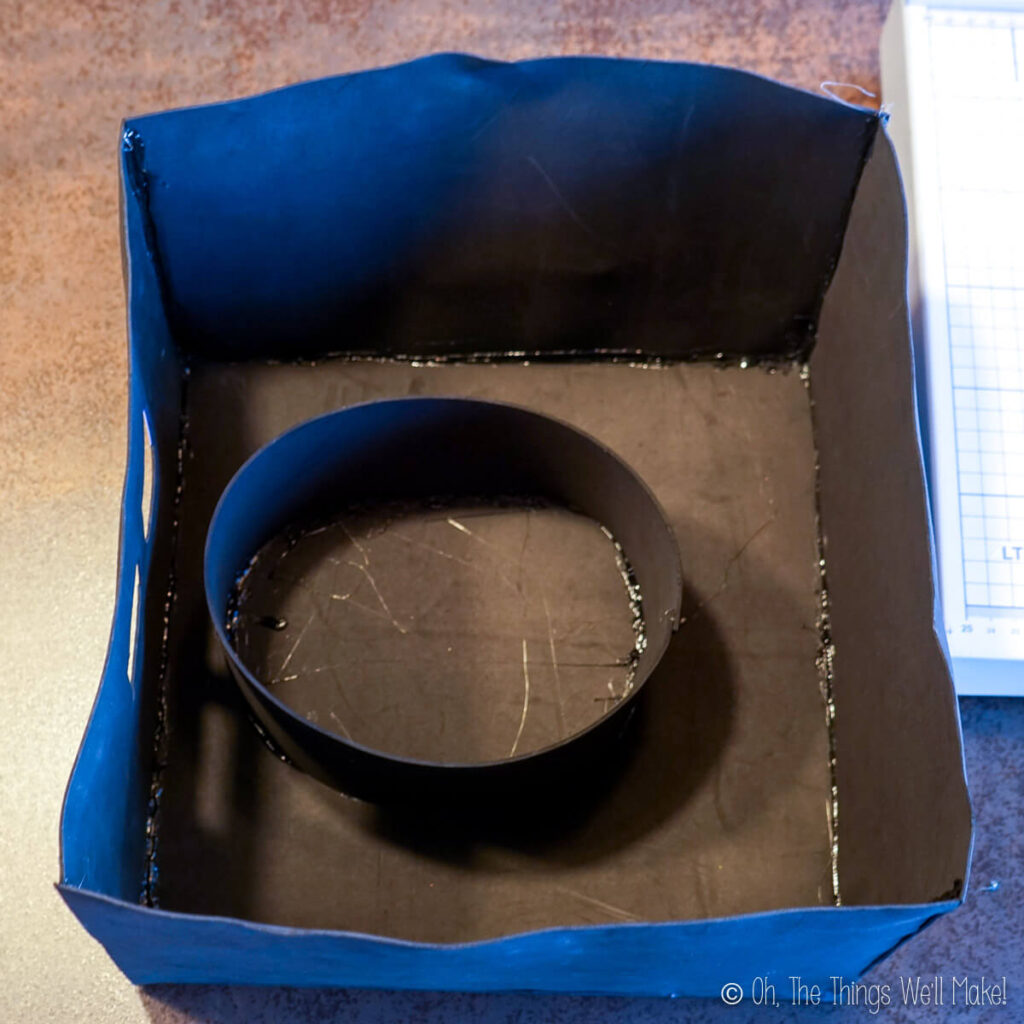
Continue in the same manner, adding on the other 2 rectangle pieces until you’ve formed a square box with an open bottom.
Adding the headband
Before cutting out the eyes, we want to make sure that everything fits well.
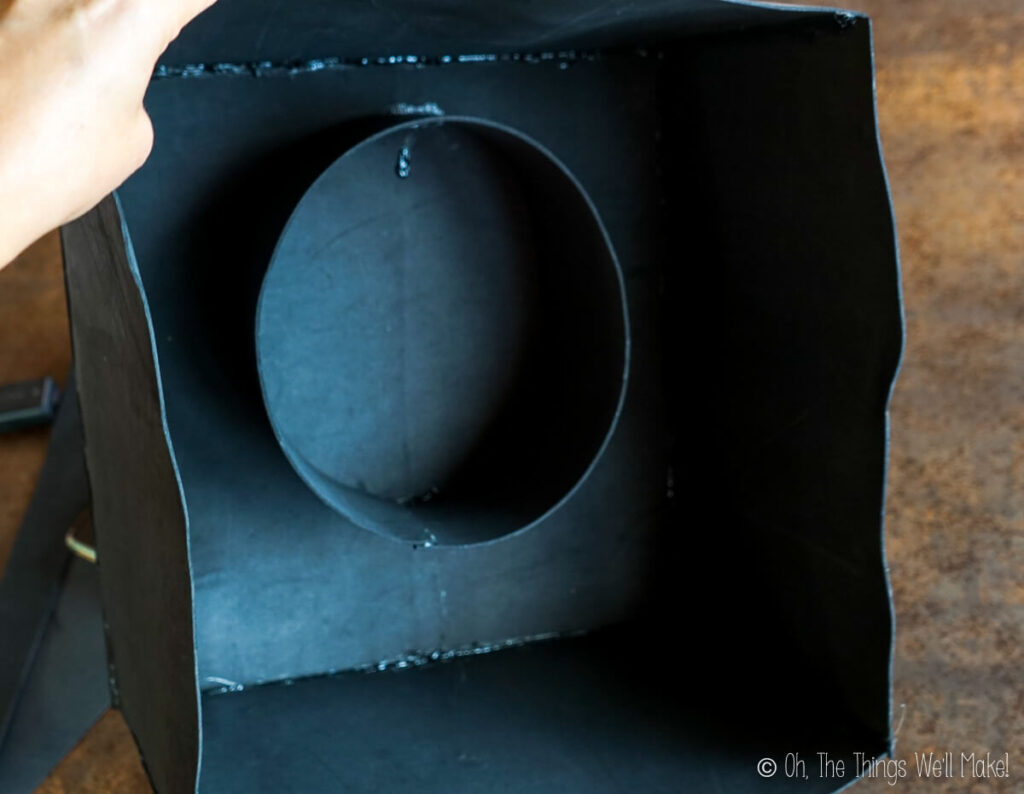
To hold the box comfortably in place, we’ll be adding a craft foam headband inside the top of the box. This will prevent the box from moving all over the place when worn.
To form the headband, glue together the edges of the black strip that you’ve cut to size together along the short edge, forming a circle. Once the glue has cooled, have the person try on the headband. It should fit comfortably over their head and sit above their eyebrows. If it doesn’t, make the necessary adjustments.
Tack the headband in place inside the top part of the box with hot glue, near one side of the box. This will become the front of the mask. (Don’t place it directly in the center because it’s easier to see through the holes when your face is closer to them.) Add a dot of glue in front, another behind and on either side, forming it into an oval shape with the longest side from front to back. (Your head is more oval-shaped and not a perfect circle.)
Once cooled, have the person try on the head mask and see if it fits comfortably. Make adjustments as needed before completely gluing the strip in place. If it looks good, run a line of hot glue along the seam to reinforce the band.
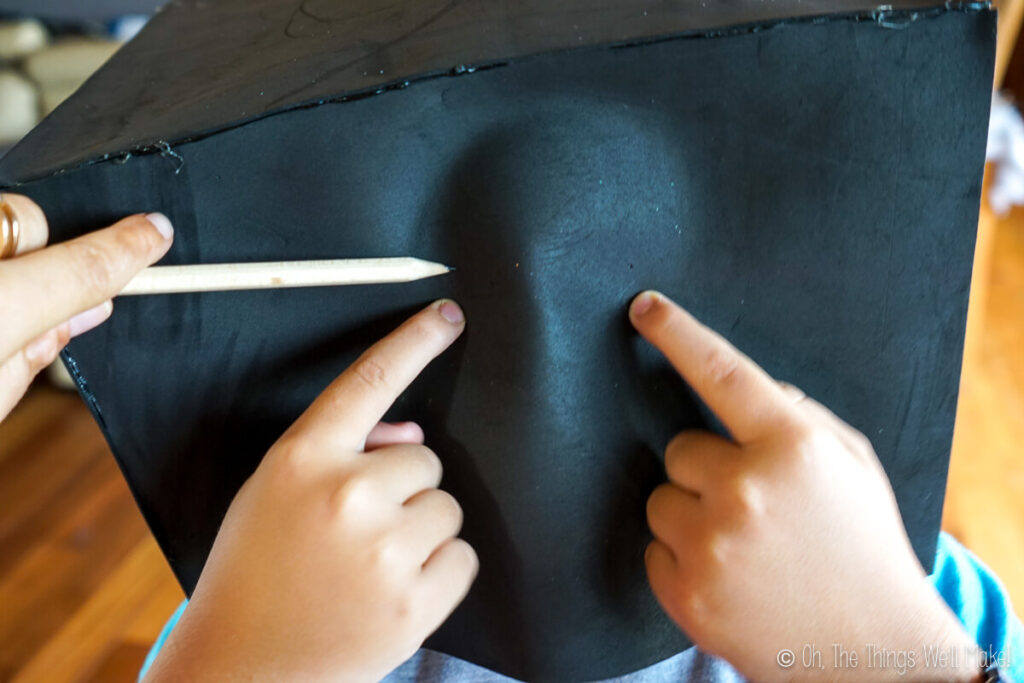
Cut eye holes
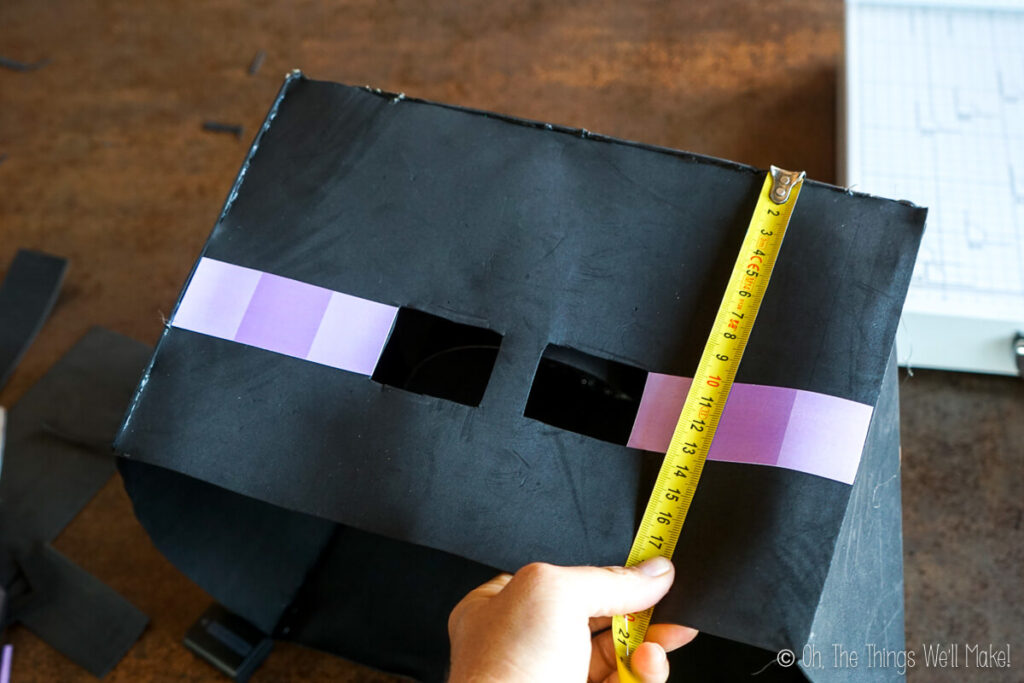
To get an idea of where the eyes will be, have the person try on the headpiece and press against their eyes. Mark the eye area with a piece of chalk. Make sure the marks are centered across the width of the front of the box. If they are off-center, move both marks as needed to center them (keeping the same amount of space between them).
Cut out a small circle in the marked spot for each eye. This is only the initial cut, so keep it relatively small.
Then, have the person try on the mask again to make sure the holes are in the right place for them to see out of them. Make a note of which direction you should enlarge the holes to make them easier to see out of.
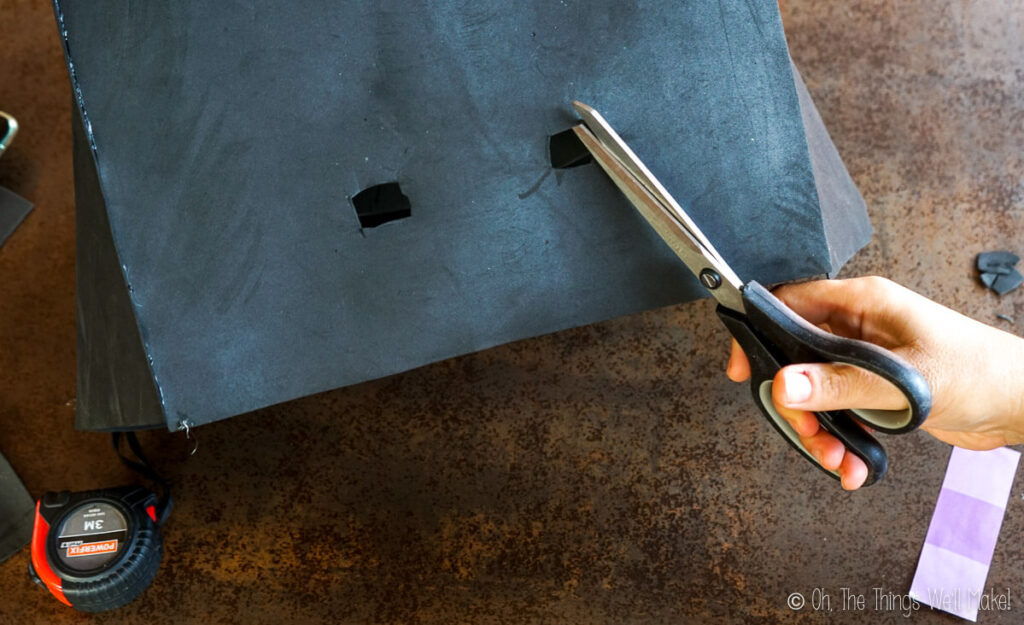
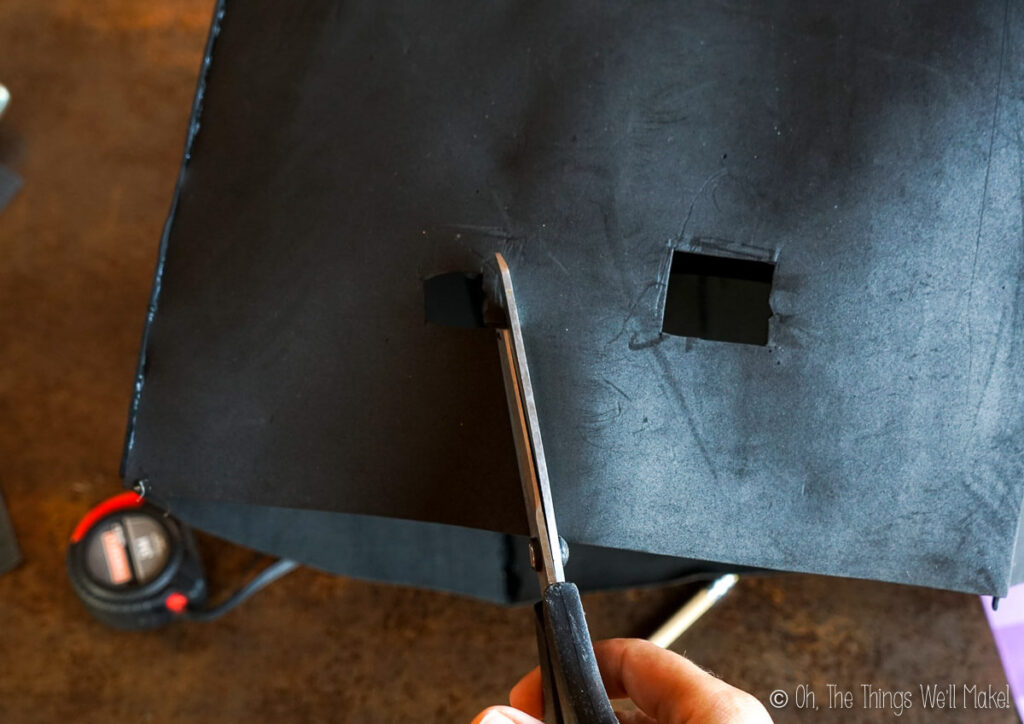
Enlarge the holes into rectangular eye holes that are large enough to give good visibility. (You may want to wait to completely enlarge them until after adding the creepy eyes!)
Adding the eerie enderman eyes
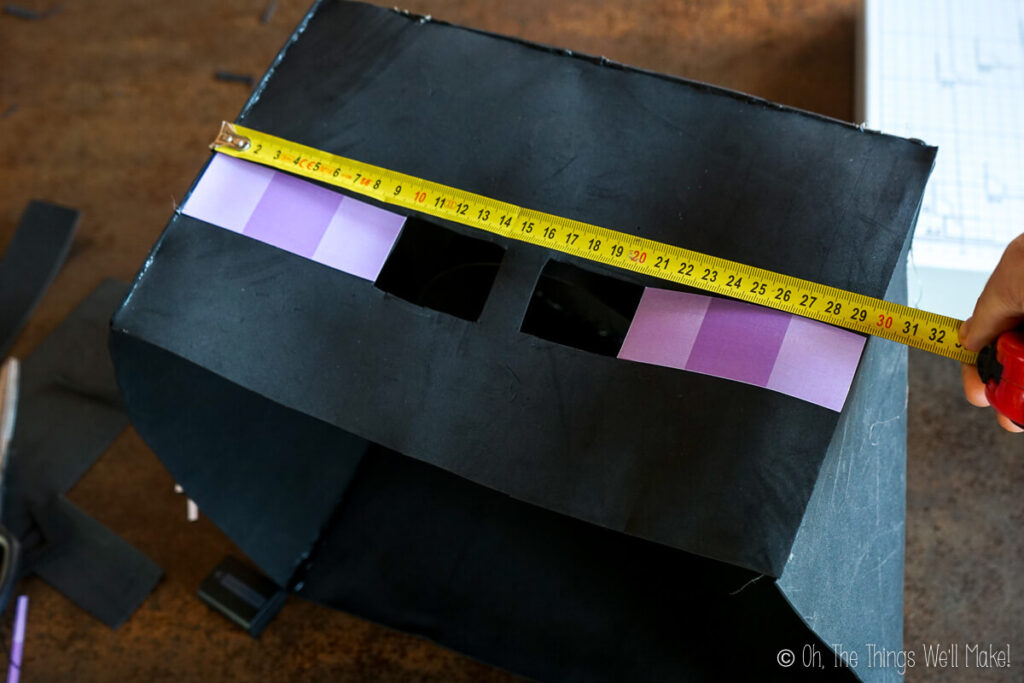
Before completely cutting out the rectangle, you may want to print out the enderman eyes. This will allow you to line up your cuts with the glued-on enderman eyes for a more professional-looking finish.
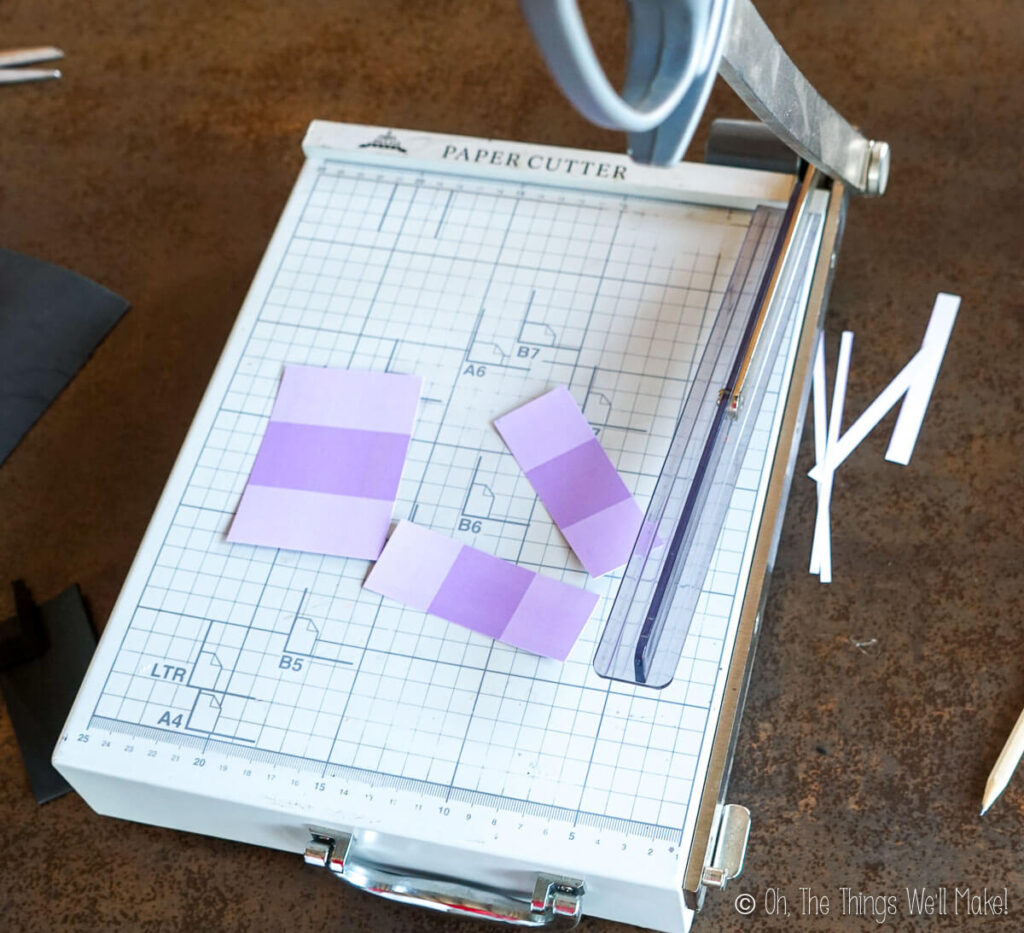
Print out the file for the enderman eyes onto waterproof photo paper that is 10×15 centimeters (4×6 inches). Cut off the excess white areas and then cut what’s left in half across the purple stripes. (You want all 3 bands on each section.) Cut each section in half again. (You now have 2 sets of eyes. You only need one, but have an extra one just in case.)

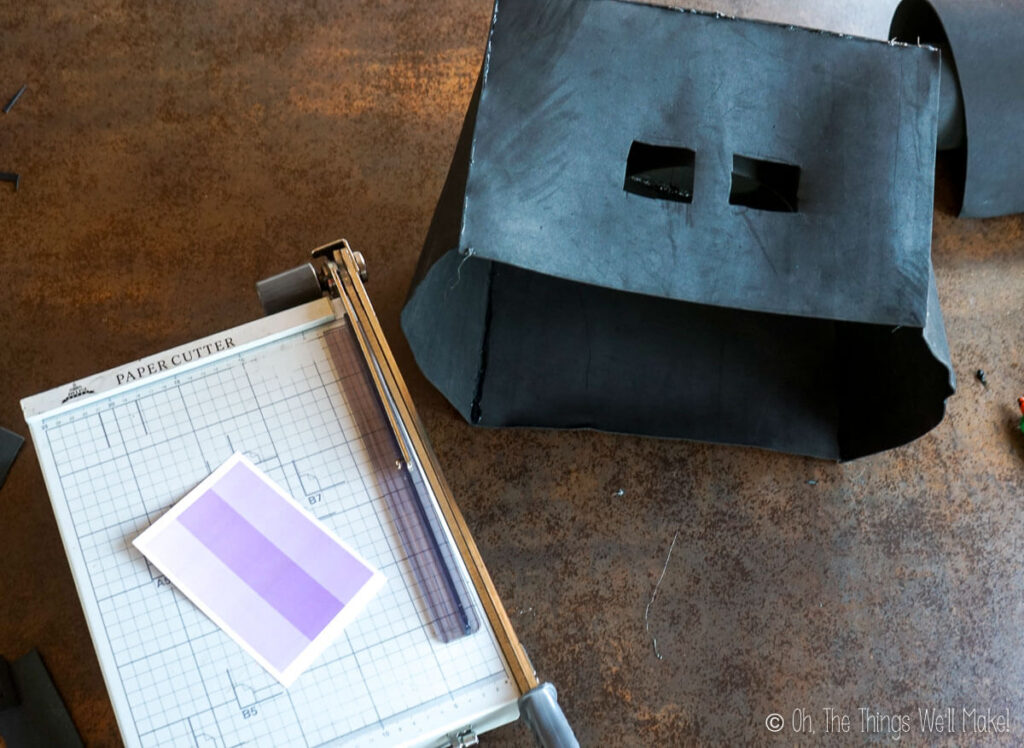
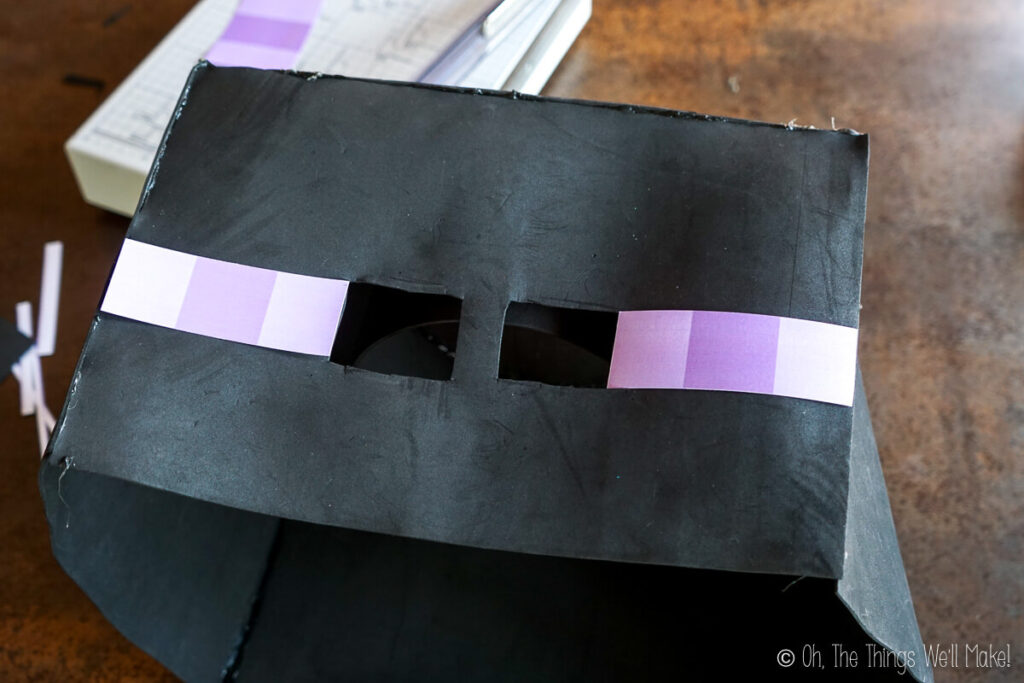
Glue the purple eyes onto the box along either edge wherever it looks best on your mask. In our case, we lined them up with the eye holes made in our mask. I then enlarged the holes, even more, to line the eye holes up with the top and bottom of the purple eyes.
If you don’t have a printer, you can use two different shades of purple craft paint to paint the eyes on instead!
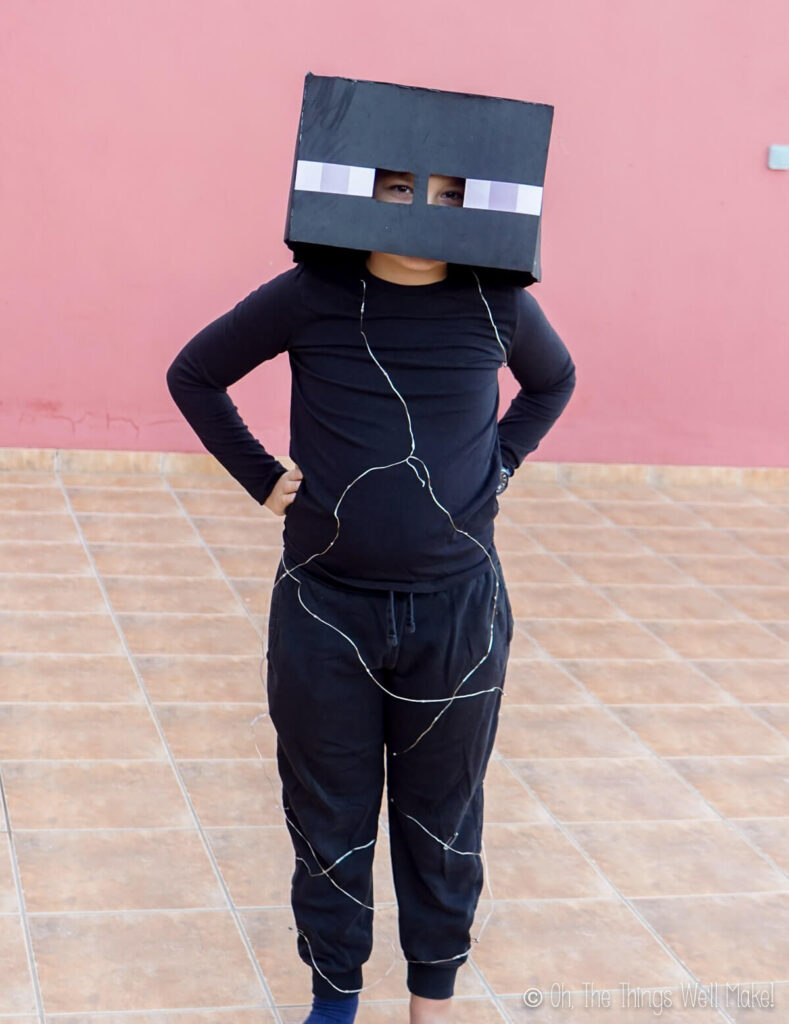
You’ve finished the mask!
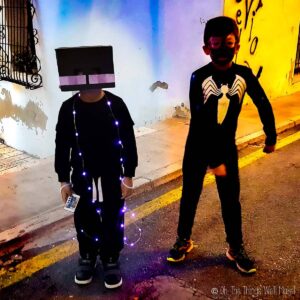
You may notice that in the photos of the finished costume that the size of the mask is smaller and the eyes are placed slightly differently. When my son was smaller, we had done the costume differently. We also tried making a hole in the foam behind the eyes for single LEDs with batteries to light up the eyes. This year we simplified!
Putting the enderman costume together
Once you’ve finished the mask, the rest of the costume couldn’t be easier!
You’ll need:
- Black pants (Sweatpants, leggings, or black jeans)
- Black long sleeve shirt (Sweatshirt, jacket, or jersey material, depending on whether they’ll be indoors or outside)
- Purple LED lights with a battery pack
- Safety pins
- Black Shoes
- Optional: Black gloves
To complete your tall black creature, have the person dress in all black. Depending on whether the costume will be worn inside at a Halloween party or outdoors while trick-or-treating, choose the fabric accordingly.
Adding the lights
We chose battery-operated purple LED fairy lights to add some fun to the costume. Endermen, when not hostile, have purple “flower” or “dust” particles around them. To mimic that, We’ll use the purple lights. Because we’re using LEDs, we don’t have to worry about them heating up so they’re safe to wear. (They also will light up for longer without needing to change the battery.)
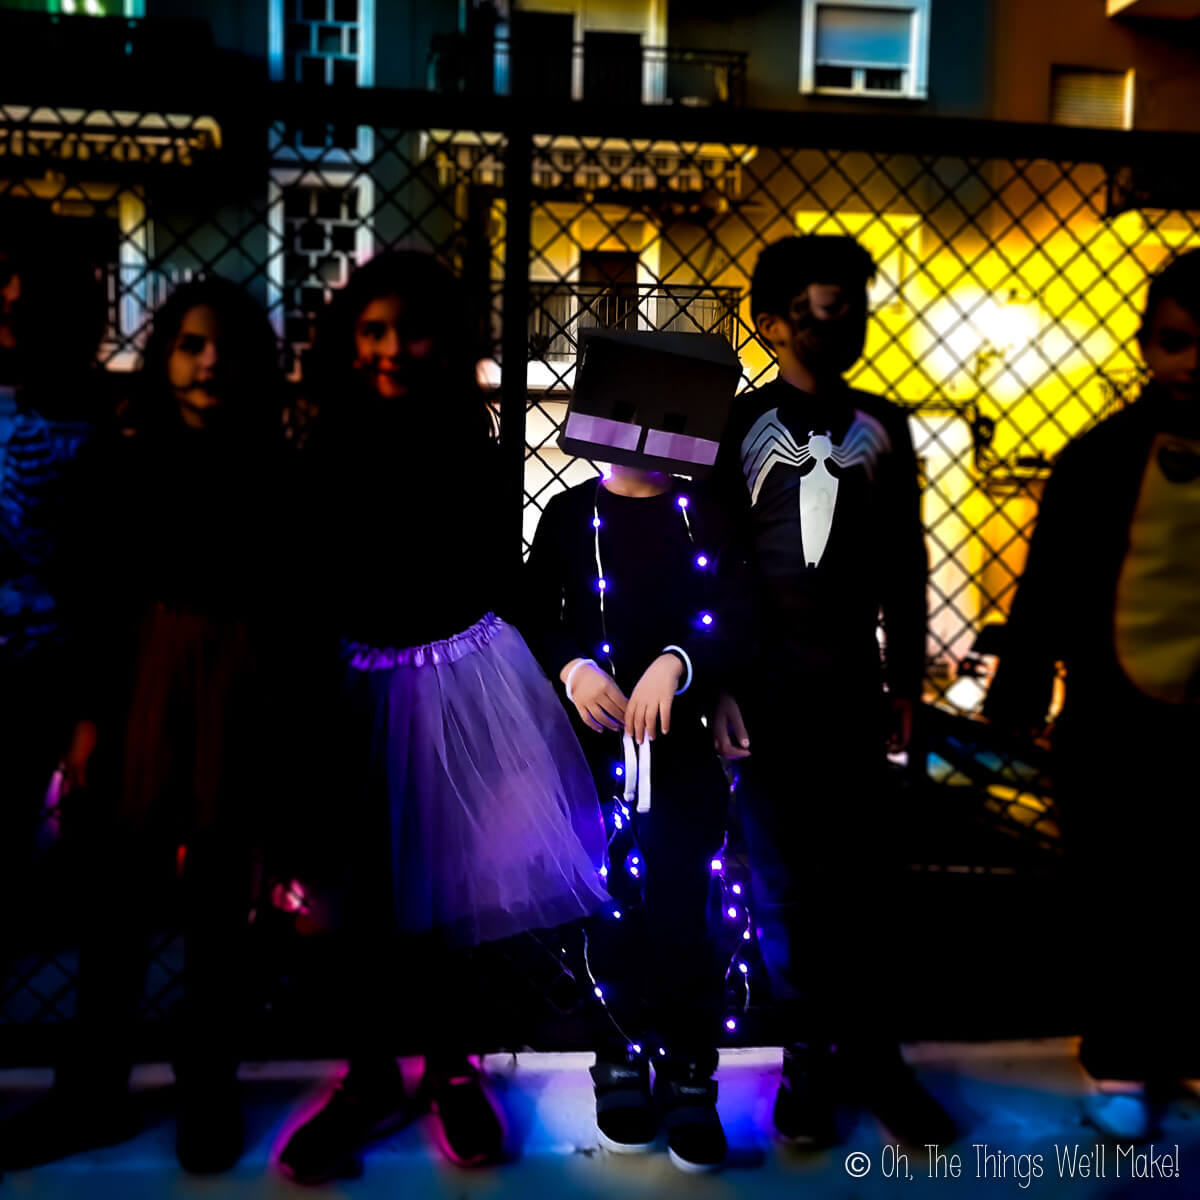
The first time my son wore this costume, I hand-sewed the lights in place onto his pants. Not only did it take me longer than I would have liked, but a lot of the stitches broke as he ran around the town on Halloween. It got progressively more difficult to keep them in place.
My son loved his costume and wanted to wear it again the next year. So, I decided I needed a new way to fasten the lights: safety pins! With my son dressed in his black sweatsuit, I wrapped the lights around him in a way that went up one leg and down the other so I’d know how to pin the lights in place.
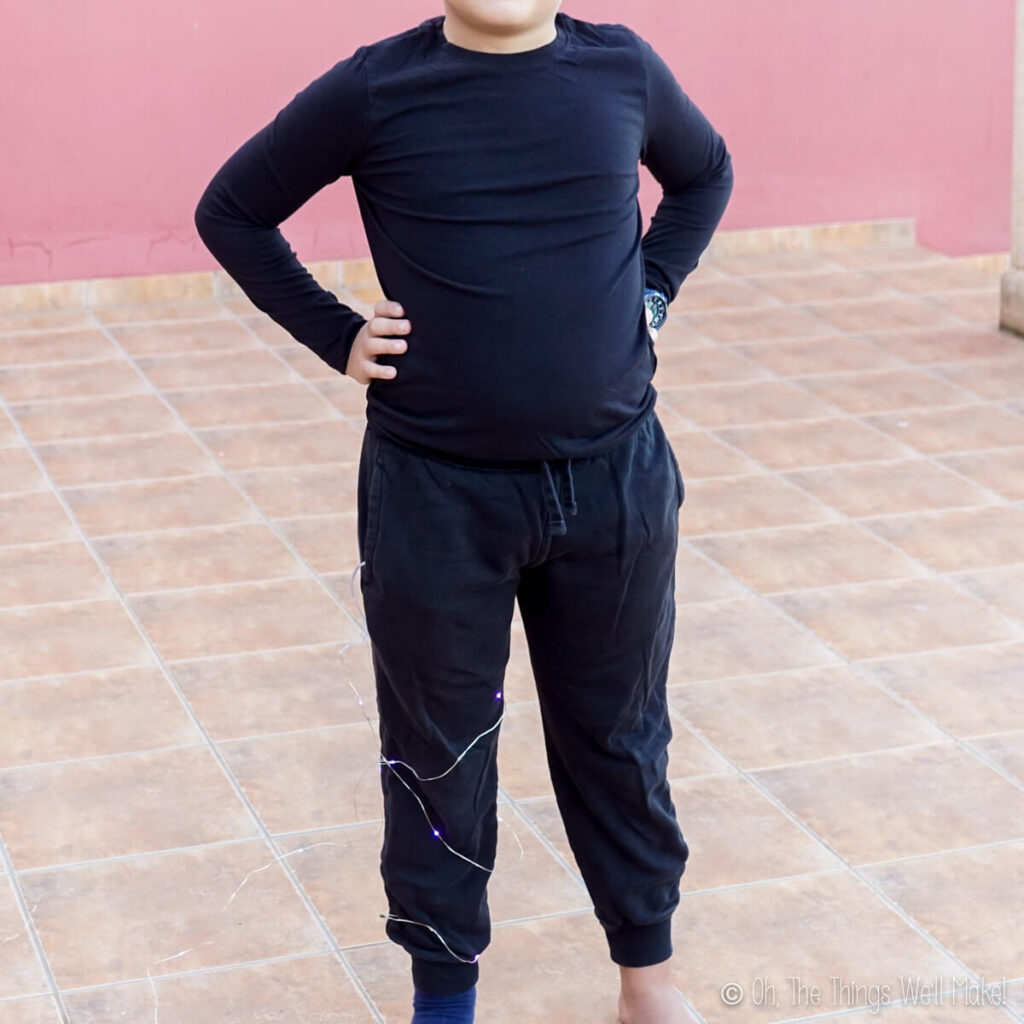
Position the lights in a way that the battery pack can be comfortably worn in one of the pockets. (If you don’t have pockets, either use a black fanny pack or tape the battery pack to the pants with black duct tape.)
Fasten the lights to the pants with safety pins every twenty to thirty centimeters. Move up and around one leg and over the child’s shoulders going back down the other leg. Don’t fasten any lights to the child’s shirt and leave plenty of room on the string of lights to be able to pull the lights on and off over the child’s head. Not only will this allow the child to comfortably use the restroom when needed, but it allows you to remove the costume and wear it again.
At first, I was worried about the safety pins standing out, but since the wires of the lights were already silver, the safety pins don’t really show. If you’re worried about it, you can buy black safety pins.
The safety pins can be easily adjusted, as needed, on the final night.
Other fun ideas
If your kid will be trick-or-treating in this costume, why not have him collect candy with this cute homemade trick-or-treat bag made from an upcycled t-shirt? (They can even help you paint it!)
Video
Minecraft Enderman Costume
Materials
For the mask
- 2 large sheets Black craft foam 40×60 centimeters or about 16 x 23.5 inches
- Scissors or a box cutter
- Ruler
- Glue gun
- Glue sticks black or transparent
- Enderman eyes file
- 1 sheet Photo paper (10x15cm) and printer or craft paint in two shades of violet
For the costume
- Black pants Sweatpants, leggings, or black jeans
- Black long sleeve shirt Sweatshirt, jacket, or jersey material, depending on whether they’ll be indoors or outside
- Purple LED lights with a battery pack
- Safety pins
- Black Shoes
- Black gloves Optional
Instructions
Cutting out the craft foam
- Begin by marking a line down the center of one of the sheets of black craft foam lengthwise and then, again, widthwise. Cut down each of the lines. This will form 4 smaller rectangles of 20 x 30 centimeters each.
- On the other sheet of black craft foam, mark off a square that is 30 centimeters by 30 centimeters. (You can use the long edge of one of the rectangles to help guide you and make it more exact if your craft foam sheet isn't exactly 40×60. Cut it out without cutting across the strip of 10cm below the square on your sheet. (We'll need a long strip of craft foam for the inside of our head.)
- Cut a long strip of craft foam that is 9 centimeters wide. (Measure from the top of the head of the person who will wear the costume to the point just above their eyebrows for a more exact measurement. In the case of my son, it was 9 centimeters.) Wrap the strip around their head and cut it to a length just past where the circle overlaps (leaving room to glue the pieces together).
Forming the box
- Once all of the pieces have been cut to size, plug in your glue gun and get ready to glue the pieces together.
- Begin with the square piece and one of the craft foam rectangles. Dispense some of the hot glue along one of the edges of the square and then place the edge of the rectangle perpendicularly into the hot glue. Make sure to use the side that’s 30 centimeters long and line up the edges on either side with the square piece. The idea is to form one side of a “box”. It may be easiest to work in small sections, dispensing about ten centimeters of glue, pushing the craft foam in place, and then continuing until the whole side has been attached.
- To reinforce the side, dispense some hot glue down the entire seam along the inside of the seam.
- Continue with the next side. Dispense the hot glue down the adjacent side of the square, adding a new rectangular piece in place. Make sure it lines up with the edges of the square and with the adjacent rectangle (at a 90º angle). Once it’s glued to the square, you can also glue it to the rectangle perpendicularly along the short edge. Again, reinforce the seams by dispensing hot glue down them along the inside of the box.
- Continue in the same manner, adding on the other 2 rectangle pieces until you’ve formed a square box with an open bottom.
Adding the headband
- To form the headband, glue together the edges of the long black strip that you've cut to size together along the short edge, forming a circle.
- Once the glue has cooled, have the person try on the headband. It should fit comfortably over their head and sit above their eyebrows. If it doesn't, make the necessary adjustments.
- Tack the headband in place inside the top interior part of the box with hot glue, near one side of the box. This will become the front of the mask. (Don't place it directly in the center because it's easier to see through the holes when your face is closer to them.) Add a dot of glue in front, another behind, and one on each side, forming it into an oval shape with the longest part going from front to back. (Your head is more oval-shaped and not a perfect circle.)
- Once cooled, have the person try on the head mask and see if it fits comfortably. Make adjustments as needed before completely gluing the strip in place. If it looks good, run a line of hot glue along the seam to reinforce the band.
Cut eye holes
- Have the person try on the headpiece and press it against their eyes. Mark the eye area with a piece of chalk.
- Make sure the marks are centered across the width of the front of the box. If they are off-center, move both marks as needed to center them (keeping the same amount of space between them).
- Cut out a small circle in the marked spot for each eye. This is only the initial cut, so keep it relatively small.
- Have the person try on the mask again to make sure the holes are in the right place for them to see out of them. Make a note of which direction you should enlarge the holes to make them easier to see out of.
- Enlarge the holes into rectangular eye holes that are large enough to give good visibility. (You may want to wait to completely enlarge them until after adding the enderman eyes!)
Adding the eerie enderman eyes
- Print out the file for the enderman eyes onto waterproof photo paper that is 10×15 centimeters (4×6 inches).
- Cut off the excess white areas and then cut what's left in half across the purple stripes. (You want all 3 bands on each section.)
- Cut each section in half again. (You now have 2 sets of eyes. You only need one, but have an extra one just in case.)
- Glue the purple eyes onto the box along either edge wherever it looks best on your mask. In our case, we lined them up with the eye holes made in our mask. I then enlarged the holes, even more, to line the eye holes up with the top and bottom of the purple eyes.
- If you don’t have a printer, you can use two different shades of purple craft paint to paint the eyes on instead!
Putting the costume together
- Have the person dress in all black.
Adding the lights
- Position the lights in a way that the battery pack can be comfortably worn in one of the pockets. (If you don't have pockets, either use a black fanny pack or tape the battery pack to the pants with black duct tape.)
- Now, position the lights going down and back up one leg, over and around the child's head (resting behind the neck) and then back down the other leg. Leave plenty of room on the string of lights to be able to pull the lights on and off over the child's head. (We'll be attaching the lights to only the pants so the child can get dressed and remove the costume without needing to take it apart.)
- Fasten the lights to the pants with safety pins every twenty to thirty centimeters. To mark the position and later hide the safety pins, pin them on the outside while the child wears the cotume.
- Once the child removes the costume, move each pin to the inside in the same place it was. (If you're using black safety pins, they can be left on the outside.)
- Safety pins (especially if using black safety pins on the outside) can be easily adjusted, as needed, when the costume is worn.

Thanks so much for this, very helpful and exactly what I’m looking for to make my son an Enderman costume
Hi Kelly!
You’re so welcome! I hope your son has fun with it! 🙂