

Hammered Shamrock Prints and Clover Hearts

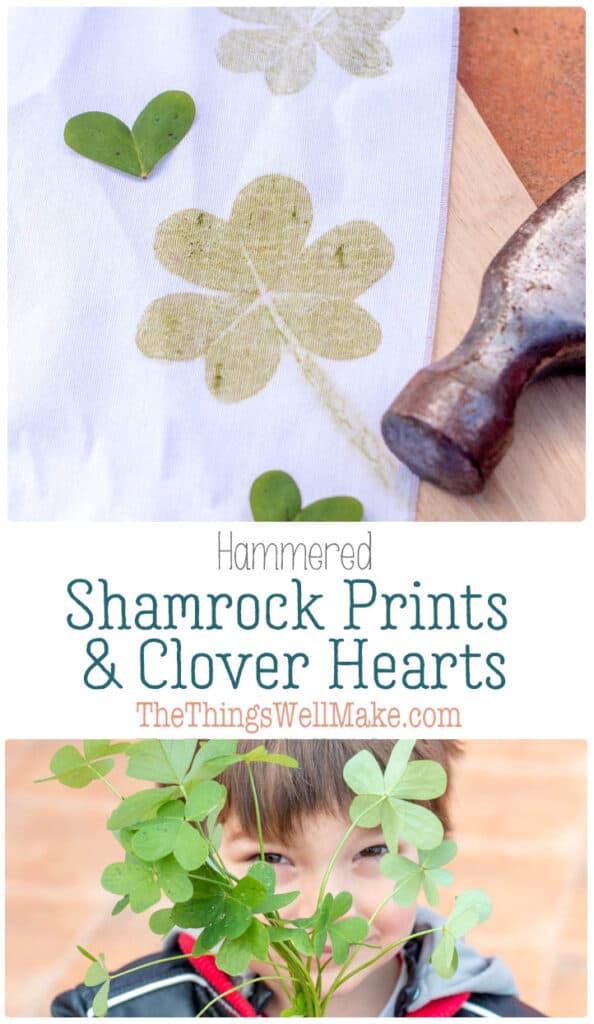
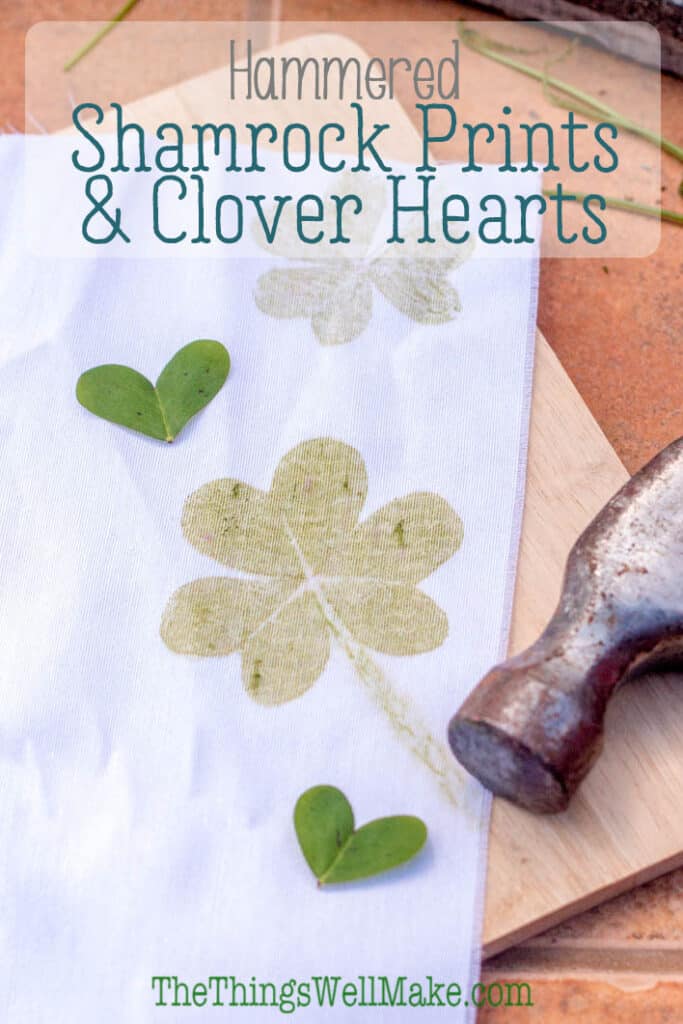
A fun St. Patrick’s Day activity for kids or adults, these hammered shamrock prints and clover hearts are a festive way to decorate cloth for all sorts of holiday projects.
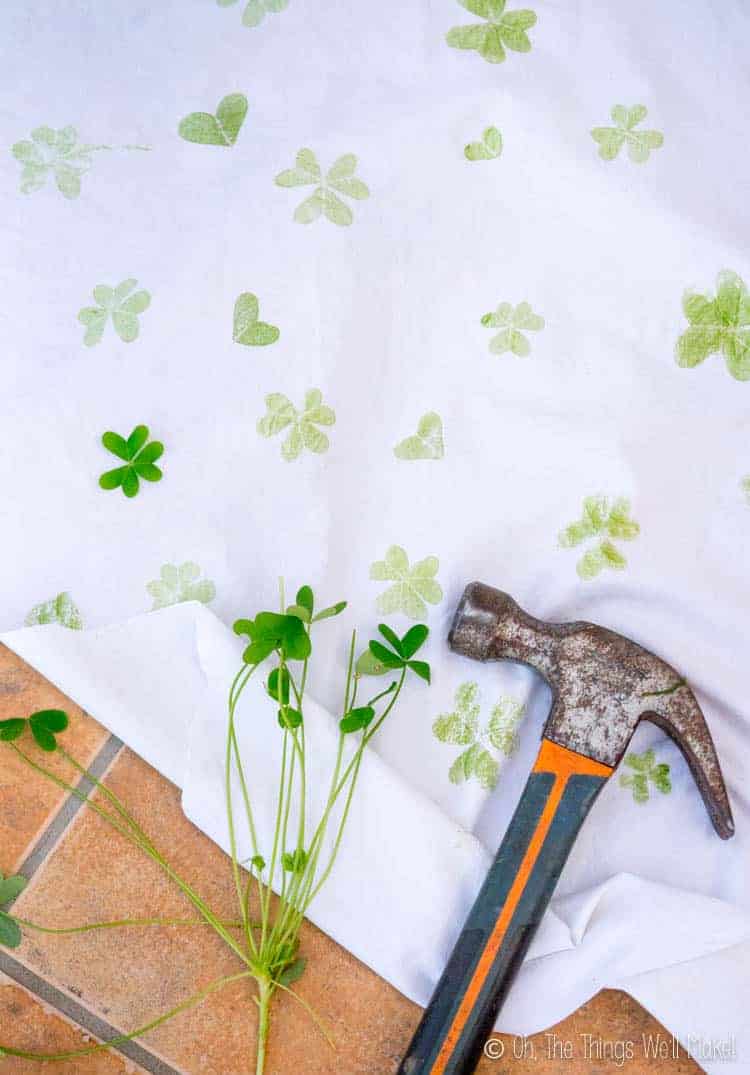
When I made lavender sachets a while back, I naturally decorated them with hammered lavender flowers. At the time, I experimented with making hammered prints with different leaves and flowers. My favorite leaf prints were the hammered clovers.
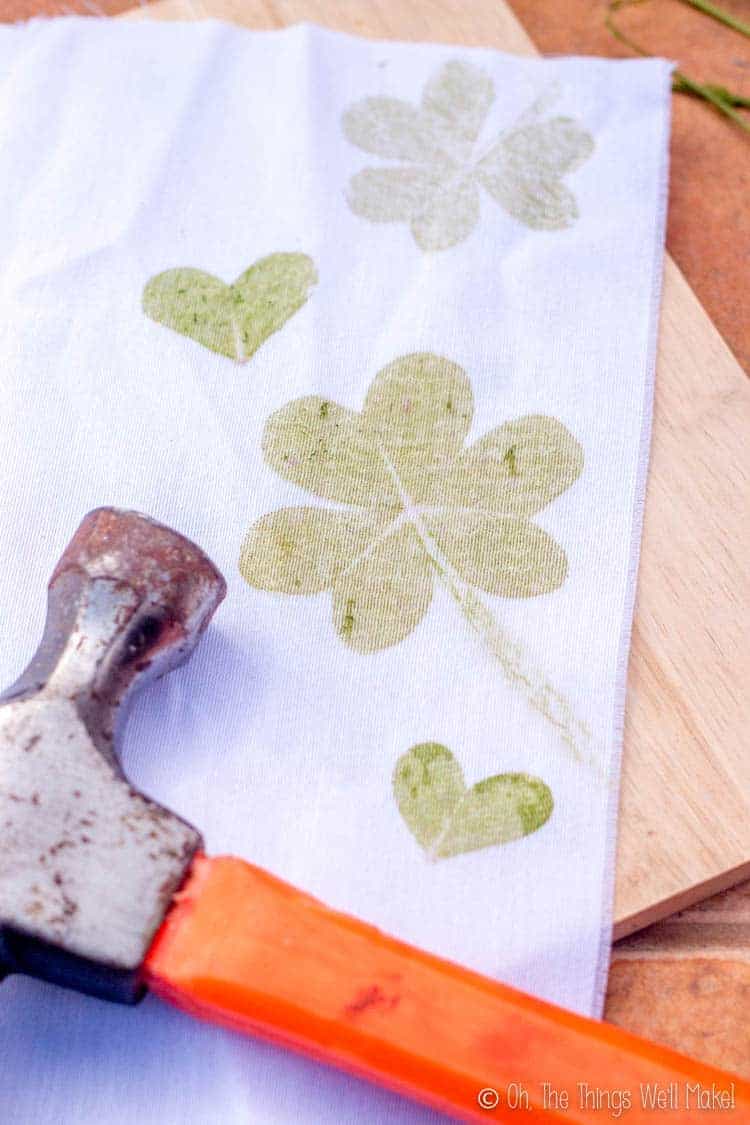
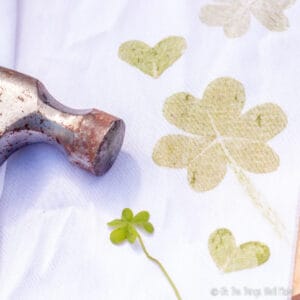
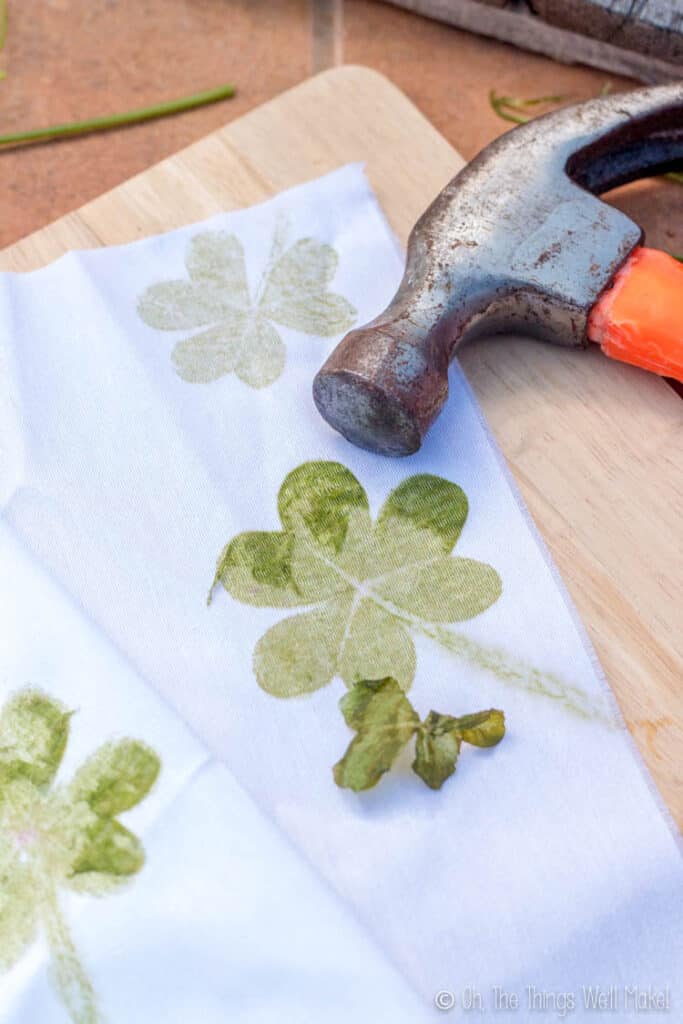
The heart-shaped leaves of the clovers are quite versatile. They make very cute shamrock prints that are perfect for St. Patrick’s Day. By separating the leaves, though, you can also make some beautiful natural hearts. That would also make this a super-cute natural project for Valentine’s day!
Including kids in the activity
This activity can be done with kids, but, because we are using a hammer, it will need adult supervision.
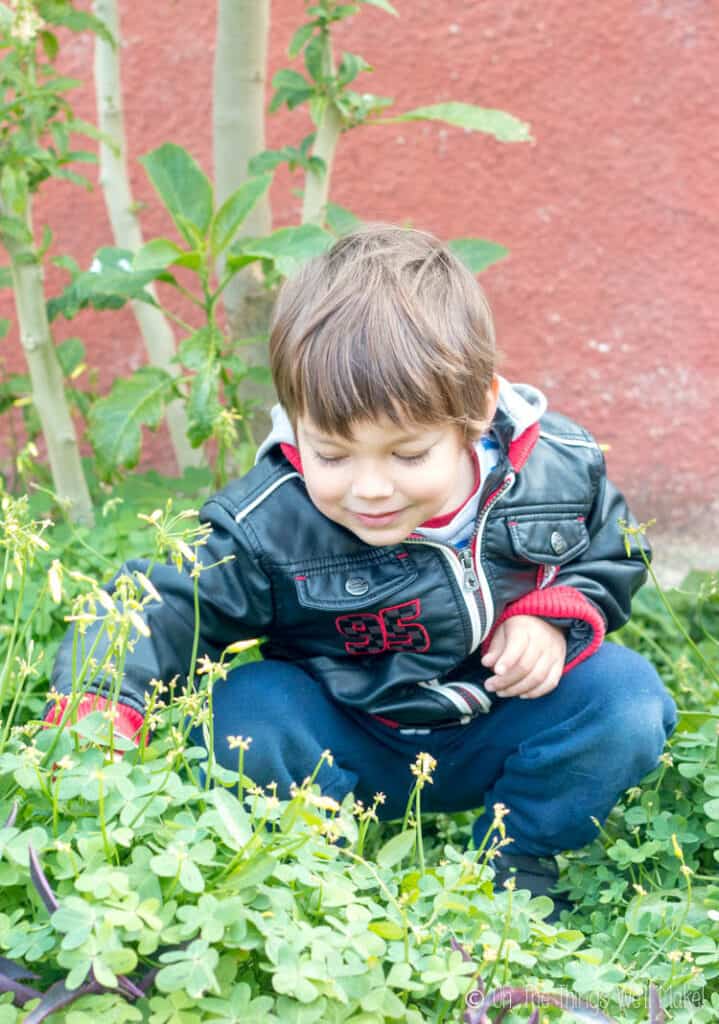
That said, even the youngest of kids can get involved and help you make these prints. Young children can go shamrock hunting for you and they can help you place the plants wherever you want to mark the cloth. Older kids can do the hammering themselves (with supervision, of course). Kids of all ages are amazed by the outcome.
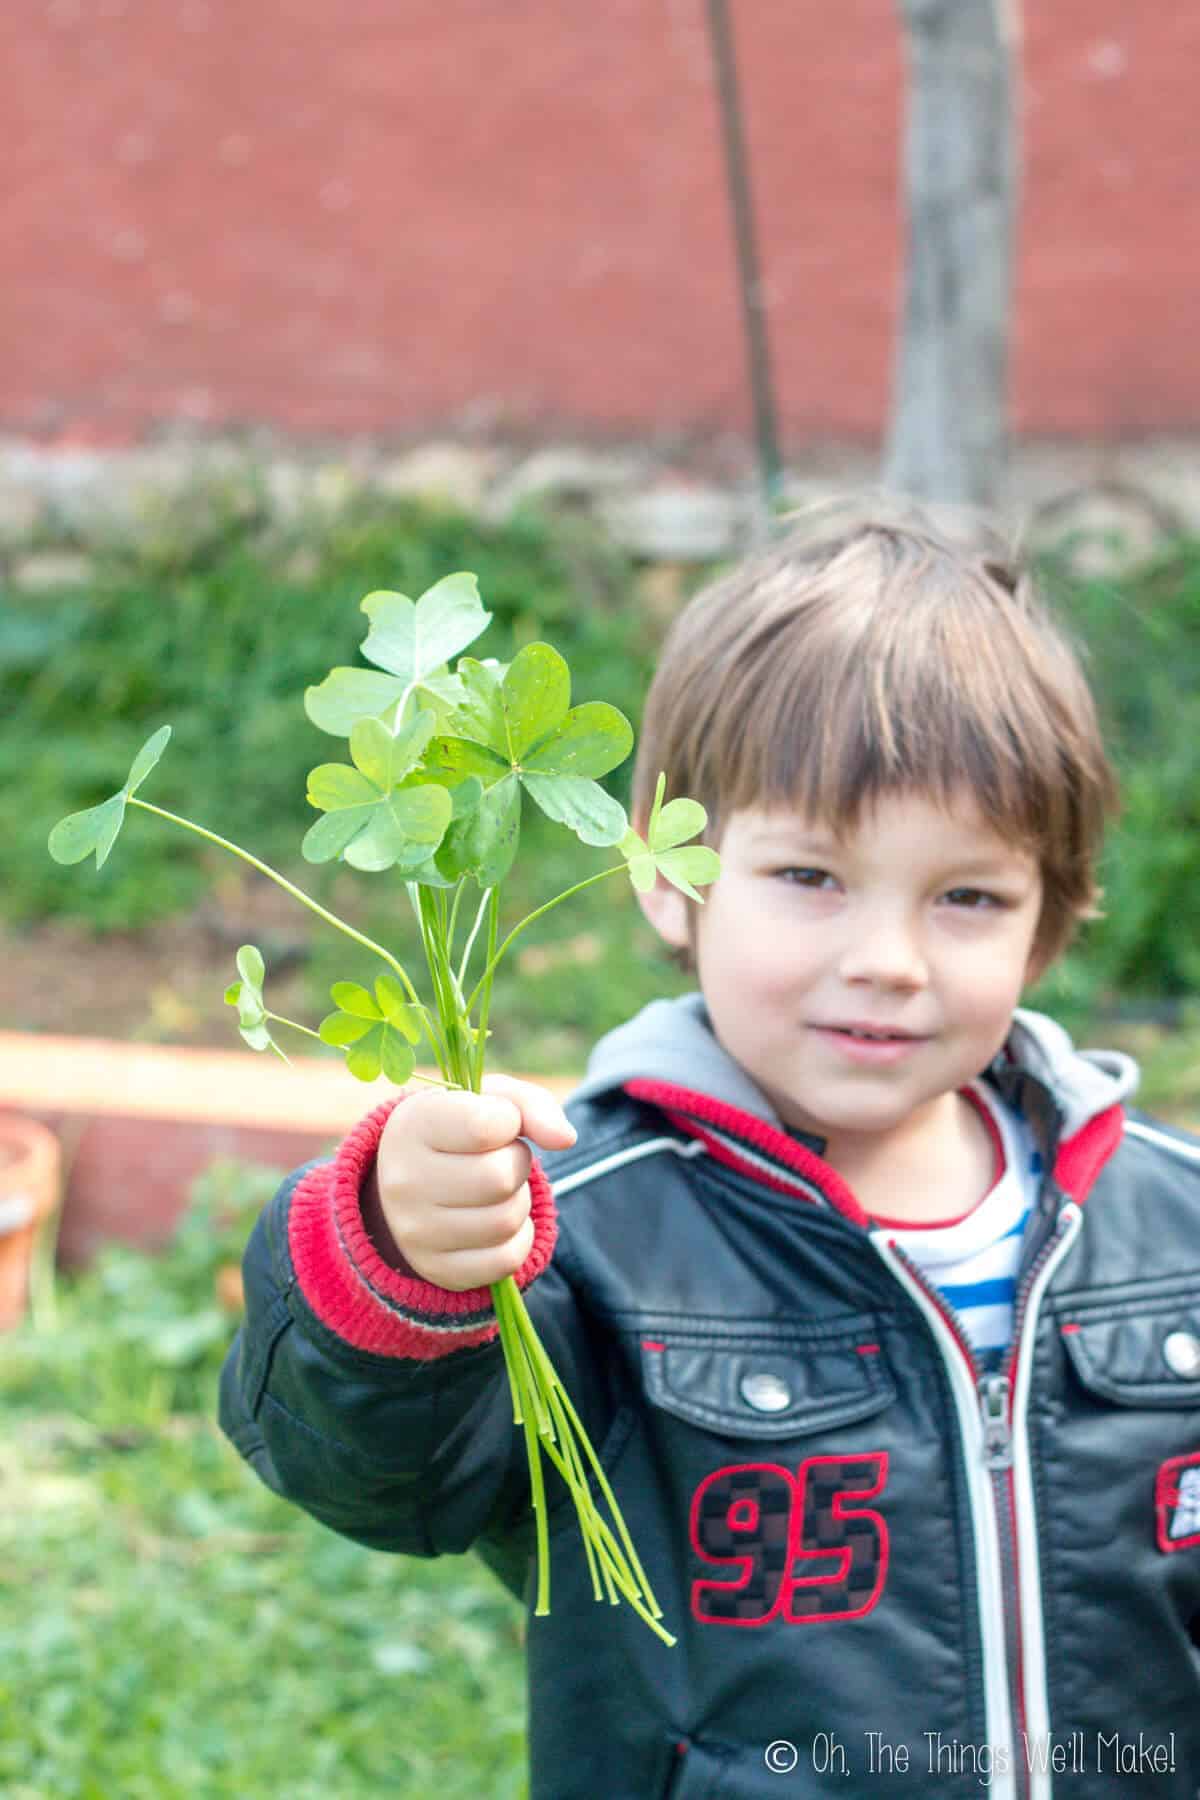
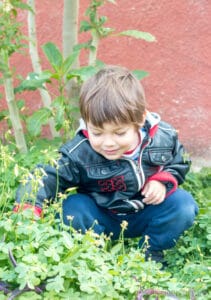
I’ve done this project with my son several times over the years. When he was very little, he had fun picking clovers for me. He got bored before it was his turn to bang on the clovers, though. I wasn’t too upset about it because I have to admit that I was a bit worried about how I was going to get him to hammer the cloth without hurting himself and/or me!
This year, now that he’s older, he was very excited to bang on the cloth for me. He quite enjoyed himself and loved seeing the outcome. It also ended up being a great excuse for getting outside just as the weather is starting to warm up. (Hopefully, you have nice weather now too!)
Materials
- Clovers
- White cotton cloth or absorbent paper (Watercolor paper works well.)
- Hammer (A metal hammer works much better than a rubber mallet.)
- Wooden board or another work surface (Note: it may get stained or dented.)
Instructions
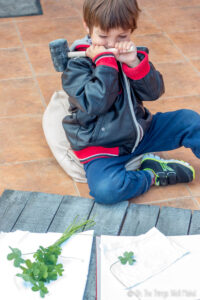
- Begin by looking for pretty clovers that you want to use for your hammered shamrock prints. Kids usually love this part of the activity and happily bring you lots of clovers.
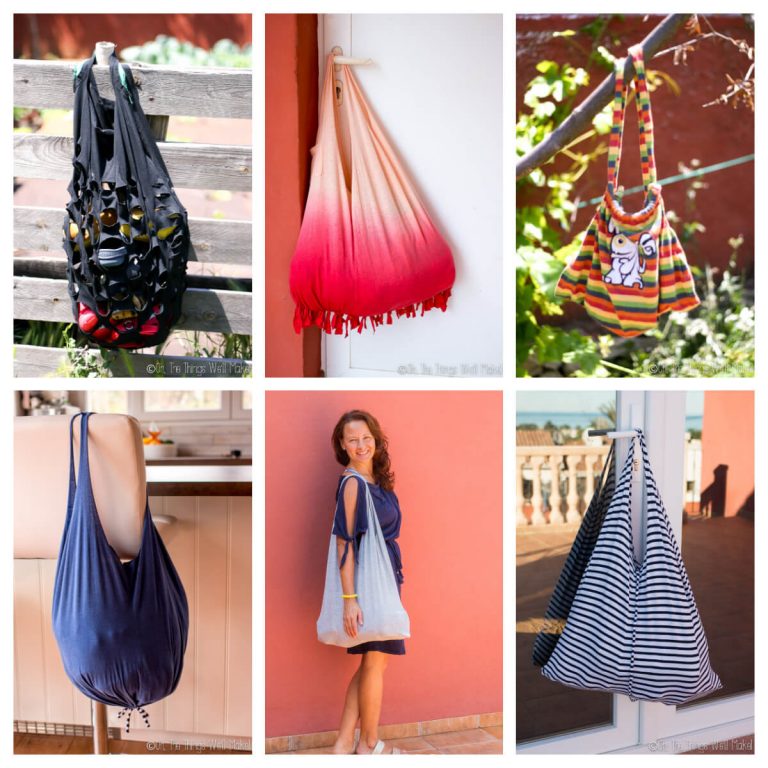
- Decide where you want to make your print. You can print on cloth, paper, or other materials. Everything from cards and stationery to t-shirts and kitchen towels can be easily decorated. It’s fun to experiment to see which materials make better prints.
- Look for a solid, smooth surface over which you can place your fabric or paper. Use something that you don’t mind staining or denting! I used a pine board once but found that the veining of the wood showed up. This time I used a smoother, wooden cutting board and it worked much better.
- Cover your work surface with the cloth or paper that you want to decorate.
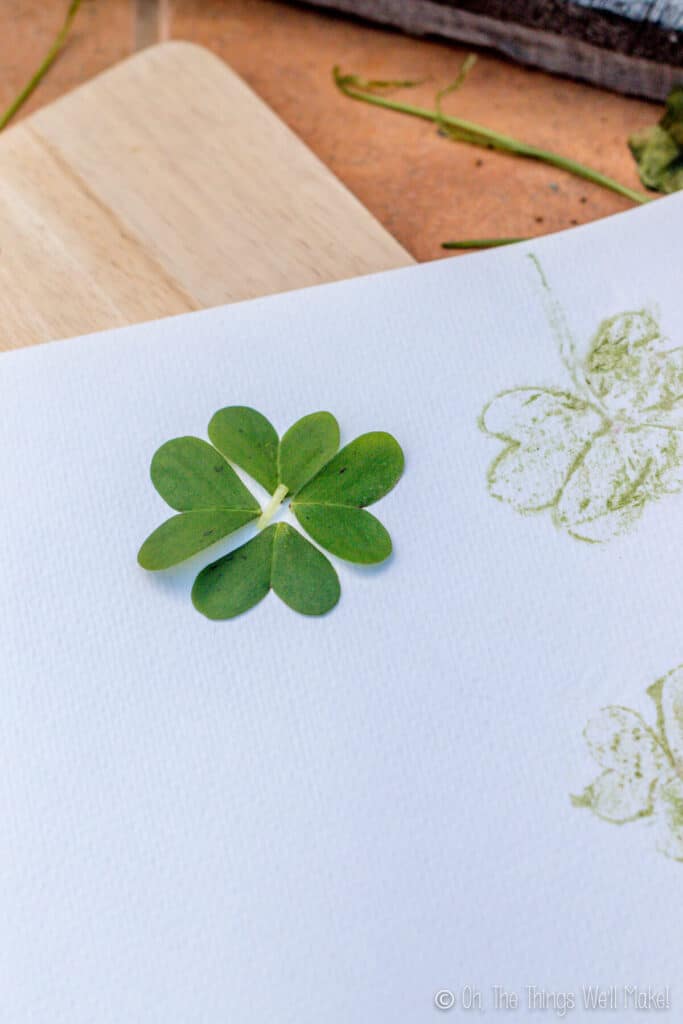
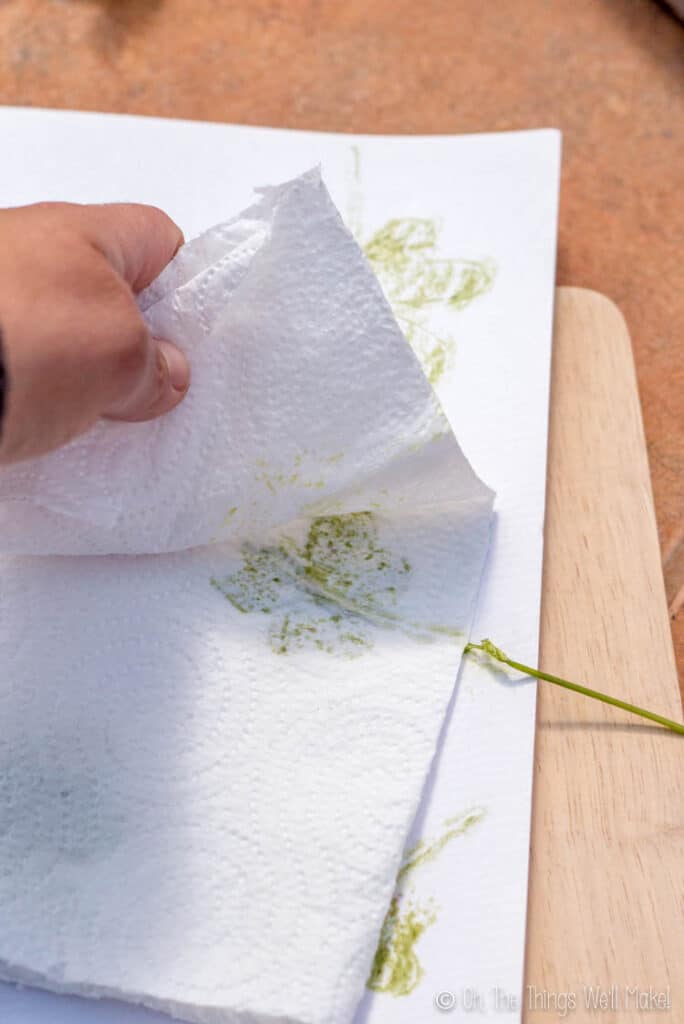
- Place your leaves or flowers into position on the board, and cover them with another layer of cloth or some paper towels. Covering them helps hold them in place and also absorbs some of the released dyes so that they don’t bleed all over the place. While the paper towel worked OK, I think the cloth made a better backing and also has the advantage of letting me stamp two cloth pieces at once. ?
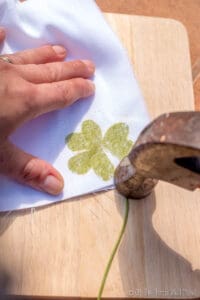
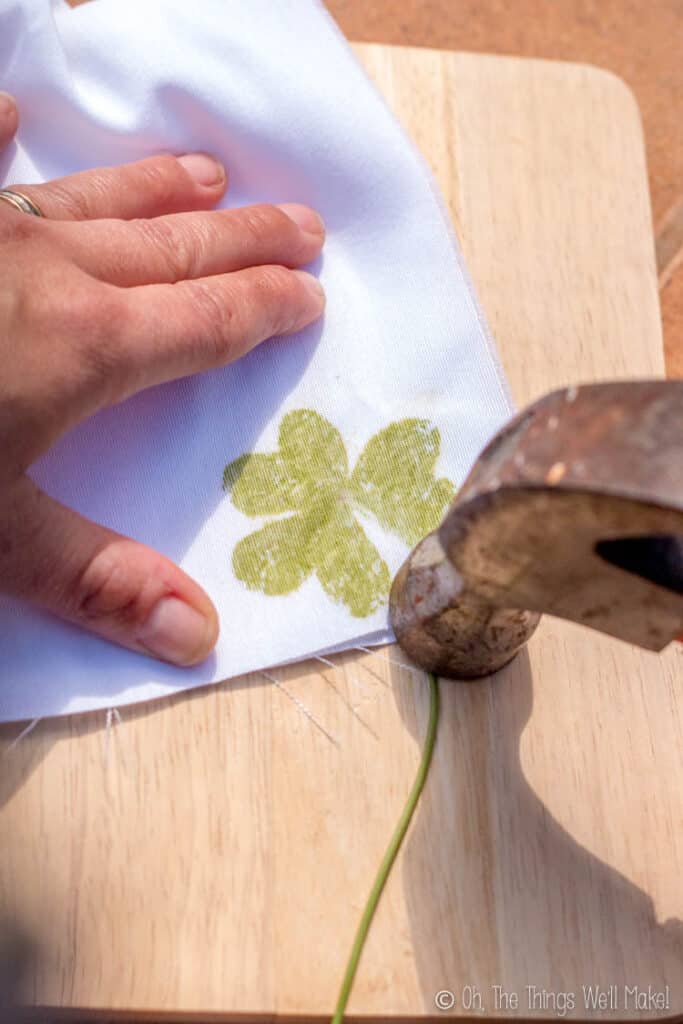
- Lightly tap over the entire surface of the clover or leaves you are using. This helps hold the materials in place. At first, we tried to use a rubber mallet, but it didn’t make the most vibrant and clear prints. We later found a normal hammer to work best!
- Once you’ve gone over everything lightly, start hammering all over the entire surface of your leaves with a bit more force. If you are using a cloth backing, you should start to see the dye from the plants starting to seep through.
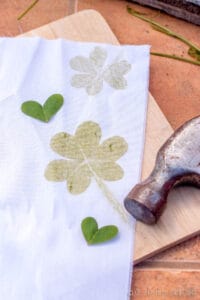
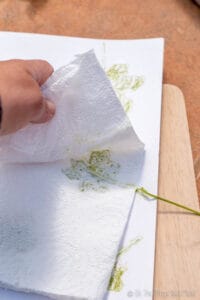
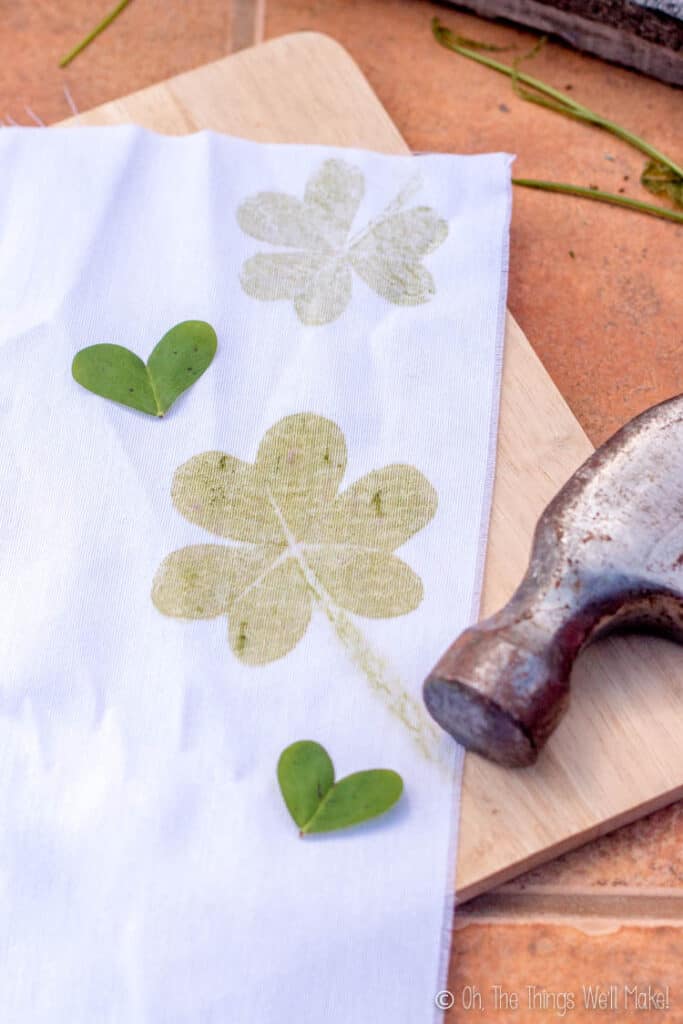
- When the dye seeps through pretty evenly, you have probably done a good job of hammering and should be ready to open it up and admire your work. The plant material may stick to the fabric. You can either carefully peel it off right away, or let it dry a little and then peel it off.
- That’s all there is to it! Admire your work!
Trying to make a 4 leaf clover 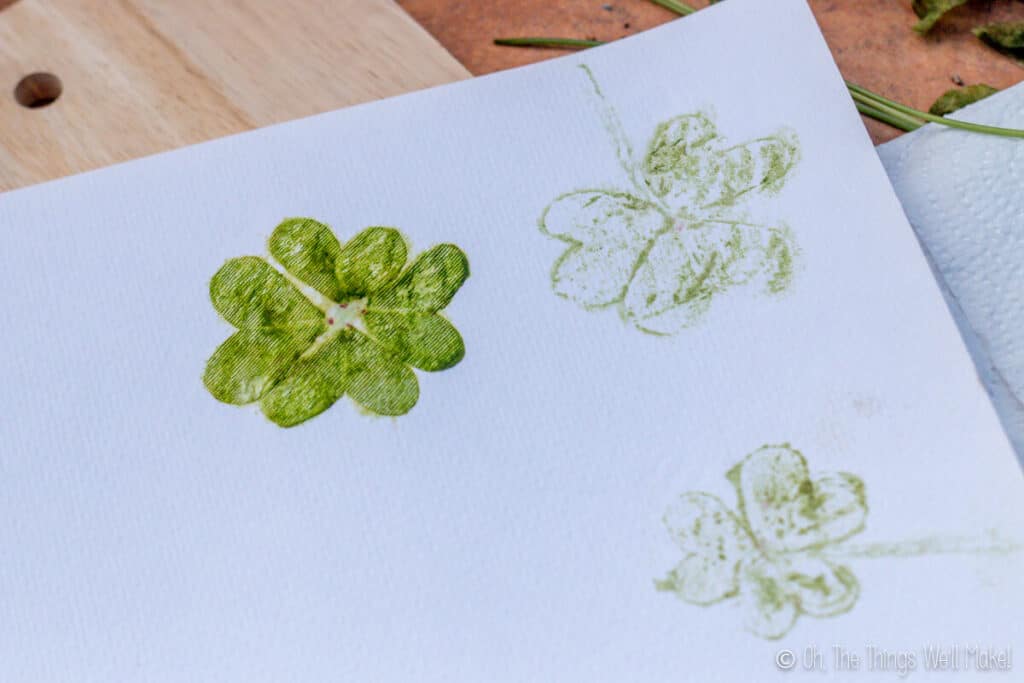
Using a hammer on watercolor paper leaves a clear print.
Video
Setting your prints to make them more permanent
I’ve washed a few of the hammered cloth prints, and they’ve held up pretty well to regular washing. (You know how hard it is to get grass stains out, right? This is the same concept!)
To ensure that the prints don’t wash away, it’s probably a good idea to run a hot iron over the prints before washing your fabric. The heat will help set the “stain” and make it more permanent.
Happy St. Patrick’s Day, everyone!
Tutorial
Shamrock Prints and Clover Hearts
Materials
- clover leaves
- cotton cloth
- hammer (A metal hammer works better than a rubber mallet.)
Instructions
- Go on a nature hike and look for pretty clovers that you want to use for your hammered shamrock prints.
- Decide where you want to make your print. The great thing about hammered leaf printing is that you can use it to decorate a variety of paper and cloth projects. Everything from cards and stationery to t-shirts and cotton cloths can be easily decorated.
- Look for a solid, smooth surface over which you can place your fabric or paper. Use something that you don't mind staining or denting! I used a weathered pine board once, but found that the veining of the wood showed up. Using a smooth wooden cutting board worked much better.
- Cover your work surface with the cloth or paper onto which you want to hammer your flower or leaves. With the clover leaves, a thin cotton fabric worked best for me. It absorbed the dye well and evenly, making the prettiest prints.
- Place the clover leaves into position on the board and cover them with another layer of cloth or some paper towels. Covering them helps hold them in place and also absorbs some of the released pigment so that it doesn't bleed all over the place. While you can use a paper towel, using another layer of cloth has the advantage of stamping two cloth pieces at once. 😉
- Lightly tap over the entire surface of the leaves. This helps hold them in place.
- Once you've lightly hammered over the entire leaf, start hitting over the entire surface with a bit more force. If you are using a cloth backing, you should start to see the pigment from the leaves starting to seep through.
- When you can see the full shape of the leaf through the cloth, you have probably done a good job of fully transering the pigment to the cloth. Open it up and admire your work! If the plant material has stuck to the fabric, you can either carefully peel it off right away or let it dry a little and then peel it off.

- That’s all there is to it! Admire your work!
Notes
Looking for more St. Patrick’s day fun? Why not make a Shamrock Shake? (Or a super healthy candida diet-safe shamrock shake!)
If you’re feeling more like rainbows, try my eat the rainbow spring rolls!


I love this idea! I know my kids would have a blast making fun prints out of clovers. Pinned~
Hi Kati,
Thanks so much. I really appreciate it!
I hope you have lots of fun and have a happy St. Patty’s day! 🙂