

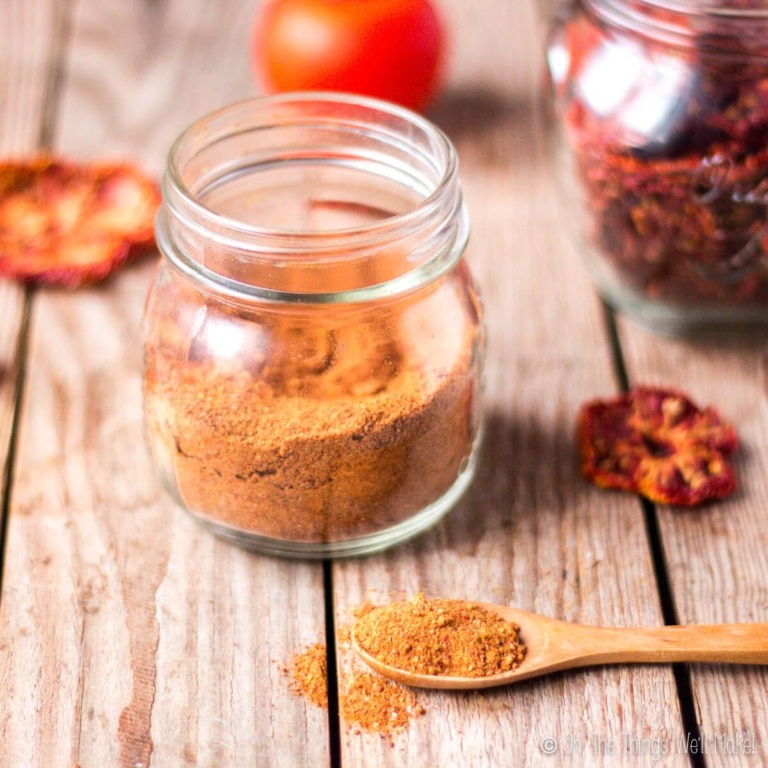
How to Make Ghee from Butter


With a nutty flavor, ghee is a healthy, stable fat that’s great for frying and adds flavor to your foods. Learn how to make ghee from butter quickly and easily.
It wasn’t until recently that I started to make my own ghee for cooking/frying. I had been frying foods in coconut oil and home-rendered lard to avoid using fats with low smoke points. I had assumed that ghee was just clarified butter and thought it would be delicate for use in cooking. Little did I know that ghee has an even higher smoke point than either of those fats.
What is ghee?
Ghee is a type of highly clarified butter that is often used in Asian foods. It’s also a staple in Indian cuisine. It can often be tolerated by people with lactose intolerance, dairy allergies, or those who can’t otherwise tolerate dairy products. That is because the water and milk proteins, like lactose and casein, are removed while making ghee, leaving only the fat of the butter. So not only is it more digestible and more stable in high-heat cooking, but it also keeps much longer than butter.
Ghee vs. clarified butter
While ghee is a type of clarified butter, it isn’t what people normally refer to when talking about clarified butter, or drawn butter. Both types of clarified butter remove the water and milk proteins, leaving only the butterfat. Ghee, though, is cooked a bit longer to allow for caramelization of the milk solids. That gives it a distinctive flavor that many people love.
Butter is lighter and creamier, but ghee has a deeper, almost nutty flavor. When simmering the butter for long enough, you end up with the deep flavor characteristic of ghee, that differentiates it from just a “plain” clarified butter.
Cooking it longer also means that you are much more likely to have removed all of the water and milk proteins, making it more shelf stable and more easily tolerated by people with lactose or casein intolerances.
Why make it?
Store-bought ghee tends to be pretty expensive. Luckily, it’s very easy to make it yourself. So, you can easily save yourself a lot of money. Plus, by making it at home, you can control the ingredients. So, you can choose organic butter, if you like, and/or butter made from pastured cows.
I love butter, but there are many times that using ghee is preferable to butter. It’s easier to digest for some people and it gives your dish a distinctive taste. It also has a longer shelf life, both when stored in a refrigerator or at room temperature.
Ingredients
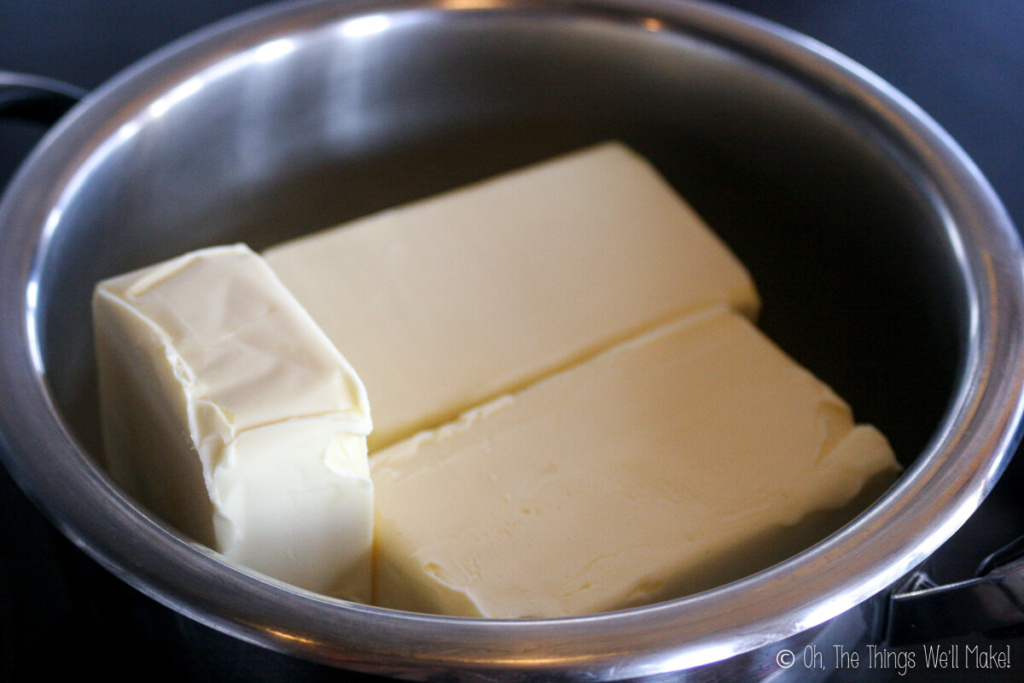
As you may have guessed, the only ingredient necessary for making ghee is fresh butter. I generally use unsalted butter. That said, if you use salted butter, the salt will be filtered out with the milk solids during the cooking process. So, you can use either without issues.
Some people say that homemade butter makes the best ghee! Despite being a hard-core make-it-yourselfer, I haven’t tried it yet to be able to opine. I also have yet to try cultured butter and would love to hear people’s experiences with either!
Procedure
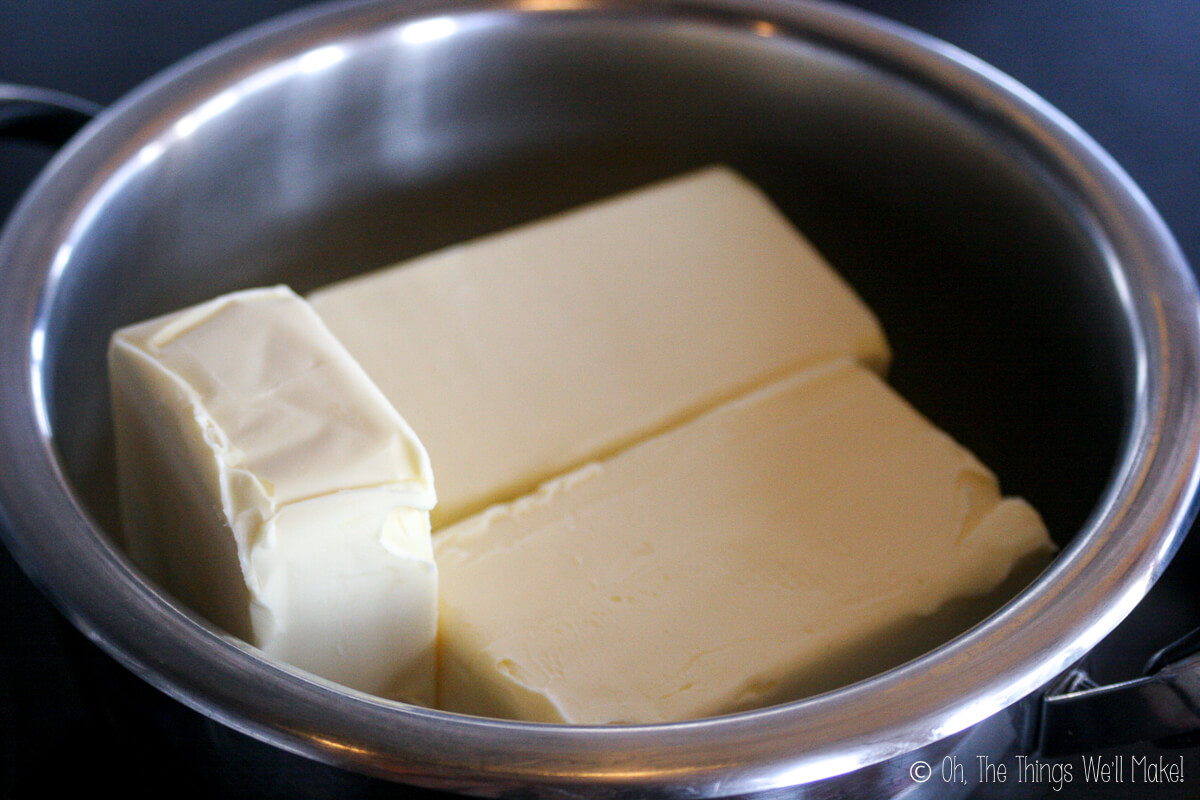
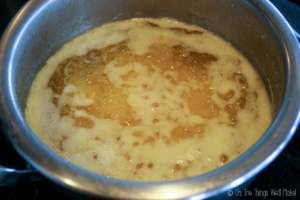
Making ghee is simple. Start by melting the butter in a pot over medium-low heat. Once melted, turn up the heat to medium-high and bring it to a boil. Immediately reduce the heat to low and let it simmer for about 20 minutes or until all of the milk solids have settled to the bottom of the pot. You may have to pull back the foam to see the solids at the bottom.
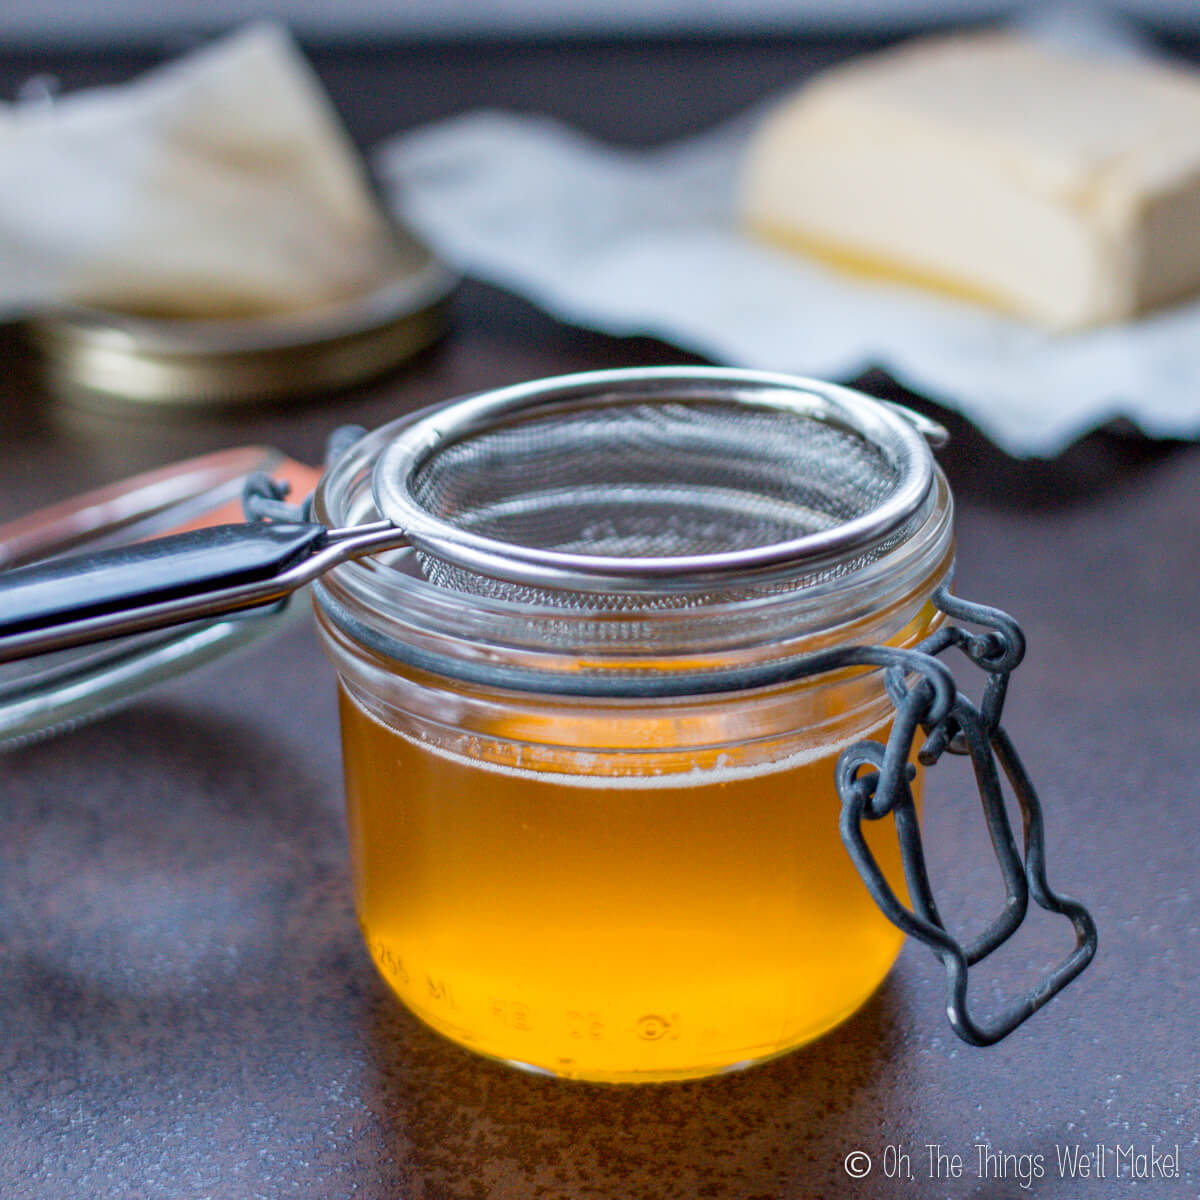
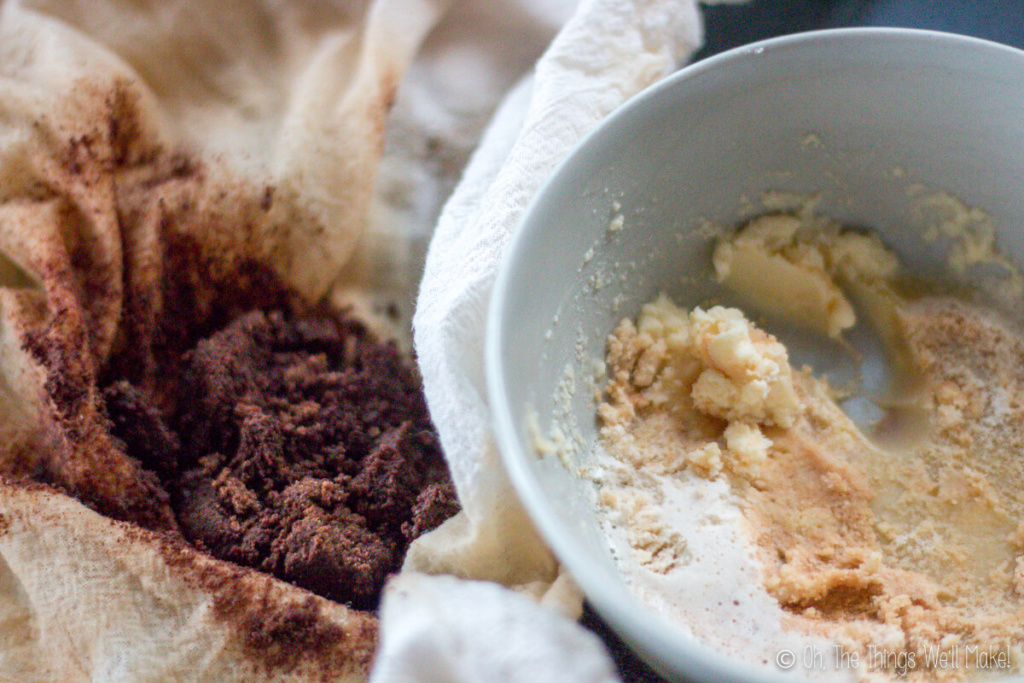
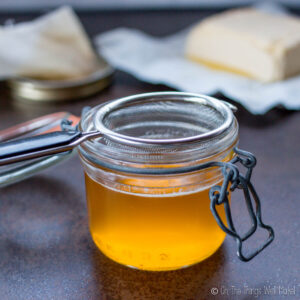
Once the milk solids have turned a toasty brown color, strain the ghee through a cheesecloth or fine mesh strainer into a clean, glass jar. Discard (or eat) the solids. (If you used salted butter, they will be quite salty.)
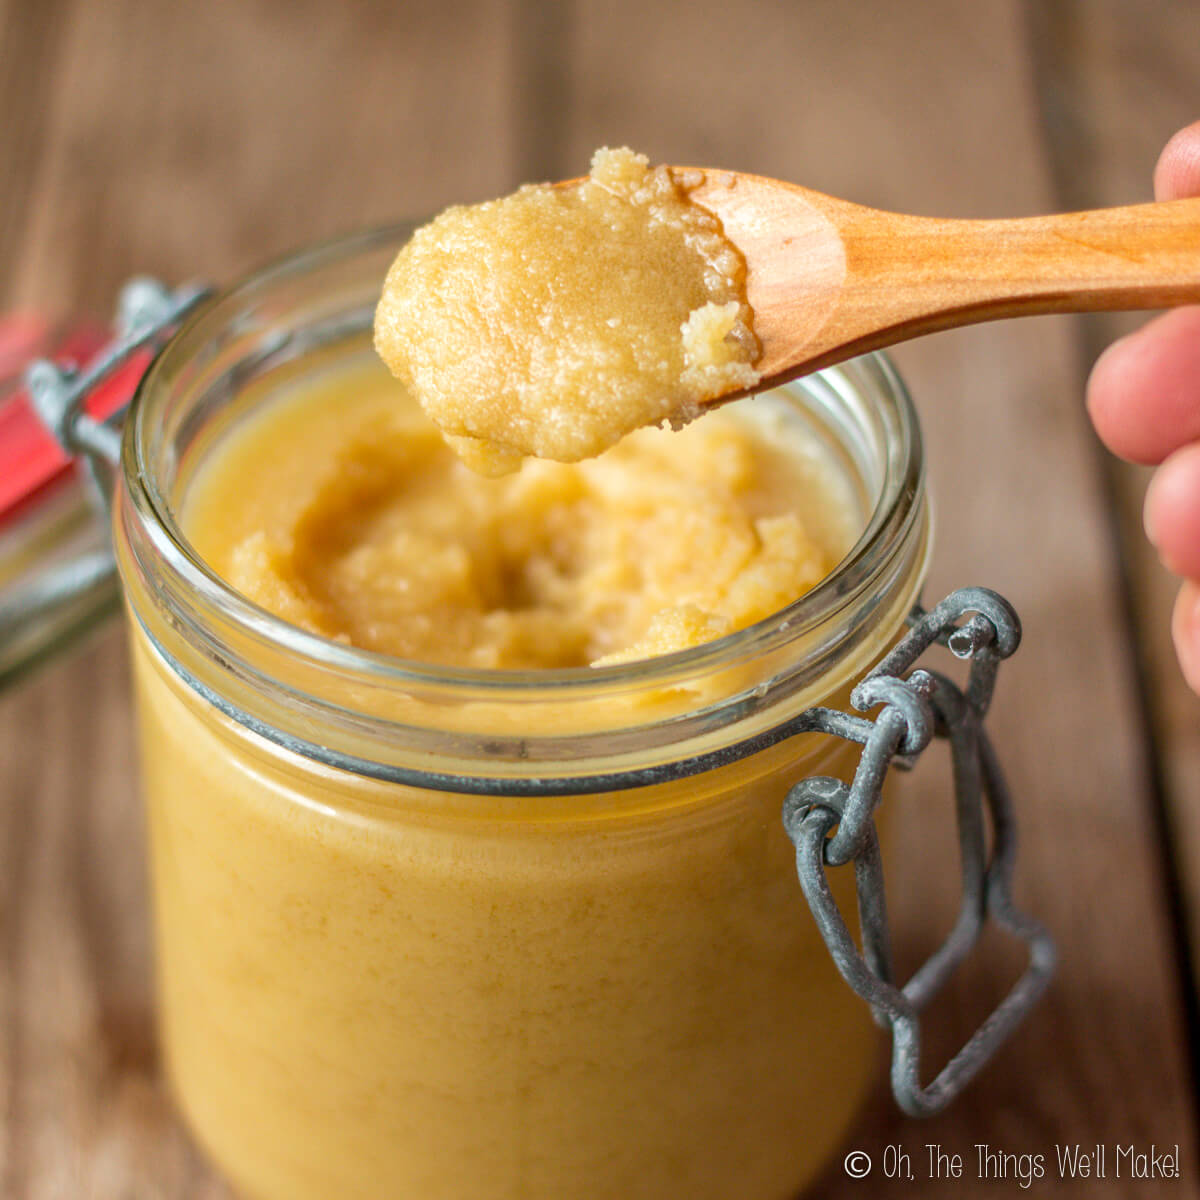
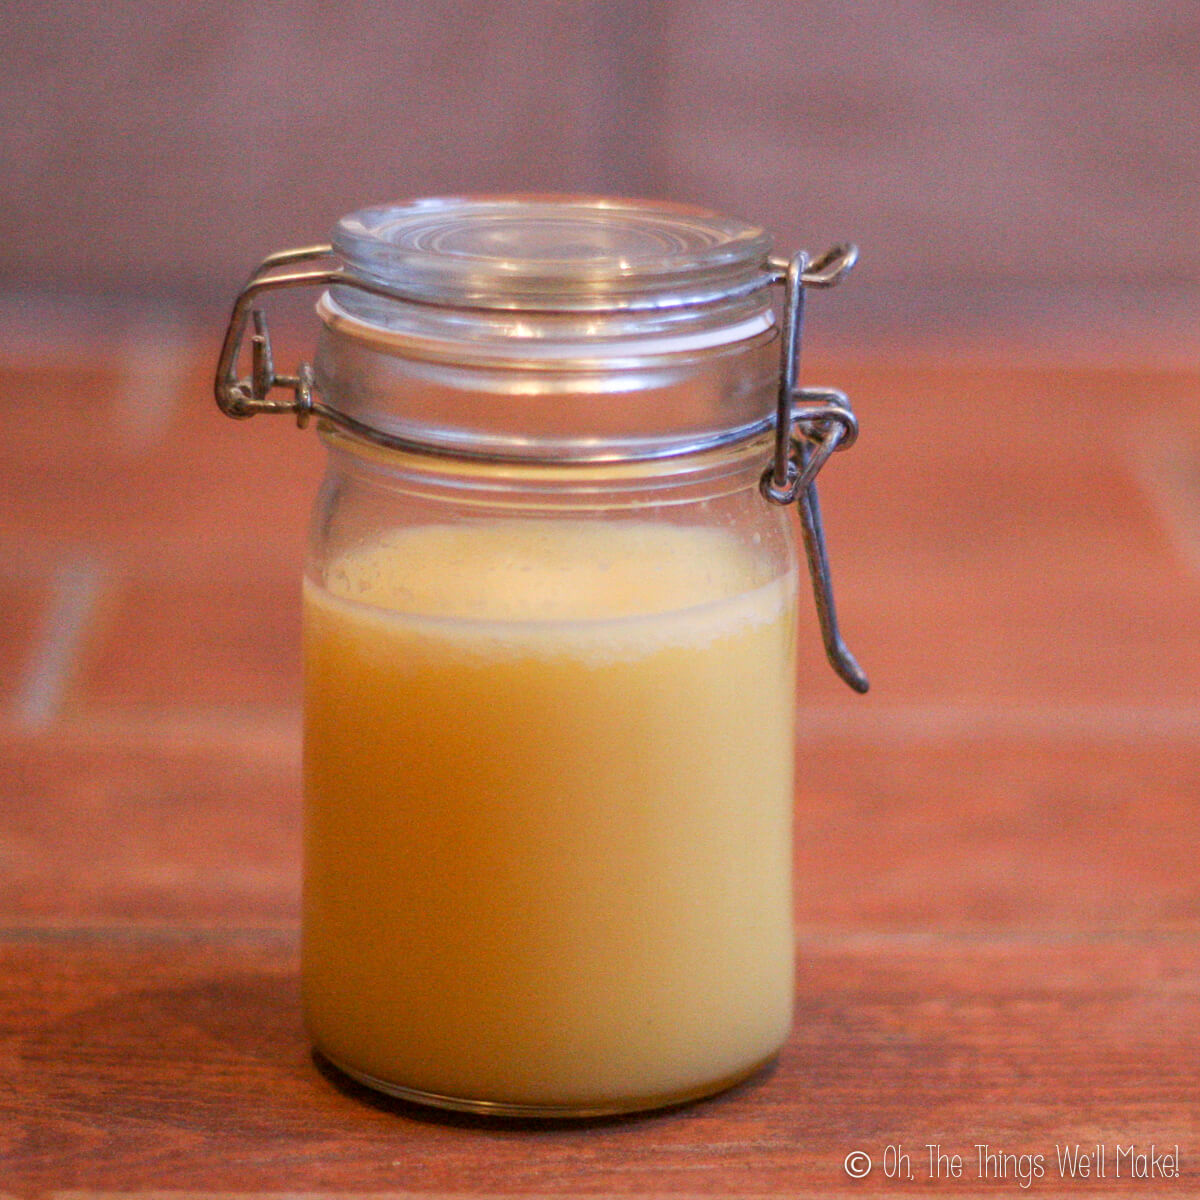
Let the finished ghee cool before sealing it with a lid. This will prevent condensation in your container which could lead to mold growth. Once it cools, it will harden and become opaque. At that point, it is now ready to use!
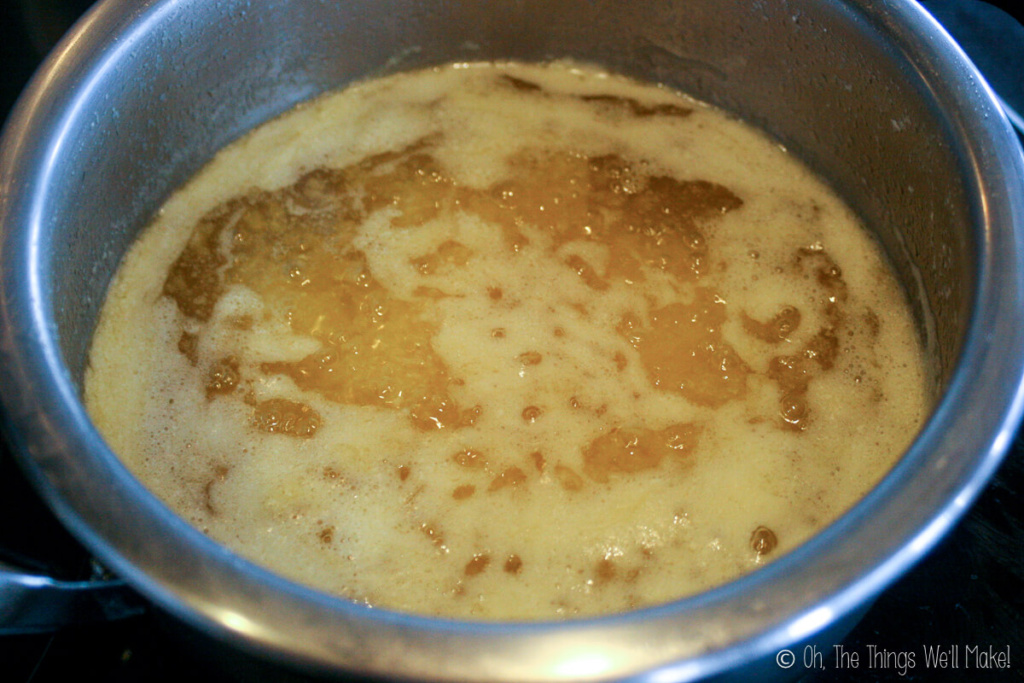
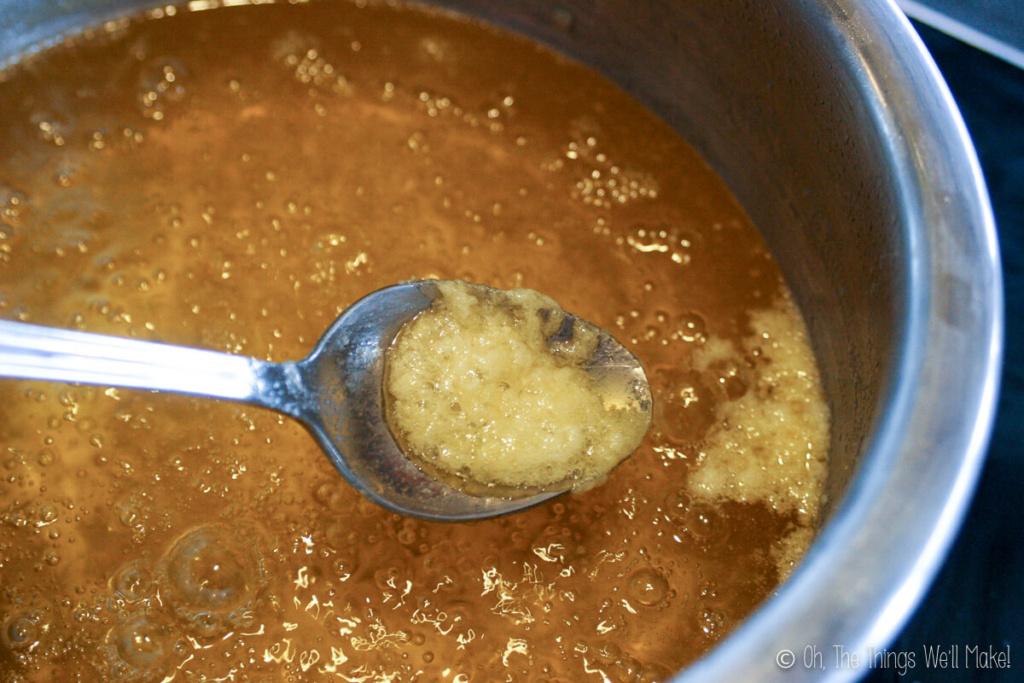
Foamy milk solids that floated on the melted butter (right) and crunchy milk solids that fell to the bottom (left) 
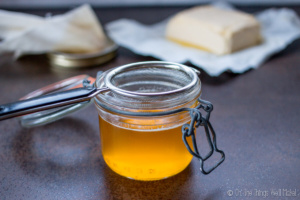
Melted ghee 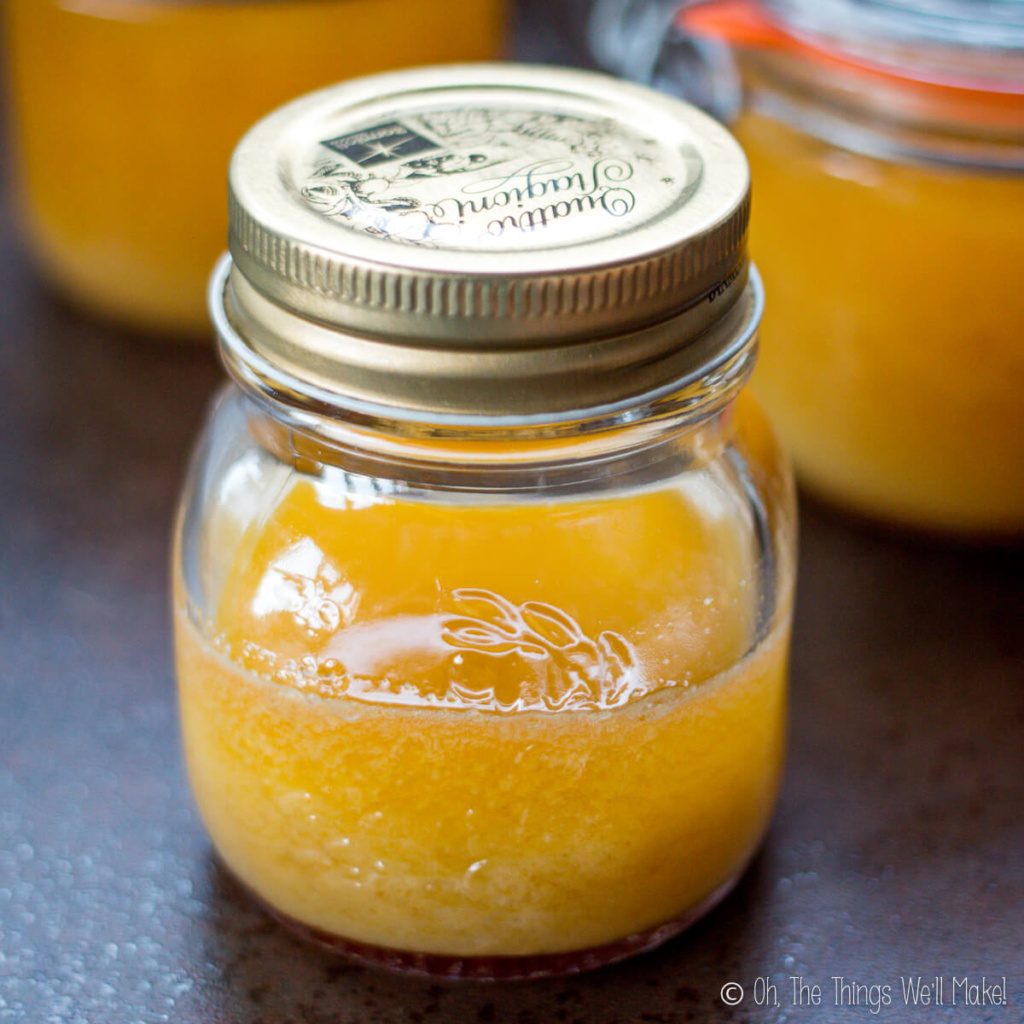
Cooling ghee 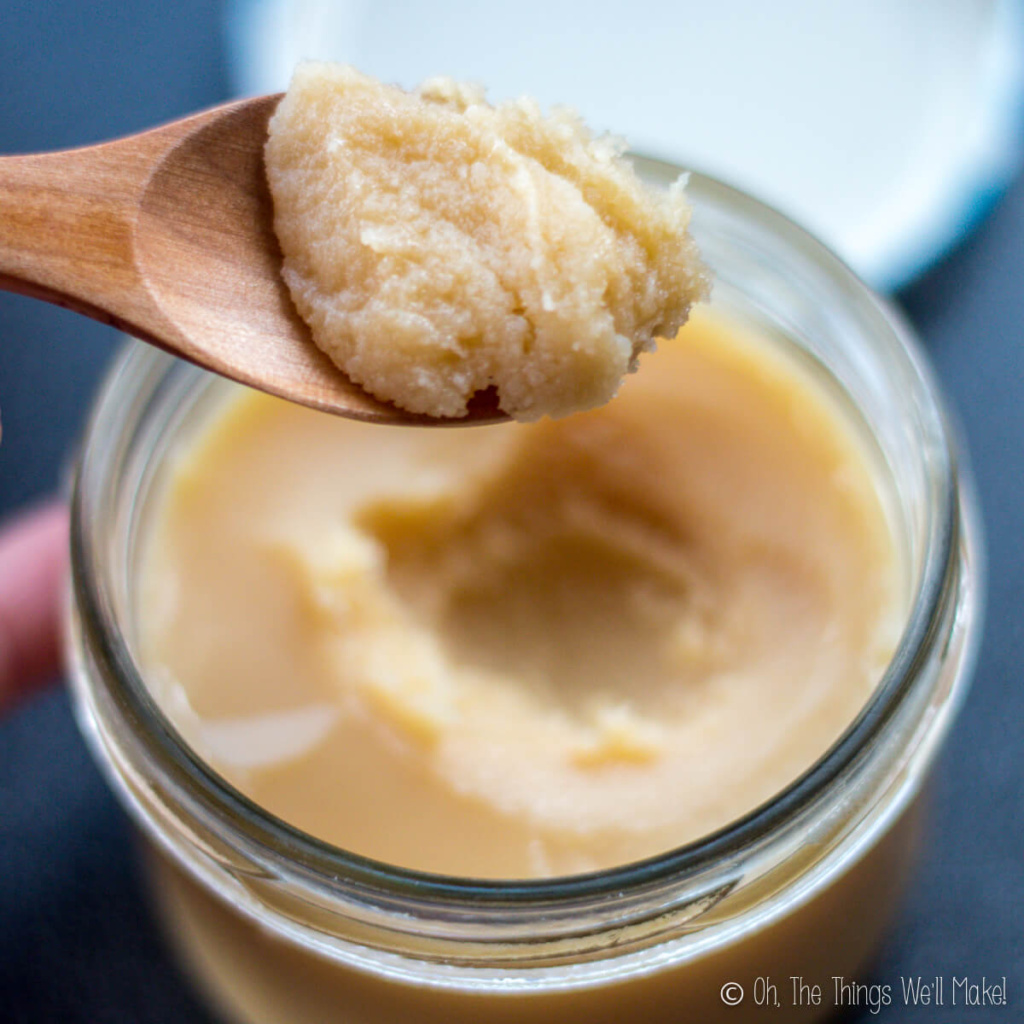
Ghee stored in the fridge gets quite hard.
Health benefits of ghee
Ghee has been used in ayurveda for centuries and is thought to have many health benefits.
- The smoke point is 485 degrees F (250ºC) which lowers the risk of destroying important nutrients such as phytonutrients and makes ghee healthier to bake with. (Butter has a much lower smoke point of somewhere between 250-350ºF/120-180ºC.)
- When well filtered, ghee is free of both lactose and casein proteins making it an option for many people who are normally dairy intolerant.
- Ghee contains butyrate. Butyric acid is a short-chain fatty acid that serves as an energy source for the cells that line your colon. It has been known to help reduce inflammation, support healthy insulin levels, and help improve digestive health, providing relief for those who suffer from Crohn’s disease.
- Ghee is rich in fat-soluble vitamins like vitamins A, E, D, and K. One to two tablespoons of ghee daily will help you meet your Vitamin K intake needs. Vitamin K helps with blood clotting and bone health.
- When made with butter from pastured cows, ghee is rich in CLA (conjugated linoleic acid) which may help aid in weight loss or prevention of obesity and may help control type 2 diabetes.
Storage
Ghee has a much longer shelf life than butter, making it especially convenient for those who are constantly cooking. If you have an unopened jar of ghee, it’s best to store it in a cool, dark place and use it within approximately 9 months from the date you purchased it.
You may store opened jars of homemade or store-bought ghee in your kitchen cabinet away from light or heat for about 3 months, and if not used by then, you may store the remaining amount in your refrigerator. In the refrigerator, ghee can be kept for up to a year. That’s why, when making large amounts of ghee, it’s a good idea to refrigerate part of it, and only take out smaller amounts to keep out on the counter.
Please note, ghee will turn hard in the refrigerator, but it will easily turn soft again when placed on the counter to thaw before use.
Skincare using ghee
You may be surprised to find that ghee is great for your skin and hair. To prepare the ghee for use on skin, blend it with water. It will form a white, butter-like consistency. Pour off the separated water and add more fresh water. Mix it again, and pour off the water again. This process is repeated many times, as shown in this video.
Here are some benefits of using ghee with your beauty routine for both skin and hair care:
- Ghee can relieve skin wounds such as chicken pox scars and burns.
- A natural skin moisturizer and safe for the face, you can use the prepared ghee as you would a moisturizing mask. To use it in this way, apply it to your skin and wash it off 10 minutes later.
- Ghee may help reduce dark circles under the eyes when applied before bed to the under-eye area.
- Warm up ghee, apply to the tips of your hair, let sit for an hour and then shampoo your hair to help with split ends.
- Ghee is full of fatty acids that can help cure winter dry skin and itch. Apply to your skin during these colder months to keep the skin feeling smooth and less itchy.
Video
How to Make Ghee
Ingredients
- 1 kg. butter
Instructions
- Heat butter in a pan over low to medium heat.

- Once the butter starts to separate, turn up the heat and bring it to a boil. Immediately lower the heat and simmer the melted butter.
- You may choose to skim off the foamy solids that float to the top or just leave them alone.

- As you heat and skim, the butter will further separate, and you will start to see milk solids start to fall to the bottom of the pan. Watch the butter carefully. You don't want to let the milk solids burn!
- Simmer the butter until you end up with a clear, yellow liquid with golden brown milk solids at the bottom.
- Strain the finished ghee into storage containers. While you can just use a stainless steel strainer, straining the mixture with cheesecloth can help remove more of the milk proteins (especially important for those with allergies).
- The transparent liquid that you obtain is your ghee. It will solidify as it cools. you can store it at room temperature for several weeks, or in the fridge for several months.
Notes
This post was originally published on November 24, 2013. It was rewritten with clearer instructions and better photos in February 2023.


How do you make this shelf stable for a long period of time?
Hi Carol,
Ghee is naturally much more shelf stable than butter because the milk solids and water have been removed. As long as it’s cooked long enough so the moisture is gone and it’s stored in a clean, airtight container, it can usually be kept at room temperature for quite a while.
To help it last longer, make sure to strain out the browned milk solids well and avoid introducing moisture or crumbs into the jar. Using a clean spoon each time also helps prevent contamination. Stored properly, ghee can last several months at room temperature, and even longer if kept in the refrigerator.
Hi Tracy, I never knew it could be so easy to make Ghee!! It seems hard to believe that all you do is heat it and then the Lactose is removed.
1kg butter equals to 2lbs butter?
Close-
It’s really 2.2lbs. For this recipe, though, the exact amount isn’t really important. 😉
How much ghee is made from 1kg butter?
Hi Fathima,
I find that usually about 1/4th of the weight is loss to evaporation and the solids that precipitate out, so you should end up with about 750g, more or less from a kg of butter.
Of course, it will depend on how long you cook it, how much you skim off, etc.
May I have process to make ghee from buffalo milk on large quantity say 20 Kgs ghee
Hello,
I’m sorry. I don’t have any experience with buffalo milk. I’m guessing that you’d first have to make a sort of butter with the cream layer that forms on top of the milk. Then you’d follow my instructions for making ghee from that butter. That’s how you’d proceed with cow milk, so I’m just guessing that you’d need to do the same thing.
The only suggestion I have for this perfectly executed recipe is to opt for unsalted organic butter. It is sometimes not difficult to opt for organic full cream milk from a reliable source to whip your own butter and then make ghee. Ayurveda has great health benefts for. Ghee.Keep up the good work!
Thank you, Senchu.
I agree with you 100%. I always choose unsalted organic butter myself, but like to leave the election up to each individual person. I wish I were able to get milk and cream from a reliable source because I’d love to whip up my own butter too! Here, I can get a better quality butter than I can get milk or cream. Ghee, here, is very difficult to come by, and expensive when you do find it, so it makes a lot of sense to make your own. 🙂
Hi Tracy! Would it be possible to make Ghee out of a dairy-free butter, such as coconut butter? Thanks! 🙂
Hi Selah,
My guess is that the ghee equivalent of coconut butter is really just coconut oil. Ghee is just a clarified butter. You are separating the milk proteins and other stuff to obtain the fat of the butter. With coconuts, the fat is just the coconut oil. Does that make sense?
That’s just me thinking “out loud,” though.
Right, that makes sense. Thanks. 🙂 Do you use coconut oil as a spreadable butter for sandwiches? If so, how does it taste?
It really depends on the coconut oil that you buy. I have bought several brands, and some taste more like fresh coconut to me than others. You can also buy expeller pressed coconut oil which is flavorless, so that is great for using in recipes that you don’t want to have a coconut flavor.
I don’t eat a lot of sandwiches, so I don’t really use it like that, but I probably would like it. I have used coconut butter as a spread, but it tastes sweet to me, so I wouldn’t probably use it for sandwiches, unless they were peanut butter or something like that. 😉
I still use butter and a lot of extra virgin olive oil (which is really cheap and abundant here in Spain), so I’m always switching things up. I also use home rendered lard occasionally in cooking, and the recipe is also on my blog. 🙂
I guess I like my fats in general, but I love anything coconut, so…