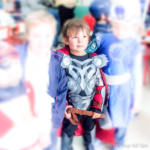
DIY Thor Costume
Make a homemade Thor costume complete with a hammer, chest armor, cape, belt, vambraces, boots, and helmet. This fun superhero costume uses craft foam, felt, fabric, and a few inexpensive accessories.
Equipment
- hot glue gun
- scissors
- Craft knife
- Sewing machine or serger
- Needle and thread
- Paintbrushes
- Soldering iron (optional, for decorative details)
- iron (optional, for fusible interfacing)
- Sandpaper
Ingredients
Thor's Hammer
- Floral foam or Styrofoam
- Packing tape
- Newspaper
- White glue
- Wooden dowel
- Paper towels
- Wall putty spackling
- Black acrylic paint
- Silver spray paint
- Cardboard
- Brown suede or faux suede
- Strong glue
Chest Armor and Belt
- Black craft foam
- Black felt
- Silver acrylic paint
- Hot glue
- Velcro hook-and-loop fastener
Cape
- Bright red fabric curtain fabric, fleece, or jersey
- Thread
Vambraces (Forearm Guards)
- Black craft foam
- Silver acrylic paint
- Red fabric leftover cape fabric
- Quilting batting
- Suede or faux suede strips
- Velcro
- Thread
Boots
- Black boots
- Black craft foam
- Silver acrylic paint
- Black felt
- Velcro
Silver Sleeves
- Silver satin ribbon
- Black tank top
- Thread
- lightweight jersey fabric (optional, for backing the woven ribbons)
- Lightweight double-sided fusible webbing optional, for attaching the jersey backing
Helmet
- Plastic Viking helmet with removable horns
- Silver spray paint
- Inexpensive blonde wig
- Craft foam
- Hot glue
To Complete the Costume
- Black pants or leggings
- Safety pins
Instructions
Make Thor's Hammer
- Cut floral foam into the shape of Thor's hammer, trimming the corners to create angled edges. If needed, layer pieces of foam and secure them with packing tape.
- Cover the foam with several layers of papier-mâché made from newspaper strips and a mixture of white glue and water. Allow to dry completely.
- Make a hole in the bottom of the hammerhead for the wooden dowel. Reinforce the hole with glue-soaked paper towels if using soft floral foam.
- Insert the dowel and glue it securely in place.
- Cover the hammerhead with wall putty to smooth the surface. Allow to dry, then sand.
- Cut a cardboard circle for the decorative disk on top of the hammer. Cover it with wall putty and glue it to the hammerhead, opposite the handle.
- Paint the hammerhead black. Once dry, apply silver spray paint, allowing some black to show through for a metallic effect.
- Wrap the wooden handle with strips of brown suede, securing them with glue. Add a suede wrist strap.
Make the Chest Armor
- Choose a design for Thor's chest armor and resize a template if needed.
- Trace the armor pieces onto black craft foam and cut them out.
- Arrange and layer the foam pieces on a black felt backing, securing them with hot glue.
- Use a soldering iron to burn decorative patterns into the foam, if desired.
- Paint the raised foam details with silver acrylic paint.
- Attach black felt straps with Velcro to the sides of the armor so it can be fastened around the body.
- Leave two felt tabs extending above the shoulders for attaching the cape.
Make Thor's Cape
- Cut a rectangle of red fabric to the desired length and width.
- Fold the upper edge back and forth to create pleats. Sew across the pleats to hold them in place.
- Finish the raw edges using a serger, sewn hems, or fusible hem tape. Fleece and jersey generally don't require hemming.
- Attach the upper corners of the cape to the two felt tabs on the chest armor using safety pins, leaving an opening between them for the head.
Make Thor's Belt
- Cut a felt backing and decorative craft foam pieces to create the belt.
- Glue the foam pieces onto the felt, layering them for a raised effect.
- Burn decorative patterns into the foam with a soldering iron, if desired, and paint the details silver.
- Add felt straps with Velcro fasteners so the belt can be adjusted around the waist.
Make the Vambraces
- Resize a Thor vambrace pattern to fit the wearer's forearms.
- Trace the design onto black craft foam, cut out the pieces, and glue them together in layers.
- Burn decorative lines into the foam with a soldering iron, if desired, and paint the pieces silver.
- Cut two rectangles of red fabric for each forearm guard. Place each pair right sides together and sew around the edges, leaving a small opening.
- Turn the fabric right side out, add quilting batting for padding, and sew the opening closed.
- Cut suede strips long enough to wrap around the forearms. Attach Velcro to their ends.
- Sew the suede straps onto the padded red fabric, reinforcing the Velcro with stitching.
- Hot glue the decorated foam pieces onto the padded fabric.
Make the Boot Covers
- Cut black craft foam into decorative armor pieces that wrap around the tops of the boots.
- Add decorative lines using a soldering iron, if desired.
- Paint the foam pieces silver.
- Attach black felt straps with Velcro to secure the armor over the boots.
Make the Silver Sleeves
- Weave silver satin ribbons over and under each other to create two large panels of patterned fabric.
- For a more stable fabric, try bonding the woven ribbons to lightweight jersey fabric using double-sided fusible webbing before cutting the sleeve shapes. Test a small section first to make sure the finished fabric remains flexible enough for comfortable sleeves. (Optional improvement.)
- Trace the shape of a shirt sleeve onto each panel, allowing extra room for seams and movement because the woven ribbons won't stretch.
- Cut out the sleeve shapes and sew ribbon along the wrist edges to finish them.
- Fold each panel lengthwise with right sides together and sew along the long edge to form a sleeve.
- Turn the sleeves right side out and pin them to the armholes of a black tank top.
- Hand-sew the sleeves to the tank top.
Make Thor's Helmet
- Remove the horns from a plastic Viking helmet and spray-paint the helmet silver.
- Cut an inexpensive blonde wig into strips and hot glue the hair along the inside edge of the helmet.
- Glue a strip of craft foam over the attached hair to cover the glue and improve the fit.
- Cut two wing shapes from craft foam and glue them over the holes left by the removed horns.
Assemble the Costume
- Put on black pants or leggings and the tank top with silver sleeves.
- Slip the connected chest armor and cape over the head, with the cape hanging behind. Fasten the armor straps with Velcro.
- Secure the belt around the waist.
- Put on the black boots and fasten the decorative boot covers over them.
- Attach the vambraces over the sleeves.
- Finish with Thor's helmet and hammer.
Notes
Save money: Check thrift shops for inexpensive boots, helmets, wigs, curtains, and other materials you can repurpose. You don't need to buy everything new!
Sizing: Adjust the armor, belt, vambraces, and sleeves to fit the person wearing the costume. Leave extra room for movement, especially when using non-stretch materials.
Cape: I finished the edges with a serger (overlock machine). If you don't have one, fold the edges over and sew them, or use fusible hem tape. Fabrics like jersey and polar fleece don't generally need their edges finished.
Silver sleeves: For a possible improvement, try bonding the woven ribbons to lightweight jersey fabric with double-sided fusible webbing. This may help prevent the ribbons from shifting and keep fingers from getting caught between them. Test a small piece first to check flexibility.
Alternative sleeves: For an easier version, try stamping a silver diamond pattern onto black sleeves instead of weaving ribbons.
Foam details: A soldering iron can be used to create decorative grooves in craft foam, but this step is optional. Use appropriate ventilation when working with heated foam.