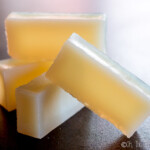
Vegan Glycerin Soap
An alternative to glycerin soaps made with lard or tallow, this vegan glycerin soap recipe uses coconut oil instead to make a hard bar of soap with lots of lather and great cleansing ability.
This makes a large batch that will fill 2 loaf pans. You can divide this recipe in half if you prefer.Servings 18 bars of soap
Ingredients
- 800 g coconut oil
- 200 g castor oil
- 172.3 g lye NaOH
- 380 g distilled water
- 120 g glycerin 8-12% oils+NaOH
- 300 g alcohol 70%+ 30-35% of oils+lye+water
- 90 g sugar 6-9% of oils+lye+water
- 180 g distilled water 12-20% of oils+lye+water
Instructions
Making the hot process soap
- First, we want to make a hot process soap with the first 4 ingredients. Begin by weighing out the water and lye, adding the lye to the container with the water (and not the other way around). This step should be done in a well-ventilated area with eye protection and gloves to protect your eyes and skin.
- Thoroughly mix together the water and lye until the lye has fully dissolved. You’ll notice it will get cloudy and heat up at first, but later it will clear up and cool off.
- Meanwhile, weight out and mix together the two oils and add them to a slow cooker.
- Pour the lye solution into the slow cooker with the oils and gently stir together.
- Once the lye solution has been incorporated into the oils, you can begin to blend it with an immersion blender.
- Continue to blend until you have reached “trace.” Trace is the point in soap making where the oils and lye solution have emulsified, the solution gets opaque and will start to thicken into what looks like a mayonnaise or pudding.
- Once you’ve reached trace, you can place a lid on the soap and allow it to cook for around 3 hours, until the soap gets more translucent.
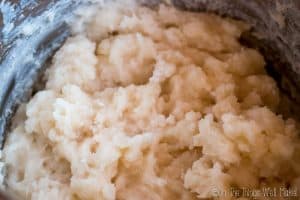
- Once the soap has become more translucent, you have finished making a hot process soap.
Adding the solvents
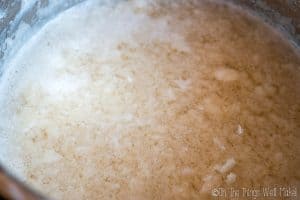
- Weigh out the alcohol and the glycerin. We'll be mixing them together and adding them to the soap.
- Pour the alcohol and glycerin mixture into the soap. You'll probably end up with chunks of soap floating in the liquid. Try to break them up as best as you can. (I used my immersion blender to break up the chunks and fully incorporate the alcohol and glycerin into the soap. Work in a well-ventilated area for this step and be careful not to have any open flames in the area. (You should always be careful when heating high percentages of alcohol.)
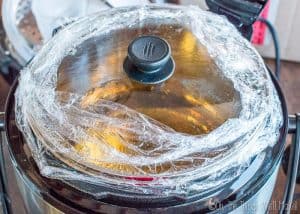
- Cover the crock pot, sealing it as best you can so that the alcohol doesn't evaporate. (If it evaporates too quickly, it won't be able to work its magic on the soap.)If you really have your heart set on making a translucent soap, you should seal your crock pot with some sort of plastic wrap before placing the lid on top. I didn't have any on hand, and wasn't really too concerned about making a fully transparent soap, so I just used the regular lid of my crock pot.
- Allow the soap to cook, covered and sealed, for around 30 minutes.
- Meanwhile, make your sugar syrup (your 3rd solvent) by weighing out the sugar and water and mixing them together in a saucepan over low to medium heat. Continue to cook and stir it until the sugar has completely dissolved. Remove it from the heat.
- Once you've cooked your soap with the first 2 solvents for 30 minutes, you can begin to add the sugar syrup to your soap. Mix it in gently so as not to form a lot of bubbles.
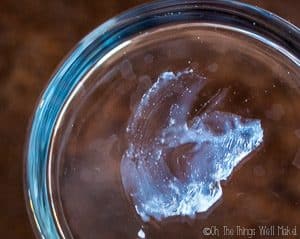
- At this point, you can begin to test the soap for translucence. It will look translucent to the eye, but as it cools, it will become more opaque. You can use the smear test that I explained above. (Smear a small amount of soap over the bottom of a cold, clear glass to cool it.)
- If you want a more translucent soap, you'll have to experiment with adding more solvent, little by little, while continuing to cook the soap. Keep checking the translucence with the frozen glass after each addition.
- Once you are happy with the transparency of your soap, you can add in any fragrances or colorings. With this being a hot process soap, the saponification (soap making) phase is finished by this point, so you could even use food coloring to color your soaps. (Normally lye can react with colorants which can completely change their appearance in the finished soaps.)
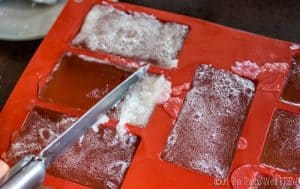
- Clear off any foam that may be on the surface, and carefully pour the soap into your soap molds. Again, try to be gentle to avoid foaming, which can also lead to a more opaque soap.
- There's no need to throw the foamy soap layer away! You can pour it into small soap molds to make a usable, albeit slightly more opaque soap.
- Allow the soap to set undisturbed overnight.
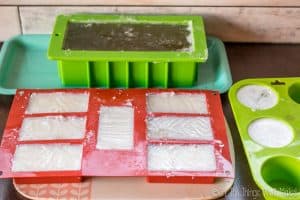
- The next morning, check the soap for hardness. If it is hard enough, unmold the soap and cut it into bars as needed.
- Allow your soap to cure and dry for several weeks. This is best done by separating the soaps to allow for air flow over them. It's a good idea to rotate the soaps occasionally so that all sides dry at the same rate. The curing process will allow it to harden and finish any remaining chemical processes to make for a better soap.