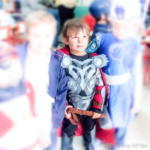
DIY Thor Costume
With a bit of hot glue, craft foam, felt, and paint, you can whip out this fun DIY Thor costume complete with a homemade hammer, vambraces, and helmet.
Equipment
- hot glue gun
Ingredients
For the Hammer
- floral foam
- packing or duct tape
- newspapers
- white glue
- wooden dowel In the desired width and length for the handle
- Wall putty spackling
- sandpaper
- black acrylic paint
- silver acrylic paint
- buede
- hot glue or other strong glue
For the armor, cape, boots, and vambraces
- 1 pair black boots
- black craft foam
- silver paint
- black felt
- velcro
- red curtains or other red material
For the outfit
- 1 pair black leggings
- 1 black tank top
- silver ribbon
For the helmet
- 1 helmet
- craft foam
- 1 blonde wig
- silver acrylic paint
Instructions
Making Thor's hammer
- Cut some floral foam (Or styrofoam or wood) into the general shape of Thor’s hammer. If needed glue several pieces together and hold them better with duct tape. Slice off the corners with a serrated knife to form the shape of his hammer.
- Cover the foam with several layers of paper mache. To do so, mix some water and white glue and dip newspaper strips into the mixture. Layer and overlap them over the entire form.
- Press the dowl into the center of one of the long sides of the hammer to form the opening for the handle. Paper mache small strips of paper towels or napkins inside the hole to strengthen it and make the handle more secure. (If you use a more durable material like wood for your handle, this step isn't necessary.)
- Once the paper mache is dry, glue the handle in place.
- To give the hammer a smoother surface, cover it with some wall putty or some fiberglass filler.
- When dry, sand the entire surface.
- Cut a cardboard disk with a diameter just smaller than the width of one of the long sides of the hammer.
- Cover the disk with the wall putty. When it dries, glue the cardboard disk to the top of the hammer.
- Paint the entire hammer black.
- Once the black paint had dried, cover it with a layer of silver spray paint, intentionally allowing some black to show through to give a metallic effect.
- After the silver paint dries, cut thin strips of brown suede. Wrap the handle of the hammer with the strips of suede, gluing them in place with hot glue or another strong glue.
Thor’s Chest Armor
- Print out a pattern for Thor's chest armor at the needed size for the person who will be wearing the costume.
- Trace out the pieces onto black or silver craft foam and cut them out. If using black craft foam, paint it with silver acrylic paint.
- Cut a rectangle of felt the width and length of the front armor (from neck just below the waist). Cut out rounded areas for more comfort at the arm openings and the neck. (The felt piece should resemble the front of a tank top.)
- Using hot glue, glue the craft foam pieces onto the felt.
- To hold the armor in place when worn, cut out strips of felt that can reach from either side of the felt piece and are long enough to overlap behind the person's back. Using hot glue, glue the strips in place on either side. Also, glue velcro to the ends of the strips in a way that you can easily fasten the chest armor behind the wearer's back.
- Attach the cape to the top of the felt piece on either side using safety pins.
Thor's Cape
- Cut a large rectangle of bright red curtain fabric. It should be wider than the person who will wear the cape and should reach from their shoulders to a point above their knees.
- To form the shape of the cape, take the top seam and fold it like a paper fan, making a series of pleats.
- Sew over the edge to hold the pleats in place. If using a fabric that frays, finish the edges by hemming or using a serger to sew and cut around all edges.
Thor's Belt
- Following the same design of the armor, cut out craft foam pieces and black felt to form a belt. To give texture to the disks on the belt and chest armor, you can use the tip of a solder iron to burn a design around the edges.
- Glue together the belt with hot glue, adding some velcro for fastening in the back when worn.
Thor's Vambraces (Arm braces)
- Trace two of the vambrace patterns onto craft foam. (You'll end up with 4 pieces of foam). Layer together one of each type and glue them together.
- Paint the craft foam silver. Optionally, burn the line details into the design with a soldering iron.
- Cut two rectangles for each arm (4 rectangles) out of some leftover cape fabric. The rectangles should be wide enough to wrap around the forearms and have the height of the craft foam vambrace.
- Layer the two rectangles on top of each other with the right sides of the fabric facing each other. Sew around the edges, leaving a small gap on one side for flipping the fabric right side out. Then, flip the fabric right side out and fill the space with some quilting batting. Finally, hand sew the opening shut.
- To fasten the vambraces, cut strips of suede leather just longer than the cloth rectangle (long enough to fasten around my son's arms). Sew the leather strips onto the red rectangles, adding velcro or bucles for fastening them around the forearms of the wearer.
- Using hot glue, glue the craft foam onto the red cloth, completing Thor's vambraces.
Thor's Boots
- Using the vambrace idea, cut out craft foam plates that can be wrapped around the top of a pair of black boots.
- Burn a design into the craft foam with a soldering iron. Again, glue felt strips and velcro to them so they can be fastened in place.
Thor's Sleeves
- Weave 2 large panels of fabric out of silver ribbons.
- To make that ribbon "fabric" into sleeves, trace out the shape of a sleeve, leaving extra space for seams and movement.
- Iron a sheet of fusible web on the back of the ribbons to keep them in place while cutting them out and sewing them.
- Fold the sleeves over, right sides facing each other, and sew down the length of the sleeve.
- Finish the wrist area by sewing on a piece of ribbon along the bottom edge on each sleeve.
- To finish the sleeves, fold them together, right sides facing each other, and sew down the long edge.
- Attach the sleeves to a black tank top by hand sewing them in place.
Thor's Helmet
- If using a Viking helmet, remove the horns. If it isn't silver, spray paint it silver.
- Cut apart an inexpensive wig and hot glue strips of the hair to the inside of the helmet. Glue a strip of craft foam over the edges of the hair.
- Cut two wings out of craft foam and hot glued them into place over the holes in the Viking helmet.
Putting the costume together
- Put on the black pants and the black tank top with fancy sleeves. Then place the chest armor in place. Since the cape is fastened to the armor with safety clips, just slip it over the wearer's head and fasten the velcro strips behind the person's back, under the cape.
- Secure the belt over the chest armor.
- Next, put on the pair of black boots and fasten the leg braces over them. Also fasten the vambraces over the sleeves.
- Grab the hammer and you're ready to go save the world(s)!
Notes
Check thrift shops for cheap fabric and a cheap helmet.
To finish off all edges on the cape, I used a serger (overlock) sewing machine. If you don't have one, fold over the edges and sew them or use a fusible seam tape to quickly finish the edges! (If using jersey fabric, polar fleece, or another fabric that doesn't fray, there is no need to finish the edges.)