
Disney Bleach t-shirts
Make these fun and easy Disney t-shirts with bleach and a bit of fabric paint. Kids love these, and they can help make these with adult supervision, of course.
Equipment
- spray bottle
- sponges
- scissors
- Silhouette Cameo (optional for easily cutting out pattern)
- paintbrush or old toothbrush
Instructions
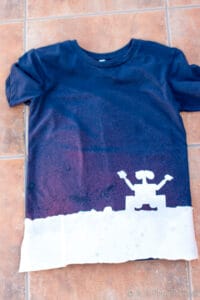
- Once you've chosen and cut out your silhouette from freezer paper, place the freezer paper silhouette onto the bottom of a dark, navy blue t-shirt with the shiny side down. Iron it at medium to high heat, until it has fully adhered to the t-shirt.

- Spray on some bleach. Spray the bleach over the t-shirt, concentrating on the areas near the stencil so that the silhouette is highlighted.
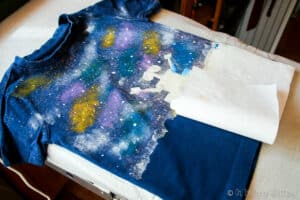
- Dab on Fabric Paint with a sponge: I used pink, light blue, yellow, and silver, blending them together in random clouds. Concentrate on the edges to make the silhouette stand out!
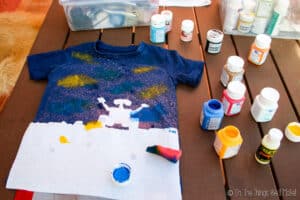
- Paint on some white stars: You can either splatter on some white stars with an old toothbrush, or you can manually paint them on with a fine paintbrush.

- Peel off the stencil and admire your work! Set it with an iron and wash immediately before wearing it. (Notes below)
Video
Notes
Choose a silhouette and cut it out of freezer paper for your stencil. I have made a Silhouette Cameo studio file you can optionally use to easily cut it out.
Place a piece of cardboard between the top and bottom layers of the t-shirt before spraying on the bleach or painting. This will keep the bleach and paint from bleeding onto the backside of the t-shirt.
Before spraying on the bleach, I suggest practicing first by spraying from the bottle using only water. Once you feel you can control the spray, switch to bleach.
Set the fabric paint with a hot iron. Most fabric paints have instructions for how long and what temperature to use for that particular paint. Follow those instructions.
Wash the shirt immediately to stop the bleach action from continuing.