 Español
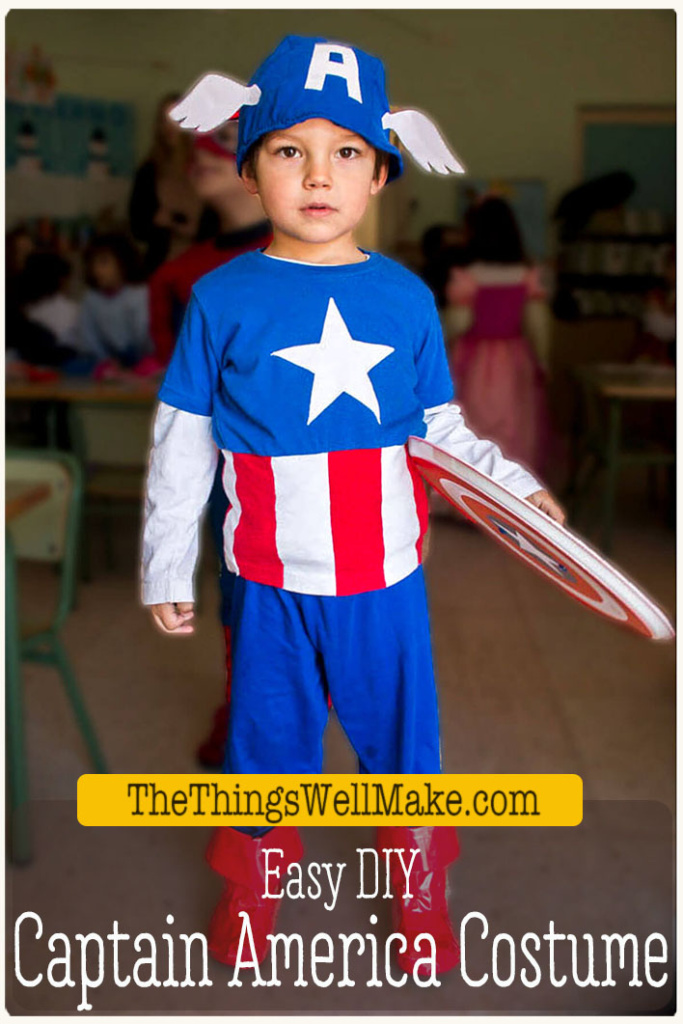

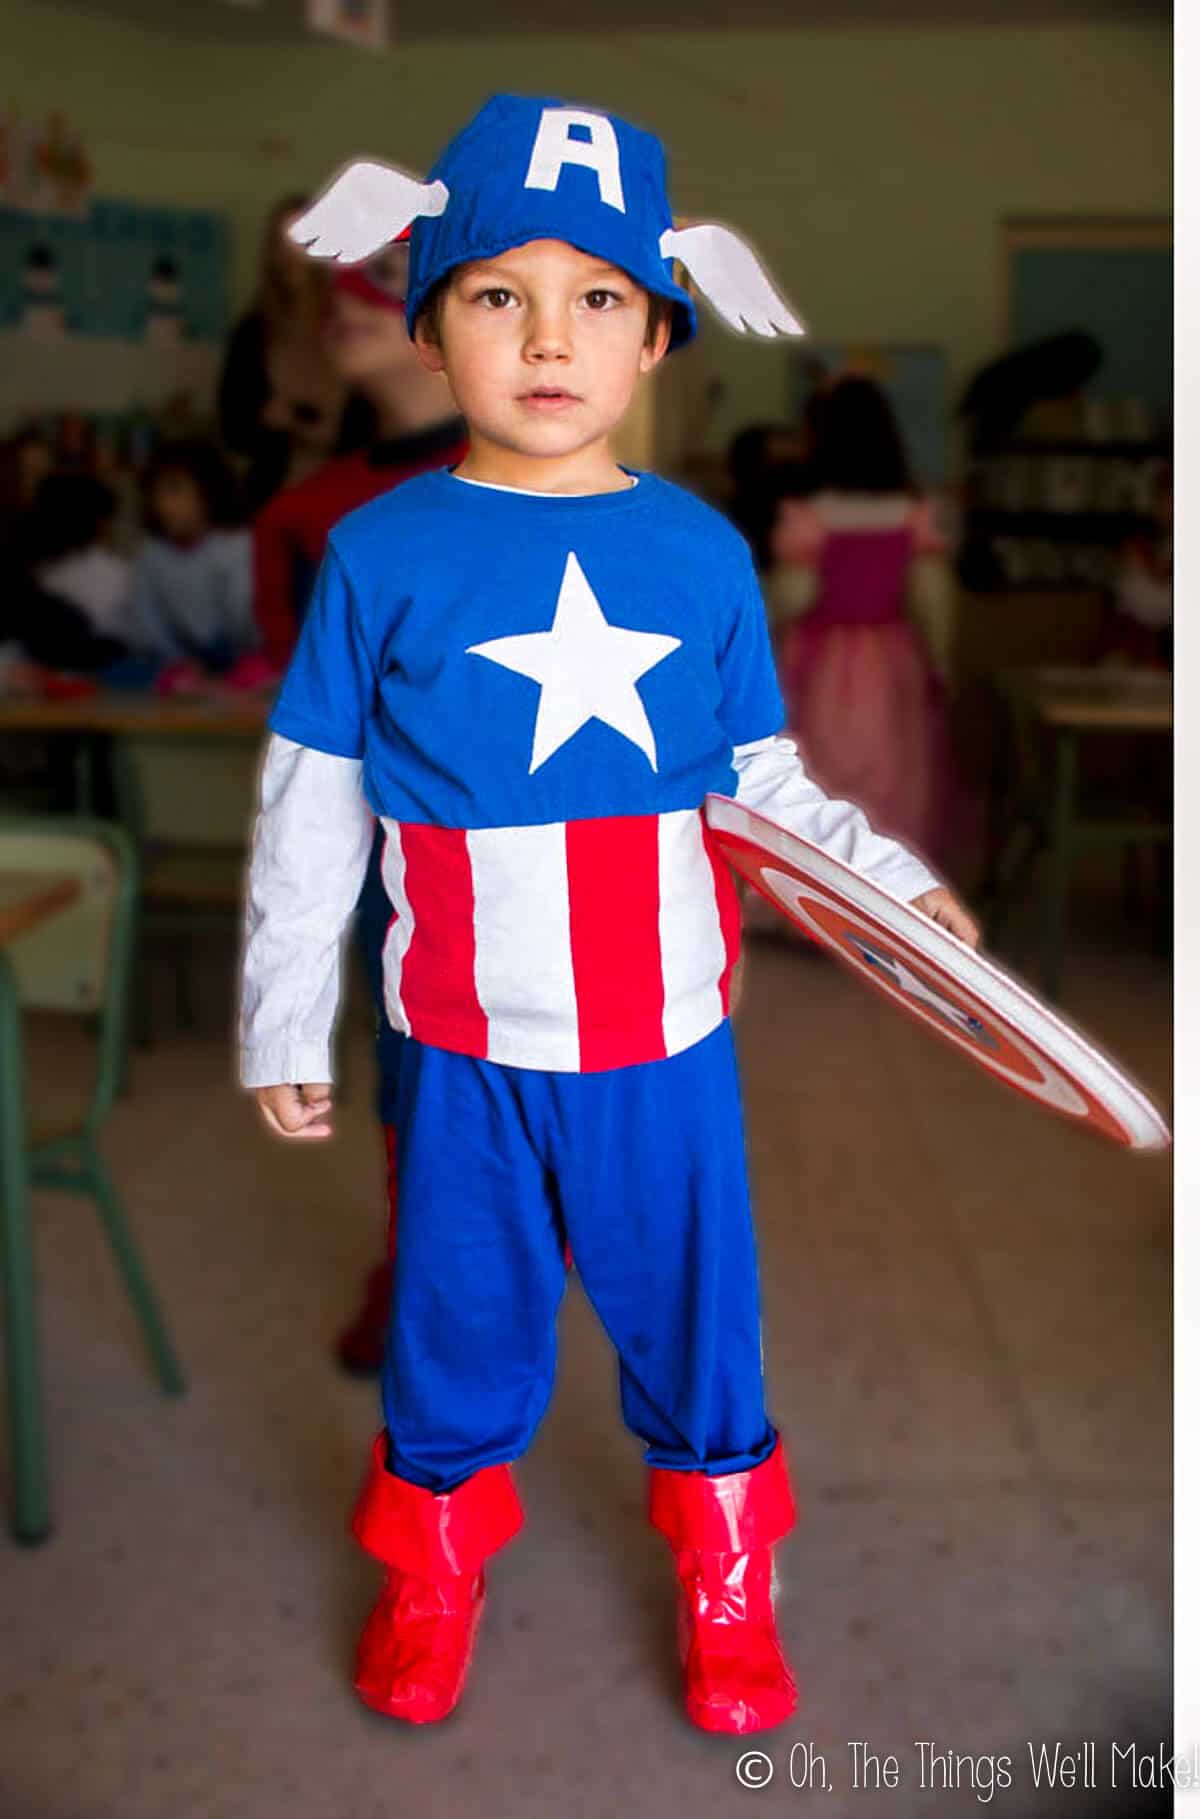
With some simple sewing, you can quickly make this easy homemade Captain America costume from recycled t-shirts. It’s super comfy, and kids will love it!
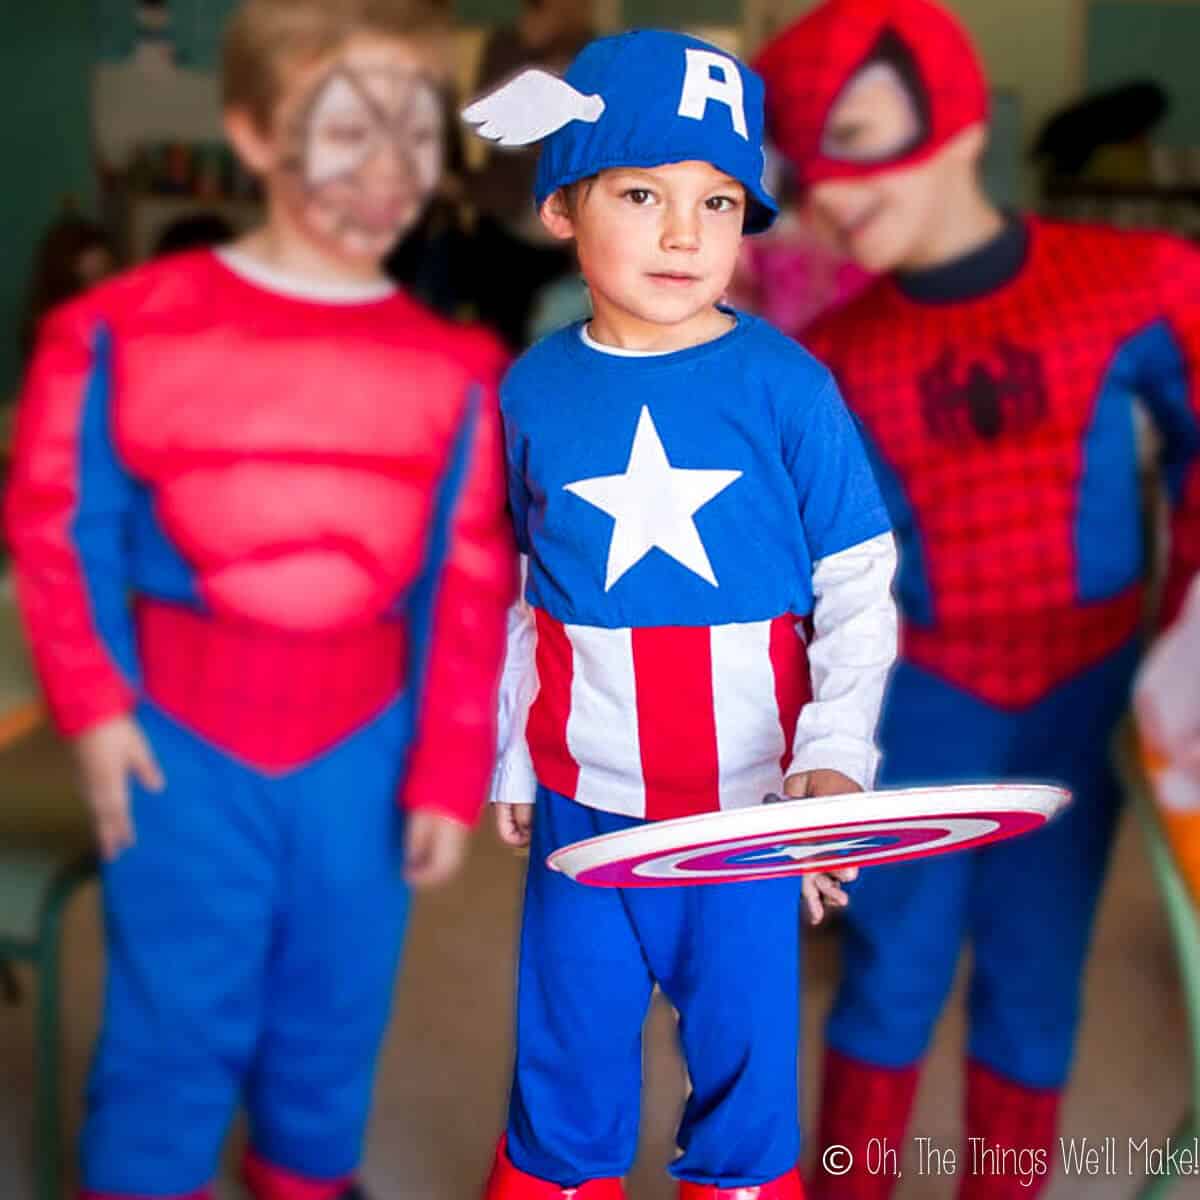
When I made this costume, my son was obsessed with superheroes, especially Marvel’s avengers. When it came time to dress him up for Carnaval at his school, I wasn’t surprised that he wanted to dress up as Captain America. (I was also relieved that he didn’t want to be Hulk or Iron Man. I figured those costumes would be more complicated to make. Little did I know that the next year I’d be stuck making a Thor costume!)
Of course, finding a Spider-Man or Superman costume is “super” easy (and yet I still made my own Superman and Batman costumes), but finding something for Captain America is a bit more tricky. I did manage to find a few things I could use, but since I didn’t like them, I ended up going the DIY route.
The costume took me a while to make, but that’s mostly because I didn’t have a set plan. I wasted time making things the wrong way and starting over. I even tried making a helmet out of cardboard, another out of craft foam, and another by repurposing a store-bought helmet. When I finally realized that my son wasn’t going to wear a helmet anyway, I got an idea for the “helmet” that took me less than half an hour to make.
While I didn’t do a perfect job of documenting the process, hopefully, this will help you whip up a costume faster than the Flash! Today, I’ll concentrate on the costume itself and the comfy helmet.
Check out my other posts for how to make the Captain America shield and how to make superhero boots!
Vintage Captain America costume
Every time I’ve made superhero costumes for my son, like the Batman costume I made him, I’ve always chosen to go the vintage route. Not only were the original costumes more colorful and fun for kids, but I think they just are so much cuter on them.
When it was time to make a homemade Captain America costume, I chose to make the iconic royal blue top with a white star and red and white stripes on the bottom.

Superman 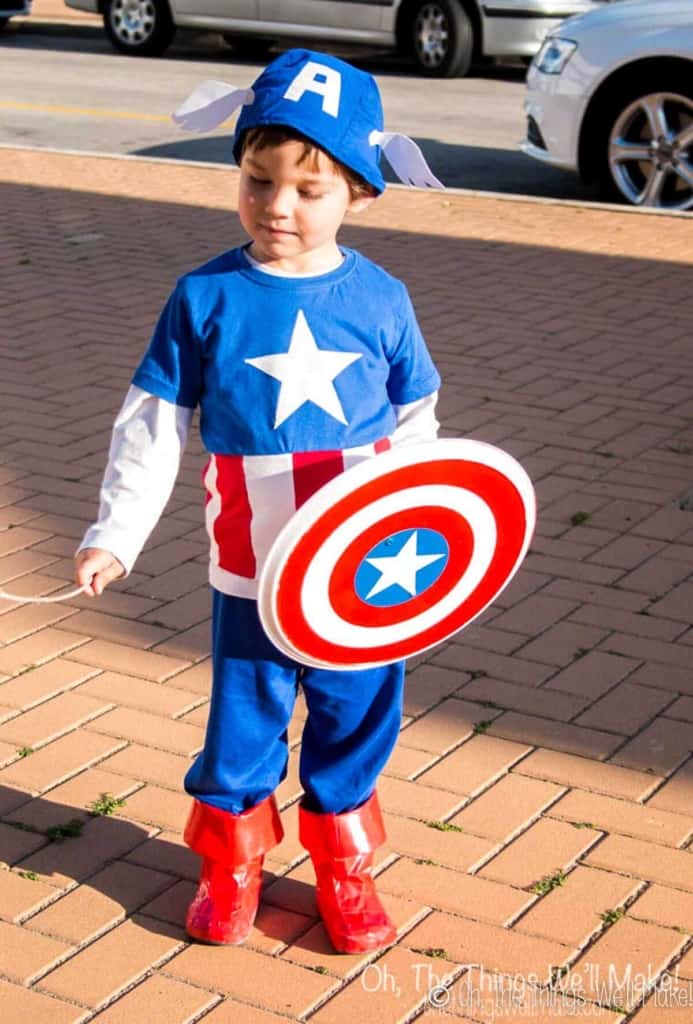
Captain America 
Thor 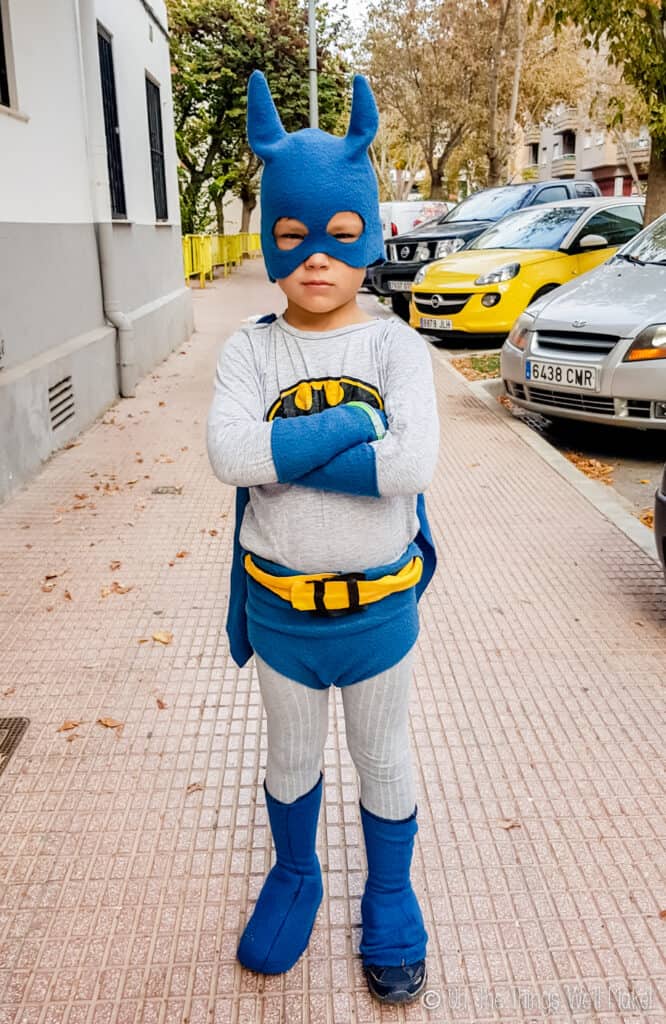
Batman
Making the Captain America shirt
If you can find an already-made Captain America shirt (something like this shirt), you can save yourself a lot of time! If you can’t find what you want, though, it’s not that difficult to make one yourself!
I chose to make the top short-sleeved and have my son wear it over a white, long-sleeved shirt. The benefit to making it that way is that kids can then play in it year-round! In the summer my son wore the short-sleeved t-shirt with some navy shorts. (He did insist on wearing the boots all year!)
Materials needed:
- 1 royal blue t-shirt (in the size of the person who will wear the costume.)
- Scraps of white and red jersey fabric (if you cut them from the bottom of old t-shirts, you can save yourself the hassle of hemming the shirt later on.)
- A piece of fusible web for the star (Or freezer paper and fabric paint, if you prefer.)
Instructions:
1. Cut the blue shirt.
In this step, we’ll be cutting the bottom part of the blue t-shirt at a point below the chest level.
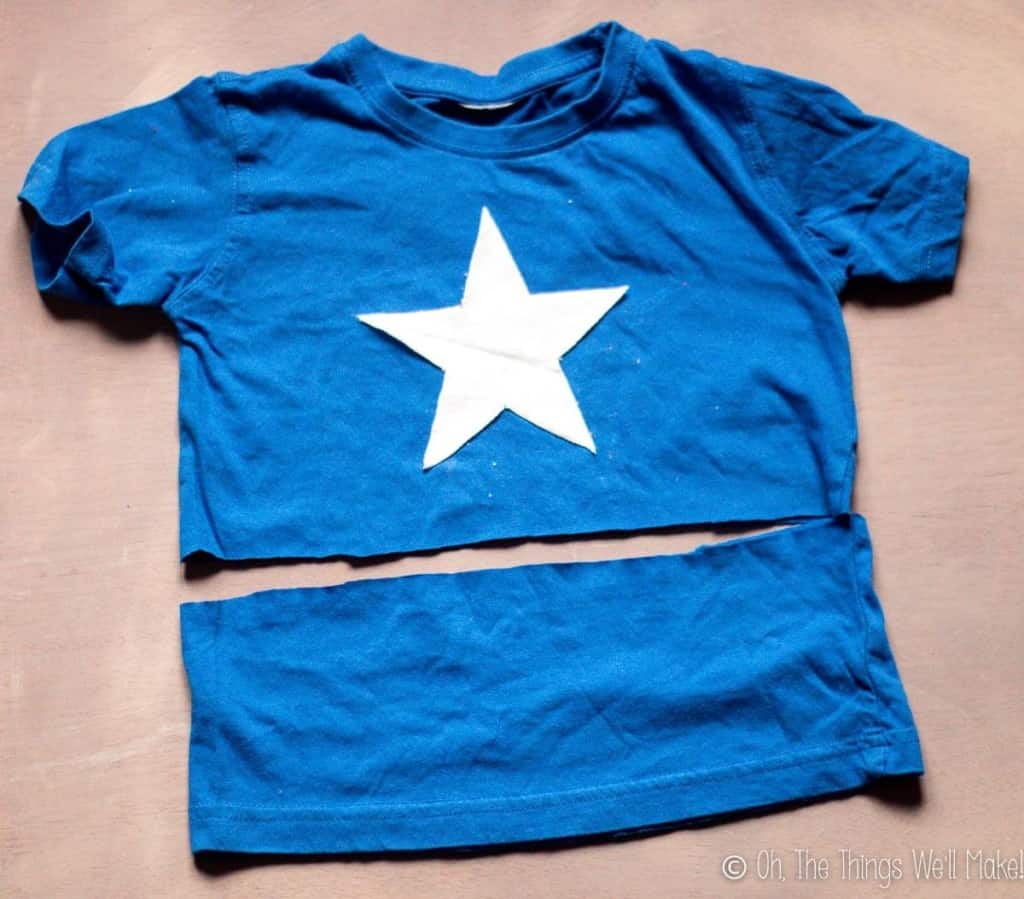
Before you make the cut, determine the size of the star you’ll use. I found a clipart star on the internet and printed it to a size that I thought looked good for my son’s shirt size. Leave enough blue fabric underneath where you’ll place the white star for the seam allowance.
To make sure your cut is symmetrical, fold the shirt in half before making your cut.
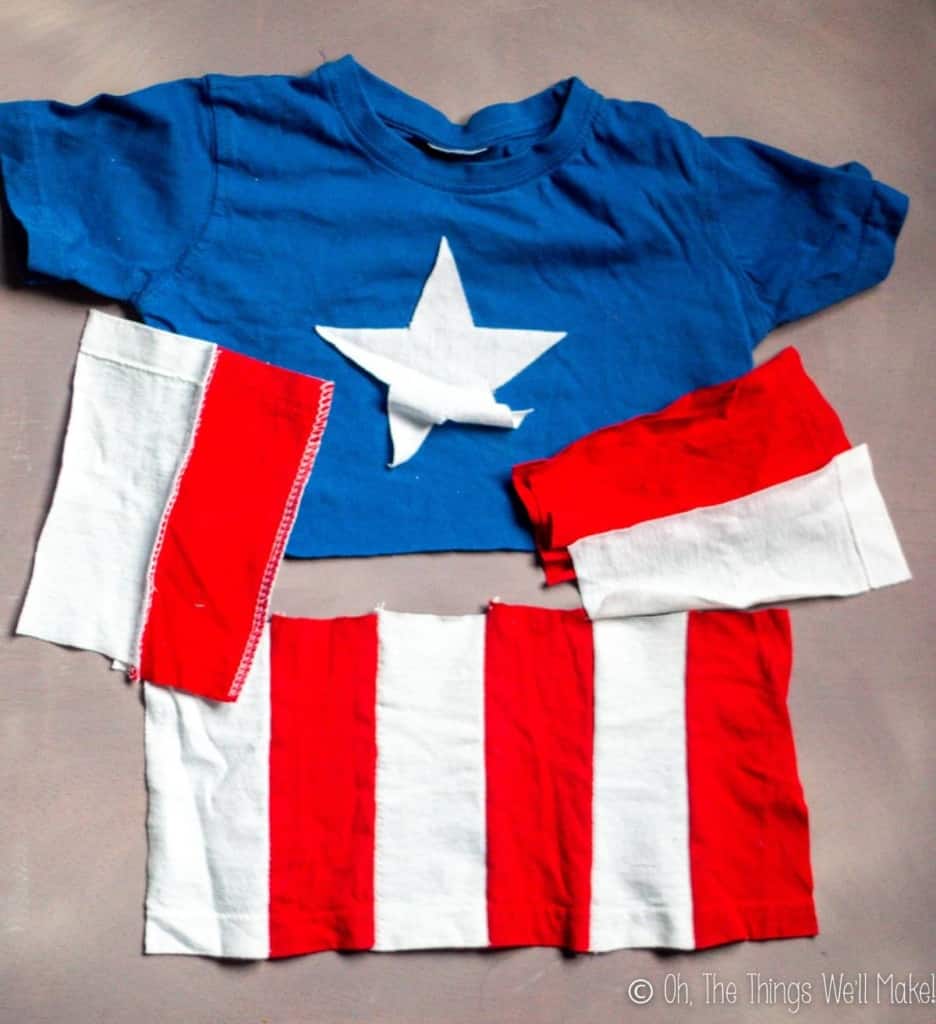
2. Cut the stripes
The trickiest part of this project is calculating the size of the stripes. I made 6 red stripes and 6 white stripes, alternating colors and leaving 6 stripes on the front and 6 stripes on the back of the shirt.
To calculate the size, place the shirt flat on a table and measure the width. Add 7 times the measurement of the seam allowance you plan on using. (So, if you plan on making a seam of 1 cm, add 7 cm to your measurement.)
Once you have calculated that measurement, divide it by 6 to get the size of the width of each stripe.
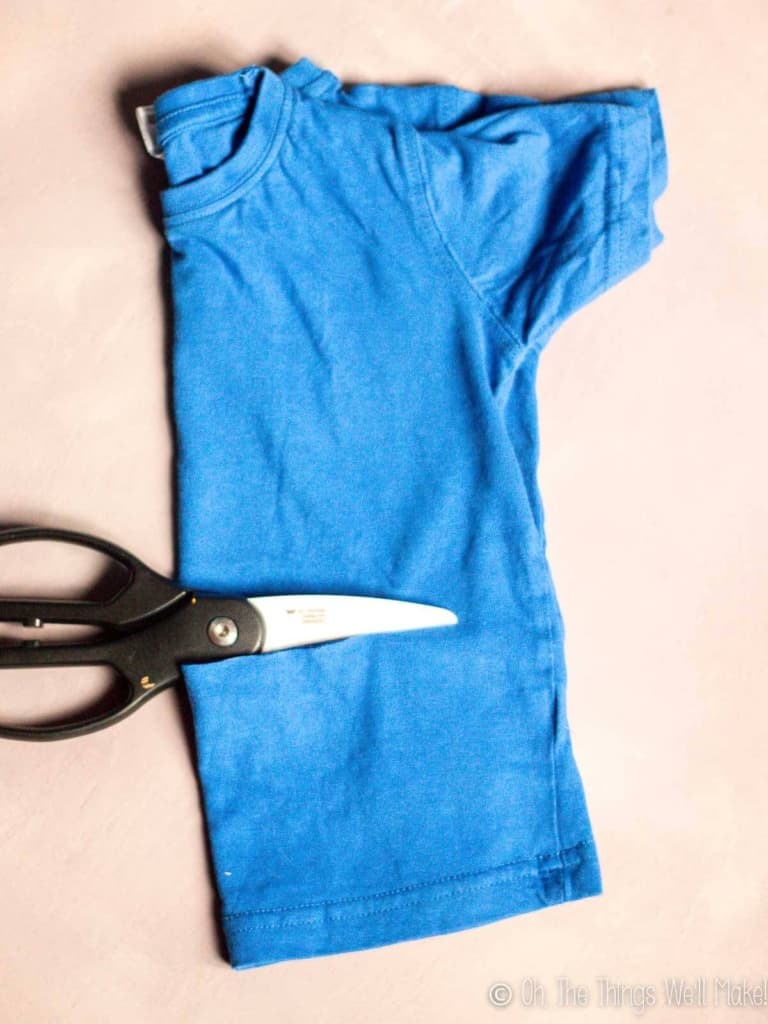
To determine the length of the stripes, have the person try on the shirt and measure from the cut line to the desired length. Once again, add your seam allowance for the top seam. If you are using fabric from old t-shirts, cut the stripes from the bottom, leaving the hem. This will save you the hassle of hemming the shirt later on. If not, add extra length for the hem of your shirt.
Cut out 6 white stripes and 6 red stripes with the calculated width and length.
3. Sew the stripes together
Once you have cut out the stripes, sew them together. Place one white stripe together with one red stripe with the right sides facing each other. Sew down the length on one side, lining up the bottom hems well if you’re using them. (I used a serger/overlock machine to make the seam tidy and then sewed down the seams with a regular sewing machine to strengthen the seams. Feel free to do it however you prefer with whatever machine you have.)
Add another stripe by placing a new, red stripe together with the unsewn part of the white stripe (right sides together and lined up along the hem) and sew down the unsewn edge of the white stripe. Continue the process until you have six stripes together. Repeat with the remaining six stripes.
Line up the stripe panels under the t-shirt to see if you have the width right. Then, stack both panels of stripes together with right sides facing each other and sew down both sides to form an inside-out tube of fabric. (Adjust the width before sewing down the sides, if needed.)

4. Finish it up!
To connect the stripes to the rest of the shirt, flip the tube right side out and then flip the blue shirt inside out.
Place the right-side-out tube inside of the inside-out shirt, lining up the raw edges (not the hemmed edge if you are using it).
Sew the stripes panels to the shirt by sewing along that edge, going all the way around the entire shirt.
Flip the shirt right-side-out to view your almost finished t-shirt. It just needs to be decorated with a white star!
5. Add the star!
I cut the star out of white jersey fabric and used an appliqué technique to sew the star onto the shirt. I’m probably not the best person to explain the technique, though, so I’ll link to a blog that explains it well.
If you don’t want to sew on the star, though, there are other options. One idea is to iron on some t-shirt transfer paper (the white, opaque kind made for dark-colored fabrics) cut into the shape of a star. For a less permanent option, you could even cut the star out of white duct tape and tape it in place.
Another idea is to cut the star shape out of freezer paper, focusing on preserving the outside part vs. the star itself. (Using an x-acto knife will help cut the shape out without cutting the paper outside the star.) Then, iron on the paper as a stencil and pain the star with white fabric paint. (Look at my post for how to make a stenciled Wall-E shirt to see how to do it better.)
If painting the star, make sure to set the paint using an iron following the directions for your particular fabric paint.
Making the pants
While you could buy some blue pants, I couldn’t find any in the right color so I decided to make my own. (If looking for pants, choose something comfortable like spandex pants, sweatpants, or leggings.)
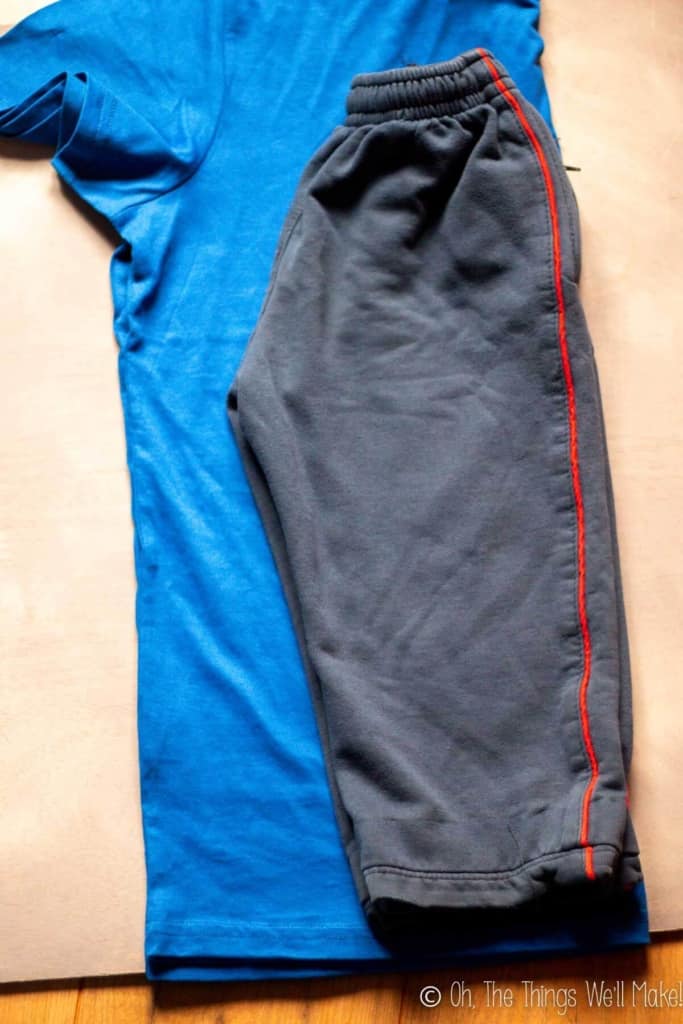
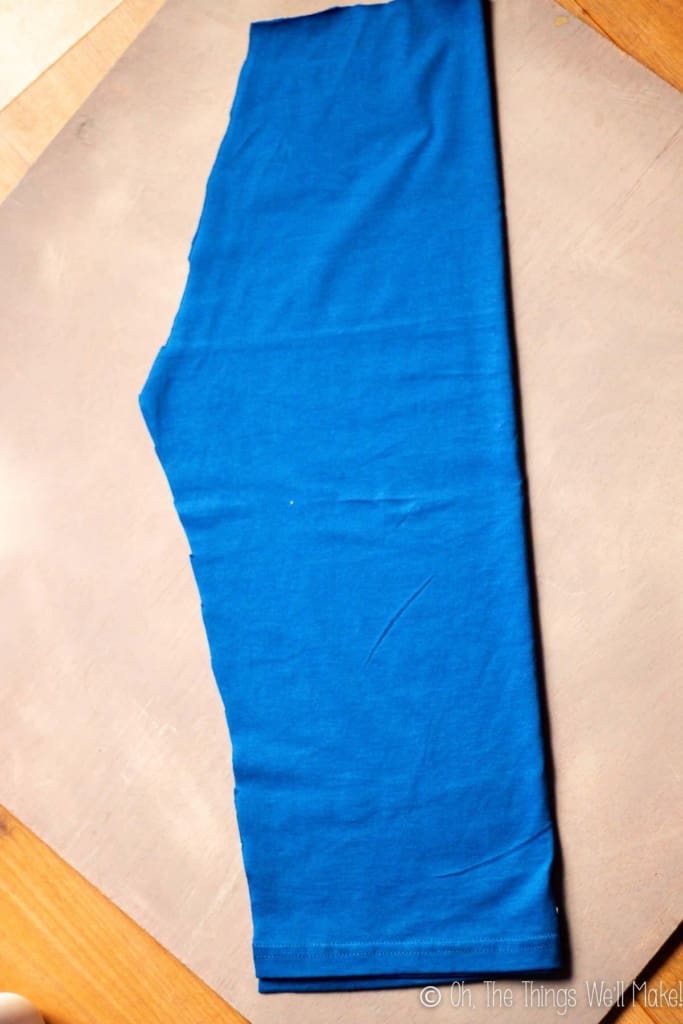
I recycled an old, big, adult t-shirt in the same royal blue color as the top of the shirt and used a pair of my son’s pants to use as a pattern.
Again, I’m not the best person to show you how to make pants, so here’s a good blog post that explains the (EASY) process. It looks complicated at first, but once you get the hang of it, you can quickly whip out a bunch of them if need be! (I did when my son was potty training.)
Making Captain America’s helmet
I stupidly wasted A LOT of time on this part.
Had I realized how easy I could have made this, I would have saved myself the hours of trying to make a helmet out of cardboard, craft foam, and even paper-mache-ing over a store-bought helmet to make it into a Captain America helmet.
Not only were the other ideas more difficult and time consuming, but my son didn’t want to wear any of them. They were just too uncomfortable!
Decided on making something comfortable that he would actually wear, it occurred to me to look for a swim cap pattern on the internet and use that for the helmet! It was a bit unconventional, but I’m so glad I tried it because it couldn’t have been simpler or quicker to make!
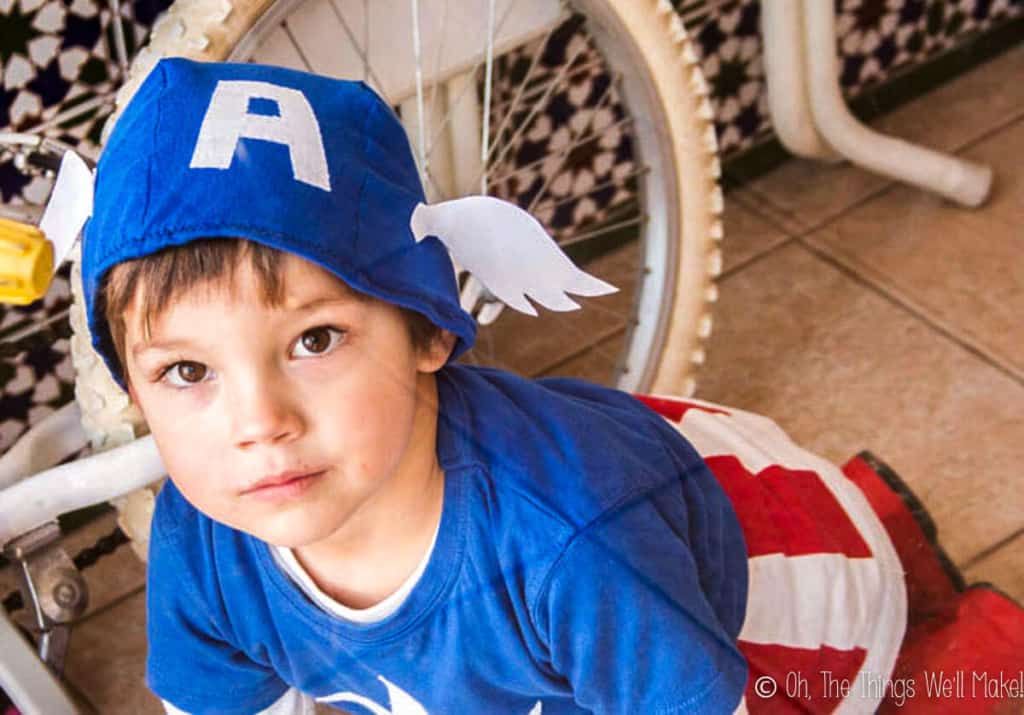
I cut some of the same blue jersey fabric leftover after making the pants slightly larger than the pattern so it wouldn’t be uncomfortable for him. It ended up being slightly big on him, so that was probably unnecessary. Despite not being great at sewing, I made the “helmet” in less than half an hour.
Decorating the helmet
I used this picture of Captain America’s “A” and cut it out of white jersey fabric and appliquéd it on the “helmet.” If you don’t want to sew it, though, you could paint it on or cut it out of white, opaque t-shirt transfer paper (the type made for dark-colored fabrics) and iron it on. (In the same way as explained for the star on the shirt.)
As for the little wings, I just free-handed the wing shape and cut it out of a very stiff fabric. Actually, I think it was an iron-on mending fabric like the one I’m linking to. (I bought mine here in Spain and am not sure if it’s the same exact thing, but I think it should be similar). Because it was an iron-on fabric, I was able to place the adhesive sides together and iron it to itself to make an extra stiff fabric. You could also probably use stiff felt.
I sewed the bottom ends of the wings to the swim cap helmet on either side. You can hand sew or machine sew them. You could also probably use a hot glue gun to glue them in place. (That goes for the star and the “A” too!) Once sewed on, the wings stuck out a little bit on their own, exactly as I wanted!
Putting it all together
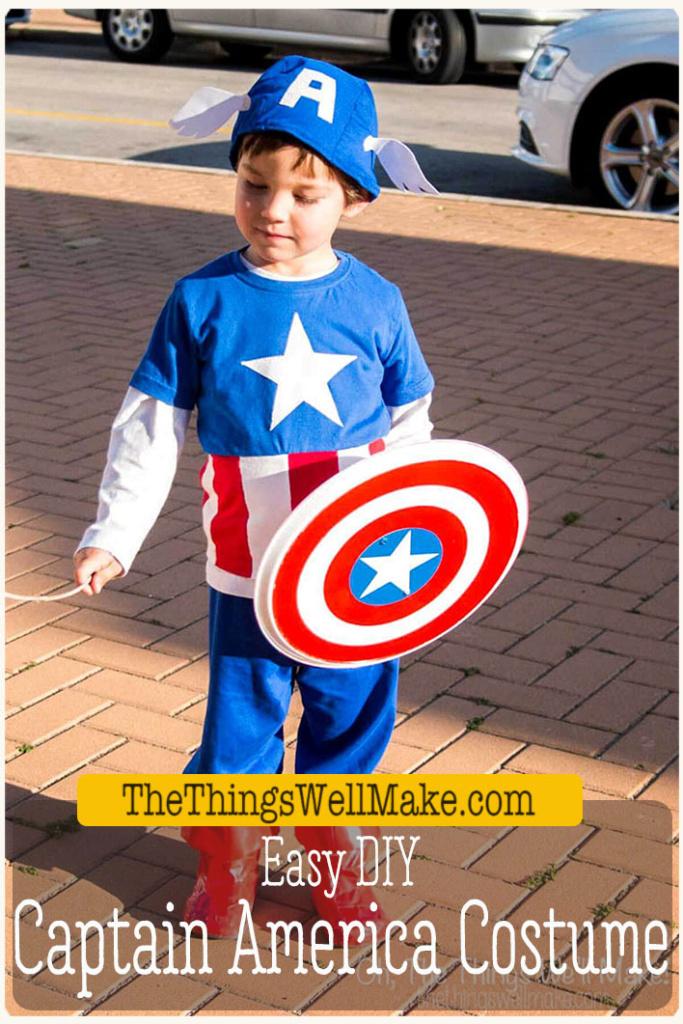
This costume is really easy to put together and super comfy! That’s great for small kids. My son used the costume for playing months past Carnaval.
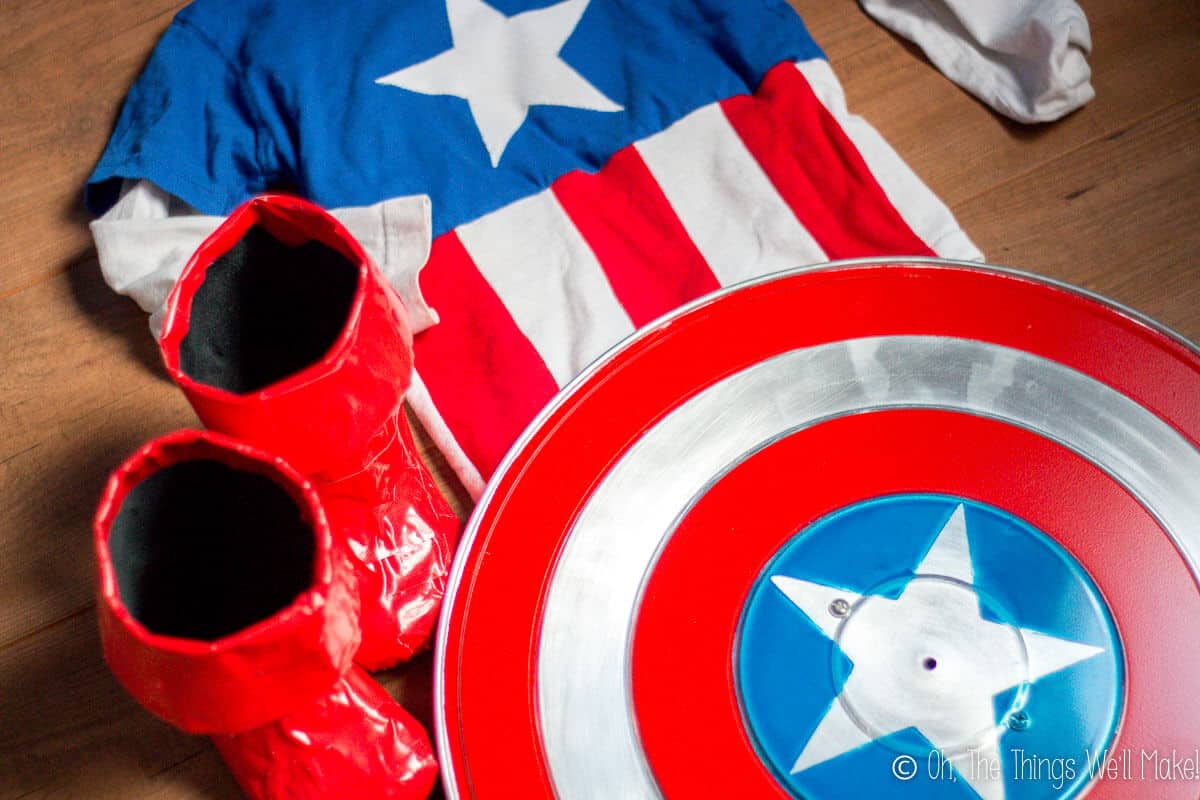
You’ll need:
- Captain America shirt
- Blue pants
- Helmet
- Red gloves (optional)
- White long sleeved shirt
- Red boots (Learn how to make superhero boots out of red duct tape!)
- Captain America’s shield
Put on the white long-sleeved shirt. Then, wear the Captain America shirt over it. Finish putting on the pants, helmet, and red boots. Optionally, buy some red gloves to wear with the rest of the costume. (I bought some, but my son didn’t want to wear them.)
That’s all there is to it!
Just grab the shield and do your first avenger duties of saving the world!

Homemade Captain America Costume
Materials
- 1 royal blue t-shirt in the size of the person who will wear the costume.
- Scraps of white and red jersey fabric if you cut them from the bottom of old t-shirts, you can save yourself the hassle of hemming the shirt later on.
- A piece of fusible web for the star Or freezer paper and fabric paint, if you prefer.
Instructions
Make the shirt
- Cut a star out of white fabric (or paper if you'll be painting it on) in a size that looks proportional for the blue shirt you are using.
- Place the star in the desired location on the blue t-shirt and mark a horizontal cut line underneath the star. (Lower the mark line a bit to leave room for a seam allowance.)
- Cut off the bottom of the t-shirt along the cut line. To make sure your cut is symmetrical, fold the shirt in half before making your cut.
- Calculate the width of the stripes by placing the t-shirt flat on a table and measuring the width. Add 7 times the measurement of the seam allowance you plan on using. (So, if you plan on making a seam of 1 cm, add 7 cm to your measurement.)Once you have calculated that measurement, divide it by 6 to get the size of the width of each stripe.
- To determine the length of the stripes, have the person try on the shirt and measure from the cut line to the desired length. Once again, add your seam allowance for the top seam. If you are using fabric from old t-shirts, cut the stripes from the bottom, leaving the hem. This will save you the hassle of hemming the shirt later on. If not, add extra length for the hem of your shirt.
- Cut out 6 white stripes and 6 red stripes with the calculated width and length.
- Once you have cut out the stripes, sew them together. Place one white stripe together with one red stripe with the right sides facing each other. Sew down the length on one side, lining up the bottom hems well if you’re using them.
- Add another stripe by placing a new, red stripe together with the unsewn part of the white stripe (right sides together and lined up along the hem) and sew down the unsewn edge of the white stripe. Continue the process until you have six stripes together. Repeat with the remaining six stripes.
- Line up the stripe panels under the t-shirt to see if you have the width right. Then, stack both panels of stripes together with right sides facing each other and sew down both sides to form an inside-out tube of fabric. (Adjust the width before sewing down the sides, if needed.)
- To connect the stripes to the rest of the shirt, flip the tube right side out and then flip the blue shirt inside out.
- Place the right-side-out tube inside of the inside-out shirt, lining up the raw edges (not the hemmed edge if you are using it).
- Sew the stripes panels to the shirt by sewing along that edge, going all the way around the entire shirt.
- Flip the shirt right-side-out.
- Cut the star out of white jersey fabric and appliqué it onto the shirt. (You can also paint on a star or cut a star out of iron-on t-shirt tranfer material and ironing it on.)
The pants
- If you can't find comfortable pants in the right color, make some pants, using some pants that currently fit to help make a pattern.
- Cut the pattern out of blue jersey fabric and use these instructions to sew them together.
Making Captain America’s helmet
- Trace and cut this pattern out of blue jersey fabric, following the instructions for sewing the pieces together.
- Trace and cut Captain America’s “A” out of white jersey fabric. Sew it onto the helmet using an appliqué technique. (You can paint it on instead.)
- Free-hand a wing shape pattern on paper and trce and cut it out of a very stiff fabric.
- Sew or glue the bottom ends of the wings to the swim cap helmet on either side.
Putting it all together
- Put on a white long-sleeved shirt. Wear the Captain America shirt over it.
- Finish putting on the pants, helmet, and red boots.
- Optionally, buy some red gloves to wear with the rest of the costume.
- Hold the shield and you're ready to go!
Notes
This post was originally published on October 21, 2015. It was rewritten and republished, years later, adding clearer instructions.
 DIY Thor Costume
Joanne
Thank you so much for your tutorial! The directions were really so easy to follow and I was very happy with my son’s Halloween costume- and so was he! I thought the tutorial for the pants (from the other website) was kinda confusing, but I’d never made pants before. I finally figured it out. Thanks again! I wish you wrote all sewing tutorials. 🙂
Tracy Ariza, DDS
Awwww, thanks, Joanne!
I’m happy to hear he liked it! I’ve been feeling really bad for kids this year with such a strange Halloween!
Thanks for letting me know that the tutorial made sense, too. I always feel like it’s confusing to explain sewing steps. 😉